![]()
In this tutorial, we will show you how to install and configure the Mate Desktop on Ubuntu 16.04. For those of you who didn’t know, The MATE Desktop Environment is the continuation of GNOME 2. It provides an intuitive and attractive desktop environment using traditional metaphors for Linux and other Unix-like operating systems. There are several Linux distributions that support the MATE desktop including of course Ubuntu, and there is a dedicated Ubuntu MATE edition for this elegant desktop environment as well.
This article assumes you have at least basic knowledge of Linux, know how to use the shell, and most importantly, you host your site on your own VPS. The installation is quite simple and assumes you are running in the root account, if not you may need to add ‘sudo‘ to the commands to get root privileges. I will show you the step-by-step installation of the Mate Desktop on a Ubuntu 16.04 (Xenial Xerus) server.
Prerequisites
- A server running one of the following operating systems: Ubuntu 16.04 (Xenial Xerus).
- It’s recommended that you use a fresh OS install to prevent any potential issues.
- SSH access to the server (or just open Terminal if you’re on a desktop).
- A
non-root sudo useror access to theroot user. We recommend acting as anon-root sudo user, however, as you can harm your system if you’re not careful when acting as the root.
Install Mate Desktop on Ubuntu 16.04
Step 1. First, make sure that all your system packages are up-to-date by running the following apt-get commands in the terminal.
sudo apt-get update
sudo apt-get upgrade
Step 2. Installing Mate Desktop.
First, add the community PPA and this PPA can be used only by Xenial users. And please make sure that idr00t doesn’t provide any guarantee and you understand that you install at your own risk:
sudo apt-add-repository ppa:ubuntu-mate-dev/xenial-mate
sudo apt-get update
Now, type the following command to finally install Mate Desktop:
sudo apt-get install mate
Wait for a few minutes, depending on your Internet connection speeds for the installation process to finish.
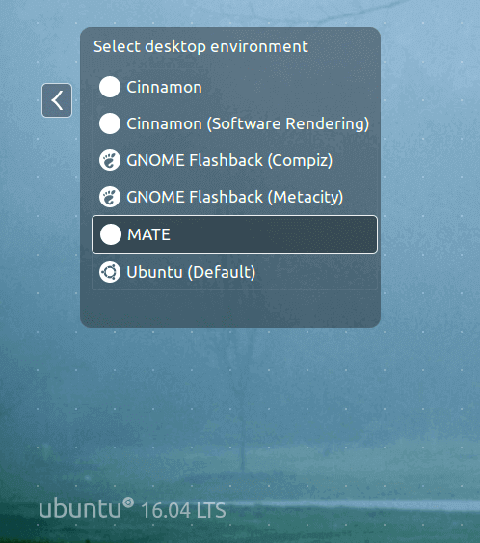
Step 3. Accessing Mate Desktop.
If everything goes OK, log out of your current session or restart your system and choose MATE desktop at the login interface as in the image below.
If you didn’t like the Mate Desktop, you can remove it completely from your respective Linux distributions using the following instructions:
add-apt-repository --remove ppa:ubuntu-mate-dev/xenial-mate
apt-get remove mate
apt-get autoremove
Congratulations! You have successfully installed Mate Desktop. Thanks for using this tutorial for installing MATE Desktop Environment on your Ubuntu 16.04 LTS system. For additional help or useful information, we recommend you check the official Mate Desktop website.