![]()
In this tutorial, we will show you how to install Oracle Java on your Ubuntu 17.04 server. Ubuntu 17.04 Zesty Zapus is the first release of the year 2017 for one of the most popular Linux distributions in the world. Let’s learn how to install it in 10 easy steps.
This article assumes you have at least basic knowledge of Linux, know how to use the shell, and most importantly, you host your site on your own VPS. The installation is quite simple and assumes you are running in the root account, if not you may need to add ‘sudo‘ to the commands to get root privileges. I will show you the step-by-step installation of the Ubuntu 17.04 server Zesty Zapus.
Prerequisites
- A server running one of the following operating systems: Ubuntu or any other Debian-based distribution like Linux Mint.
- It’s recommended that you use a fresh OS install to prevent any potential issues.
- SSH access to the server (or just open Terminal if you’re on a desktop).
- A
non-root sudo useror access to theroot user. We recommend acting as anon-root sudo user, however, as you can harm your system if you’re not careful when acting as the root.
Install Ubuntu 17.04 Server Zesty Zapus
Step 1. First, get the mini.iso image for your machine.
Step 2. Insert your Ubuntu install CD into your system and boot from it. When you install the OS in a virtual machine as I do it here, then you should be able to select the downloaded ISO file as a source for the CD/DVD drive in VMWare and Virtualbox without burning it on CD first.
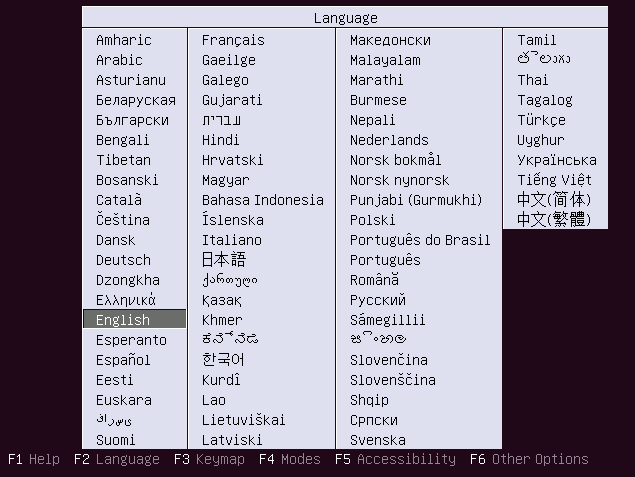
Step 3. The first screen will show the language selector. In this case, we’ll choose English.
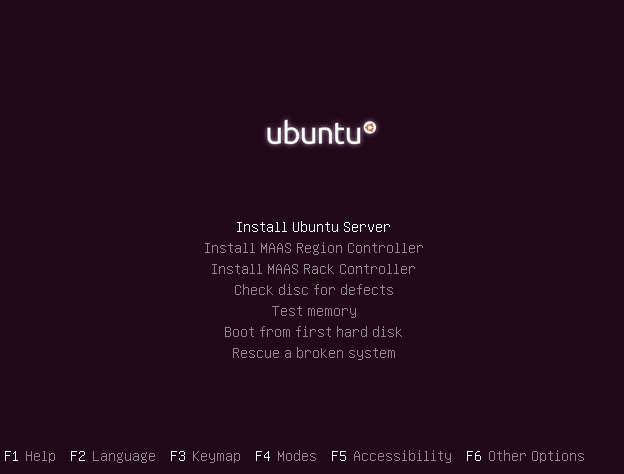
Step 4. Then choose the option Install Ubuntu Server.
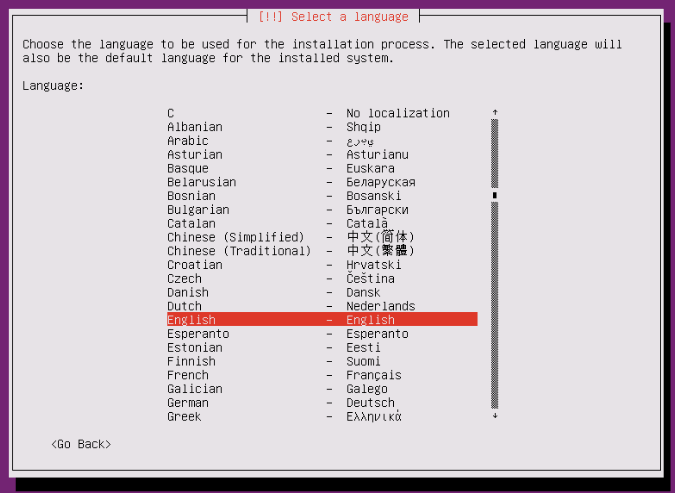
Step 5. Select your language again, we have to specify the language that will be used during the installation process. We’ll continue using English.
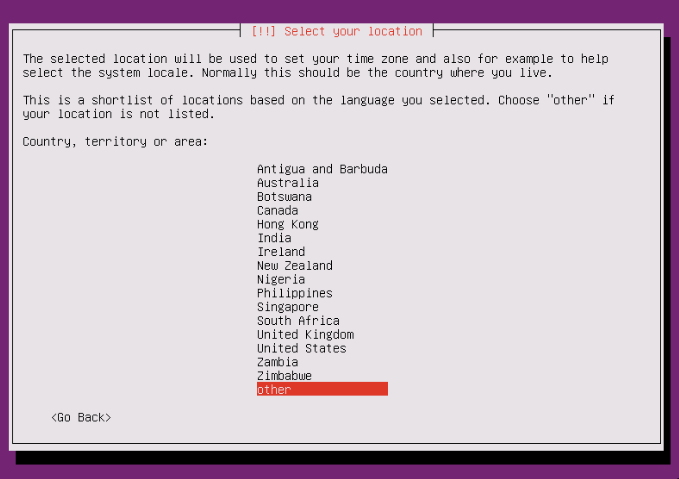
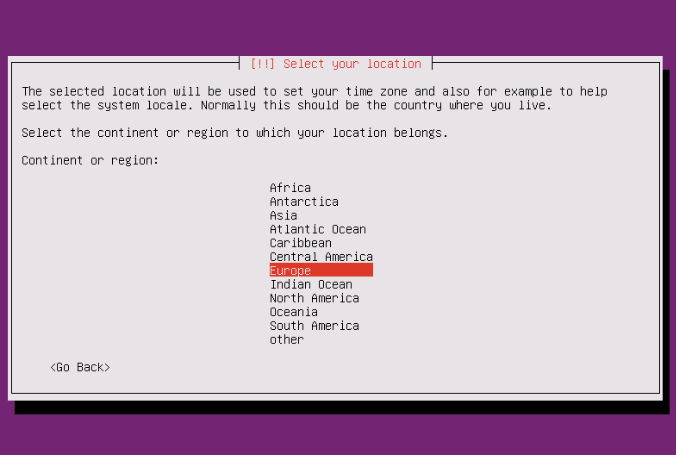
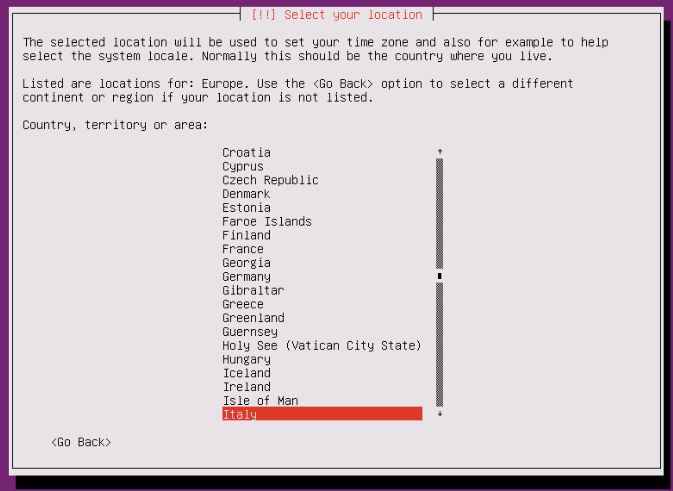
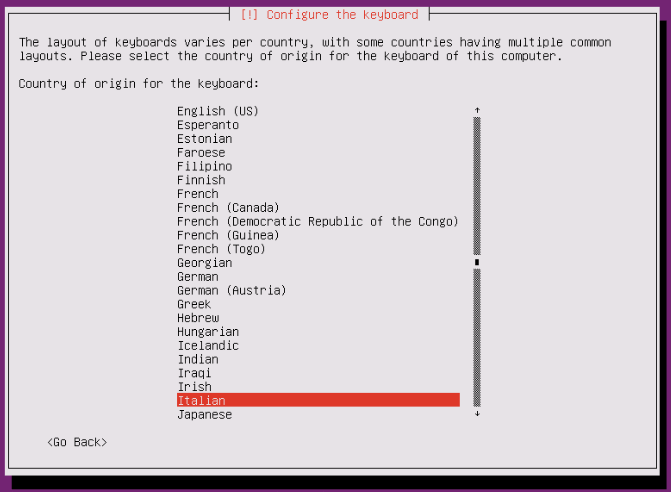
Step 6. Then choose your location. We need to tell Ubuntu where we are located. In our case, we’ll select other/Europe/Italy.
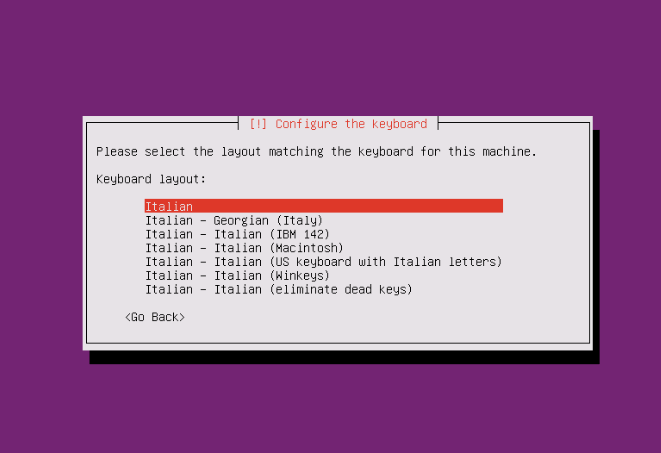
Step 7. Choose a keyboard layout. First of all, the installer will ask if it can detect the layout. We’ll select No here.
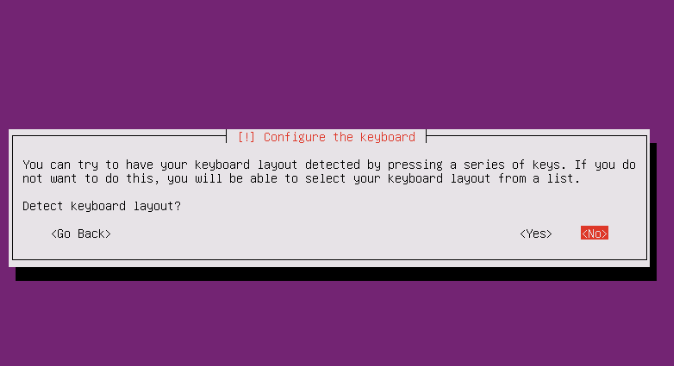
Next step, we’ll choose the Italian layout:
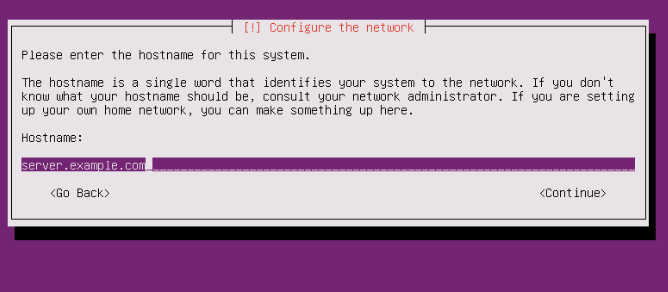
Step 8. Enter the hostname of the system. We’ll use server.example.com.
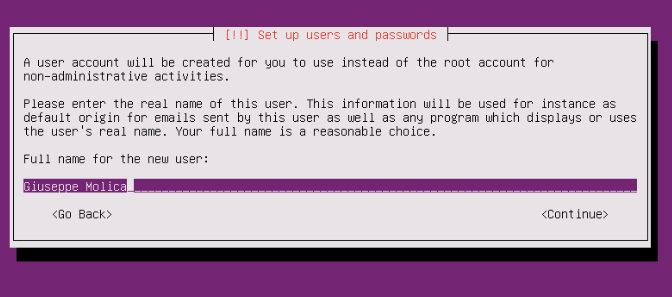
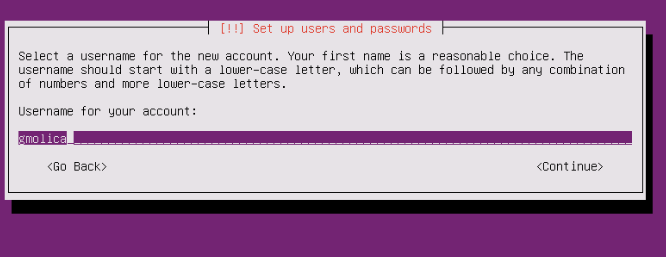
Step 9. The next step is to create a new user account. You’ll need to fill in the forms with your data. Ubuntu does not let you log in as root user directly. Therefore, we create a new system user here for the initial login.
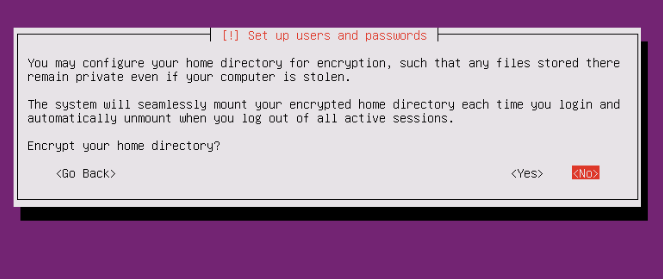
I don’t need an encrypted private directory, so I choose No here:
Step 10. Please check if the installer detected your time zone correctly. If so, select Yes, otherwise No.
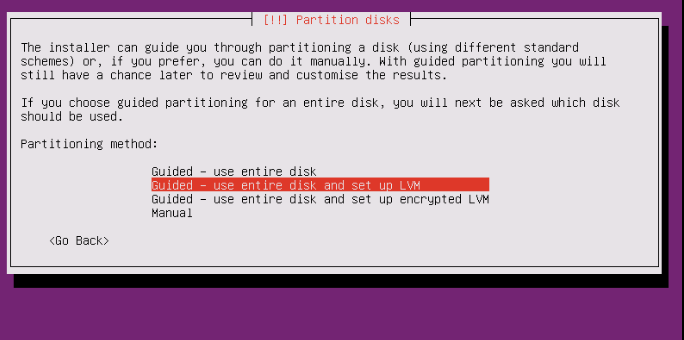
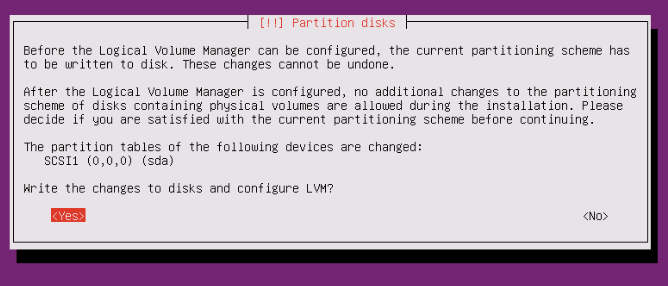
Step 11. Now you have to partition your hard disk. For simplicity’s sake I select Guided – use the entire disk and set up LVM, this will create one volume group with two logical volumes, one for the / file system and another one for swap.
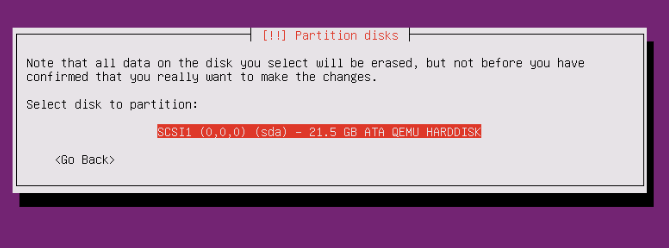
Select the disk that will be partitioned:
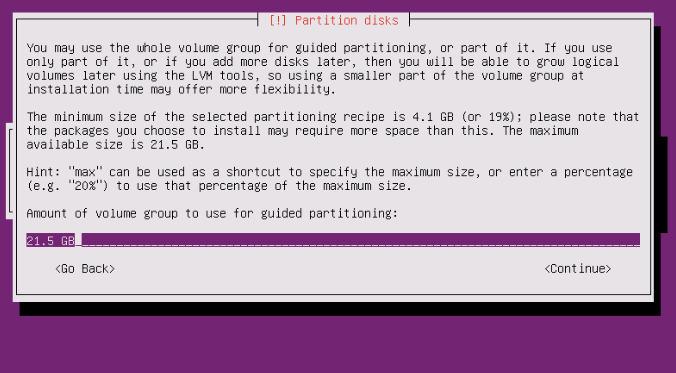
Select the ‘amount of volume group’. Of course, there are different options here, but we’ll keep it easy and choose the maximum size:
Check one last time and then allow the installer to write changes to the disk:

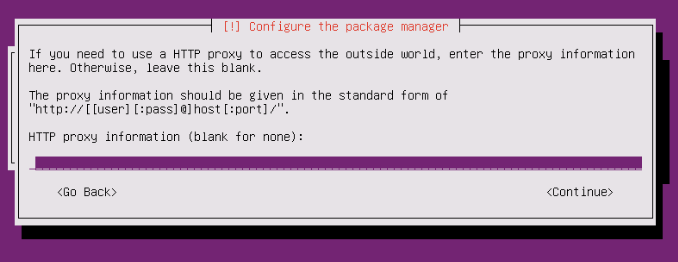
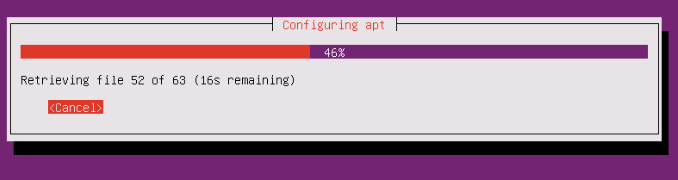
Step 12. Now the package manager “apt” gets configured. Leave the HTTP proxy line empty unless you’re using a proxy server to connect to the Internet:
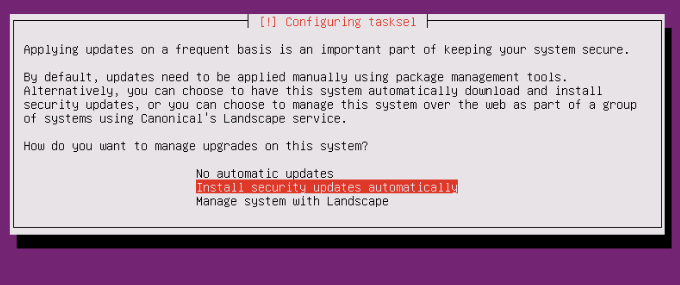
Step 13. Configure updates, It is possible to install security updates automatically, or choose to do everything manually. I like to update my servers automatically.
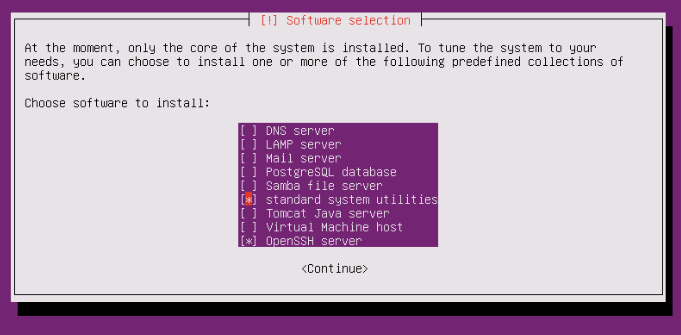
This tutorial is about a basic server, so we will just select standard system utilities and OpenSSH server:
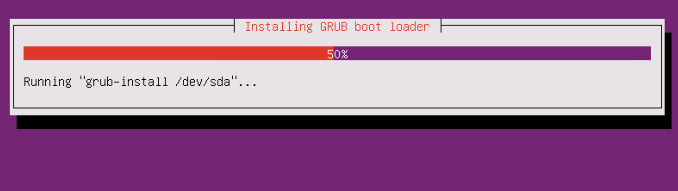
Step 14. Installing the boot loader.
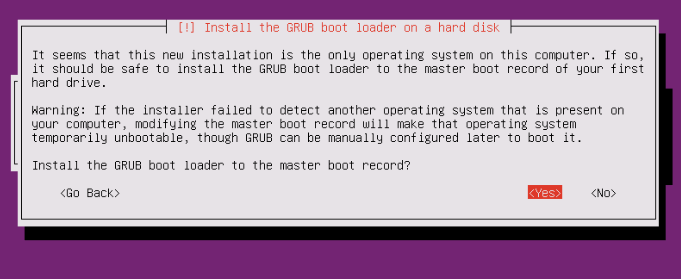
Select Yes when you are asked Install the GRUB boot loader to the master boot record?:
Step 15. The installer now finished the Ubuntu installation.
At the end the installer will ask you to remove the installation media. Select Continue and your machine will reboot:
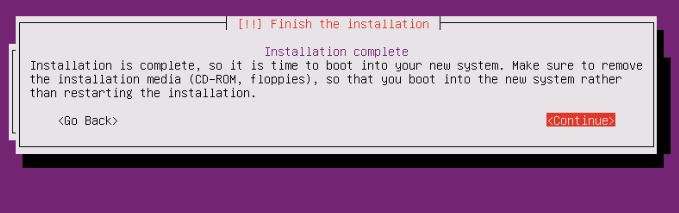
Finally, select continue to reboot the machine after the installation. When you restart, your computer will prompt you for a username and password:
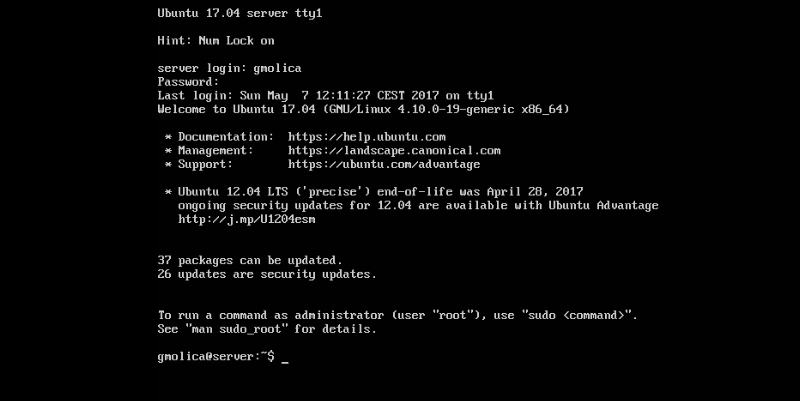
Congratulations! You have successfully installed Ubuntu 17.04. Thanks for using this tutorial for installing Ubuntu 17.04 Server Zesty Zapus system. For additional help or useful information, we recommend you to check the official Ubuntu website.