![]()
In this tutorial, we will show you how to install Nginx on Ubuntu. For those of you who didn’t know, Nginx is a powerful and widely used open-source web server that is well-known for its speed, reliability, and flexibility. The Nginx web server is often used as a reverse proxy server, load balancer, and HTTP cache, and it is a popular alternative to other web servers such as Apache.
This article assumes you have at least basic knowledge of Linux, know how to use the shell, and most importantly, you host your site on your own VPS. The installation is quite simple and assumes you are running in the root account, if not you may need to add ‘sudo‘ to the commands to get root privileges. I will show you the step-by-step installation of the Nginx web server on a Ubuntu server. You can follow the same instructions for Ubuntu 22.04, 20.04, and any other Debian-based distribution like Linux Mint.
Prerequisites
- A server running one of the following operating systems: Ubuntu 22.04, 20.04, 18.04, and any other Debian-based distribution like Linux Mint.
- It’s recommended that you use a fresh OS install to prevent any potential issues.
- SSH access to the server (or just open Terminal if you’re on a desktop).
- A
non-root sudo useror access to theroot user. We recommend acting as anon-root sudo user, however, as you can harm your system if you’re not careful when acting as the root.
Install Nginx on Ubuntu
Step 1. First, make sure that all your system packages are up-to-date by running the following apt commands in the terminal.
sudo apt update
sudo apt upgrade
Step 2. Installing Nginx on Ubuntu.
To install Nginx, run the following command:
sudo apt install nginx

Once the installation process is complete, you can start the Nginx service using the following command:
sudo systemctl start nginx
sudo systemctl enable nginx
To verify that Nginx is running, you can run the following command:
sudo systemctl status nginx
Step 3. Configure Firewall.
Now add firewall rules to allow connections as well as HTTP (port 80) and HTTPS (port 443) traffic:
sudo ufw allow ssh
sudo ufw allow 'Nginx Full'
sudo ufw enable
Step 4. Configuration Nginx files/folders.
- The main configuration file for Nginx is
/etc/nginx/nginx.conf - Virtual hosts are defined in
/etc/nginx/sites-available/default - PHP will be configured in
/etc/php-fpm.d/www.conf
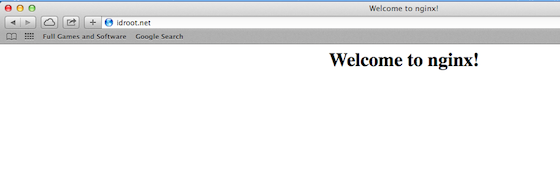
Step 5. Accessing Nginx Web Server.
Navigating to your Server’s IP address (assuming you have no other server listening on port 80), you will be greeted with the standard welcome page:
Congratulations! You have successfully installed Nginx. Thanks for using this tutorial for installing the Nginx web server on Ubuntu Linux. For additional help or useful information, we recommend you check the official Nginx website.