How To Install Laravel on AlmaLinux 9

Laravel, a powerful PHP framework, has revolutionized web development by simplifying common tasks and providing an elegant syntax. Its popularity among developers continues to grow, thanks to its extensive ecosystem and robust features. AlmaLinux 9, a stable and secure Linux distribution, serves as an excellent platform for hosting Laravel applications. In this comprehensive guide, we will walk you through the step-by-step process of installing Laravel on AlmaLinux 9, enabling you to harness the full potential of this dynamic duo.
Prerequisites
Before we dive into the installation process, ensure that you have the following prerequisites in place:
- An AlmaLinux 9 server with root access
- A non-root user with sudo privileges
- A domain name pointing to your server’s IP address
- SELinux set to permissive mode
Having these prerequisites ready will ensure a smooth and hassle-free installation experience.
Step 1: Setting Up the Environment
To begin, we need to set up a conducive environment for installing Laravel on AlmaLinux 9. This involves updating system packages and installing essential repositories.
Updating System Packages
First, update your system packages to ensure you have the latest versions. Open your terminal and run the following command:
sudo dnf updateThis command will fetch and install any available updates for your AlmaLinux 9 system.
Installing EPEL and Remi Repositories
Next, we need to install the EPEL (Extra Packages for Enterprise Linux) and Remi repositories. These repositories provide access to additional packages required for Laravel installation. Run the following commands:
sudo dnf install epel-release
sudo dnf install https://rpms.remirepo.net/enterprise/remi-release-9.rpm
Once the repositories are installed, enable the Remi PHP repository by running:
sudo dnf module enable php:remi-8.3This command enables the PHP 8.1 module from the Remi repository, which is compatible with Laravel.
Step 2: Installing LAMP Stack
Laravel requires a web server, database, and PHP to function properly. We will install the LAMP (Linux, Apache, MariaDB, PHP) stack to fulfill these requirements.
Installing Apache
Install the Apache web server by running the following command:
sudo dnf install httpdOnce the installation is complete, start the Apache service and enable it to start automatically on system boot:
sudo systemctl start httpd
sudo systemctl enable httpd
Installing MariaDB
Install MariaDB, a popular open-source database server, by running:
sudo dnf install mariadb-serverAfter the installation, start the MariaDB service and enable it to start automatically on system boot:
sudo systemctl start mariadb
sudo systemctl enable mariadb
Secure your MariaDB installation by running the following command and following the prompts:
sudo mysql_secure_installationInstalling PHP
Laravel requires PHP version 8.1 or higher. Install PHP and the necessary extensions by running:
sudo dnf install php php-cli php-common php-gd php-mbstring php-mysqlnd php-opcache php-pdo php-xml php-zipThis command installs PHP along with the extensions required by Laravel.
Step 3: Installing Composer
Composer is a dependency manager for PHP that simplifies the installation and management of Laravel and its dependencies. Install Composer globally by running the following commands:
sudo dnf install php-json php-zip unzip
curl -sS https://getcomposer.org/installer | php
sudo mv composer.phar /usr/local/bin/composer
These commands download the Composer installer, run it, and move the resulting `composer.phar` file to a directory accessible system-wide.
Step 4: Installing Laravel
With the environment set up and Composer installed, we can now proceed to install Laravel using Composer.
Using Composer to Install Laravel
Navigate to the directory where you want to create your Laravel project and run the following command:
composer create-project --prefer-dist laravel/laravel myprojectReplace `myproject` with your desired project name. Composer will create a new directory with the specified name and install Laravel along with its dependencies.
Setting Permissions
To ensure proper permissions for the Laravel project, run the following commands:
sudo chown -R apache:apache /path/to/myproject
sudo chmod -R 755 /path/to/myproject/storage
sudo chmod -R 755 /path/to/myproject/bootstrap/cache
Replace `/path/to/myproject` with the actual path to your Laravel project directory. These commands set the appropriate ownership and permissions for the Laravel files.
Step 5: Configuring Apache for Laravel
To serve your Laravel application through Apache, you need to create a virtual host configuration file.
Creating a Virtual Host File
Create a new virtual host configuration file in the Apache configuration directory:
sudo nano /etc/httpd/conf.d/myproject.confReplace `myproject.conf` with a name that reflects your project. Add the following configuration to the file:
<VirtualHost *:80>
    ServerName yourdomain.com
    DocumentRoot /path/to/myproject/public

    <Directory /path/to/myproject/public>
        AllowOverride All
        Require all granted
    </Directory>

    ErrorLog /var/log/httpd/myproject_error.log
    CustomLog /var/log/httpd/myproject_access.log combined
</VirtualHost>
Replace `yourdomain.com` with your actual domain name and `/path/to/myproject` with the path to your Laravel project directory.
Enabling the Virtual Host
Enable the newly created virtual host by running:
sudo systemctl restart httpdThis command restarts the Apache service, applying the new virtual host configuration.
Step 6: Testing the Installation
With the installation and configuration complete, it’s time to test your Laravel application.
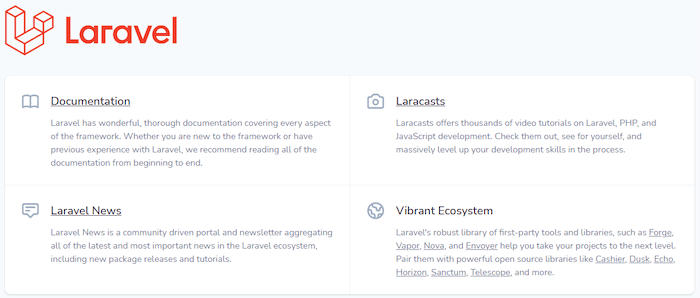
Open a web browser and visit your domain name (e.g., http://myproject.com) or the server’s IP address. You should see the default Laravel welcome page, indicating a successful installation.
If you encounter any issues, double-check the configuration files and ensure that all the necessary permissions are set correctly.

Troubleshooting Common Issues
During the installation process, you may encounter some common issues. Here are a few troubleshooting tips:
- If you see a “Permission Denied” error, ensure that the ownership and permissions of the Laravel project directory are set correctly.
- If the Laravel welcome page doesn’t appear, check the Apache error logs for any specific error messages and address them accordingly.
- If you encounter a “500 Internal Server Error,” review the Laravel application logs in the `storage/logs` directory for detailed error information.
Congratulations! You have successfully installed Laravel. Thanks for using this tutorial for installing the Laravel PHP Framework on your AlmaLinux 9 system. For additional help or useful information, we recommend you check the official Laravel website.