How To Install Microsoft Fonts on Ubuntu 24.04 LTS

In this tutorial, we will show you how to install Microsoft Fonts on Ubuntu 24.04 LTS. Fonts play a crucial role in document formatting and design, ensuring that your content looks professional and visually appealing. While Ubuntu, a popular Linux distribution, comes with a wide variety of fonts pre-installed, it does not include Microsoft fonts by default due to licensing restrictions. However, installing Microsoft fonts on Ubuntu 24.04 LTS is a straightforward process that can greatly enhance your system’s compatibility with documents created on Windows machines.
This article assumes you have at least basic knowledge of Linux, know how to use the shell, and most importantly, you host your site on your own VPS. The installation is quite simple and assumes you are running in the root account, if not you may need to add ‘sudo‘ to the commands to get root privileges. I will show you the step-by-step installation of the Microsoft Fonts on Ubuntu 24.04 (Noble Numbat). You can follow the same instructions for Ubuntu 22.04 and any other Debian-based distribution like Linux Mint, Elementary OS, Pop!_OS, and more as well.
Prerequisites
- A server running one of the following operating systems: Ubuntu and any other Debian-based distribution like Linux Mint.
- It’s recommended that you use a fresh OS install to prevent any potential issues.
- SSH access to the server (or just open Terminal if you’re on a desktop).
- An active internet connection. You’ll need an internet connection to download the necessary packages and dependencies.
- An Ubuntu 24.04 system with root access or a user with sudo privileges.
Install Microsoft Fonts on Ubuntu 24.04 LTS
Step 1. Update System and Repositories.
To begin, it is essential to keep your Ubuntu system up to date. Regular updates ensure that you have access to the latest features, bug fixes, and security patches. Open the terminal and run the following commands to update your system:
sudo apt update
sudo apt upgrade
These commands will refresh the package list and upgrade any outdated packages to their latest versions. This step is crucial to avoid potential compatibility issues during the font installation process.
Step 2. Enable Multiverse Repository.
The Microsoft fonts package is available in the multiverse repository, which is not enabled by default in Ubuntu. To enable the multiverse repository, use the following commands:
sudo add-apt-repository multiverse
sudo apt update
The first command adds the multiverse repository to your system, while the second command updates the package list to include the newly added repository. Enabling the multiverse repository grants you access to a wider range of software packages, including the Microsoft fonts package.
Step 3. Installing ttf-mscorefonts-installer Package.
With the multiverse repository enabled, you can now install the ttf-mscorefonts-installer package, which contains the Microsoft fonts. Run the following command in the terminal:
sudo apt install ttf-mscorefonts-installer
During the installation process, you will be prompted to accept the End User License Agreement (EULA) for the Microsoft fonts. Use the arrow keys to navigate to the “Yes” option and press Enter to accept the EULA. The installation will then proceed, downloading and installing the Microsoft fonts on your Ubuntu system.
After the installation is complete, it’s a good practice to verify that the Microsoft fonts are installed correctly. You can do this by using the following command:
fc-list | grep "Microsoft"
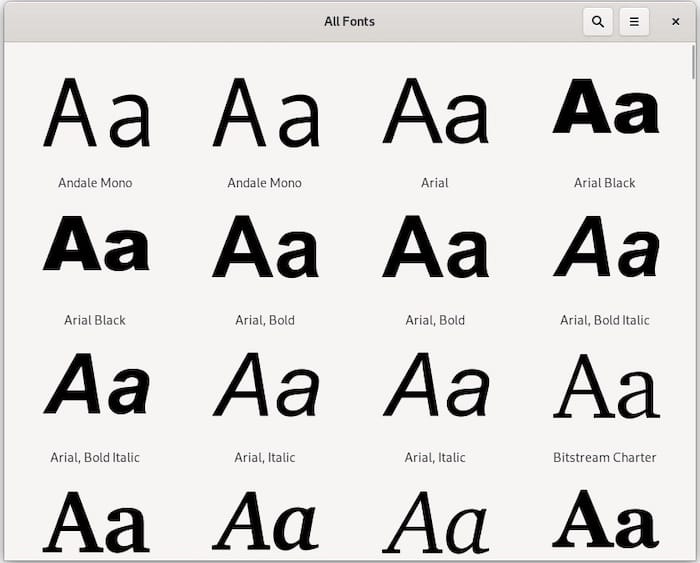
This command lists all the installed fonts and filters the output to display only the Microsoft fonts. If the installation was successful, you should see a list of Microsoft font names, such as Arial, Times New Roman, and Verdana.
If the installation fails or the Microsoft fonts are not displayed in the font list, try reinstalling the ttf-mscorefonts-installer package using the following command:
sudo apt install --reinstall ttf-mscorefonts-installer
To ensure that applications can detect and use the newly installed Microsoft fonts, you need to update the font cache. Run the following command in the terminal:
sudo fc-cache -f -v
This command forcefully updates the font cache and displays verbose output, confirming that the cache has been successfully updated. Updating the font cache is crucial for applications to recognize and utilize Microsoft fonts.
Step 4. Accessing Microsoft Fonts in Applications.
Now that the Microsoft fonts are installed and the font cache is updated, you can start using these fonts in your favorite applications. Popular applications like LibreOffice, GIMP, and Inkscape will automatically detect the new fonts, making them available for use in your documents and designs.

Congratulations! You have successfully installed Microsoft Fonts. Thanks for using this tutorial for installing Microsoft Fonts on the Ubuntu 24.04 LTS system. For additional help or useful information, we recommend you check the Microsoft website.