In this tutorial, we will show you how to install and enable HTTP/2.0 support on Nginx on Ubuntu 20.04 LTS. For those of you who didn’t know, HTTP/2 is the new updated HTTP protocol, and it’s supposed to be much more efficient than the now outdated http/1.1 version. Its goal is to reduce the latency as well as to make the web applications faster by allowing multiple concurrent requests between the web browser and the server across a single TCP connection. If you are looking to speed up the loading time of your website or blog then you should enable http/2.0 on your web server.
This article assumes you have at least basic knowledge of Linux, know how to use the shell, and most importantly, you host your site on your own VPS. The installation is quite simple and assumes you are running in the root account, if not you may need to add ‘sudo‘ to the commands to get root privileges. I will show you the step-by-step enable HTTP/2.0 support in Nginx running Ubuntu 20.04 (Focal Fossa) server.
Prerequisites
- A server running one of the following operating systems: Ubuntu 20.04, 18.04, 16.04, and any other Debian-based distribution like Linux Mint.
- It’s recommended that you use a fresh OS install to prevent any potential issues.
- SSH access to the server (or just open Terminal if you’re on a desktop).
- A
non-root sudo useror access to theroot user. We recommend acting as anon-root sudo user, however, as you can harm your system if you’re not careful when acting as the root.
Enable HTTP/2.0 Support on Nginx
Step 1. First, make sure that all your system packages are up-to-date by running the following apt commands in the terminal.
sudo apt update
sudo apt upgrade
Step 2. Enable HTTP/2.0 Nginx web server.
So make sure that your Nginx version supports the HTTP/2 protocol. If you have not installed Nginx or using an older version upgrade it first:
sudo apt install nginx
To verify the Nginx version we can use the following:
nginx -v
# nginx version: nginx/1.10.1
To enable HTTP/2 in Nginx on an Ubuntu VPS you should edit the default Nginx server block:
nano /etc/nginx/sites-available/default
Add the http2 keywords to your virtual host/server block configuration:
server {
        server_name idroot.us www.idroot.us;
        listen 443 ssl http2 default_server;
        root /var/www/html;
        index index.html;

        location / {
                try_files $uri $uri/ =404;
        }

        ssl_certificate /etc/nginx/ssl/domain.com.crt;
        ssl_certificate_key /etc/nginx/ssl/domain.com.key;
}

server {
       listen         80;
       server_name    domain.com www.domain.com;
       return         301 https://$server_name$request_uri;
}
Enabling really is this simple, just change your current SSL line from this:
server {
  listen        443 ssl;
  ...
}
to this:
server {
  listen        443 ssl http2;
  ...
}
Once you finish editing the server block, save and close the file. Check if there are errors in the Nginx configuration using the command:
nginx -t
And then restart Nginx for the changes to take effect:
systemctl restart nginx.service
Step 3. Verify HTTP/2.
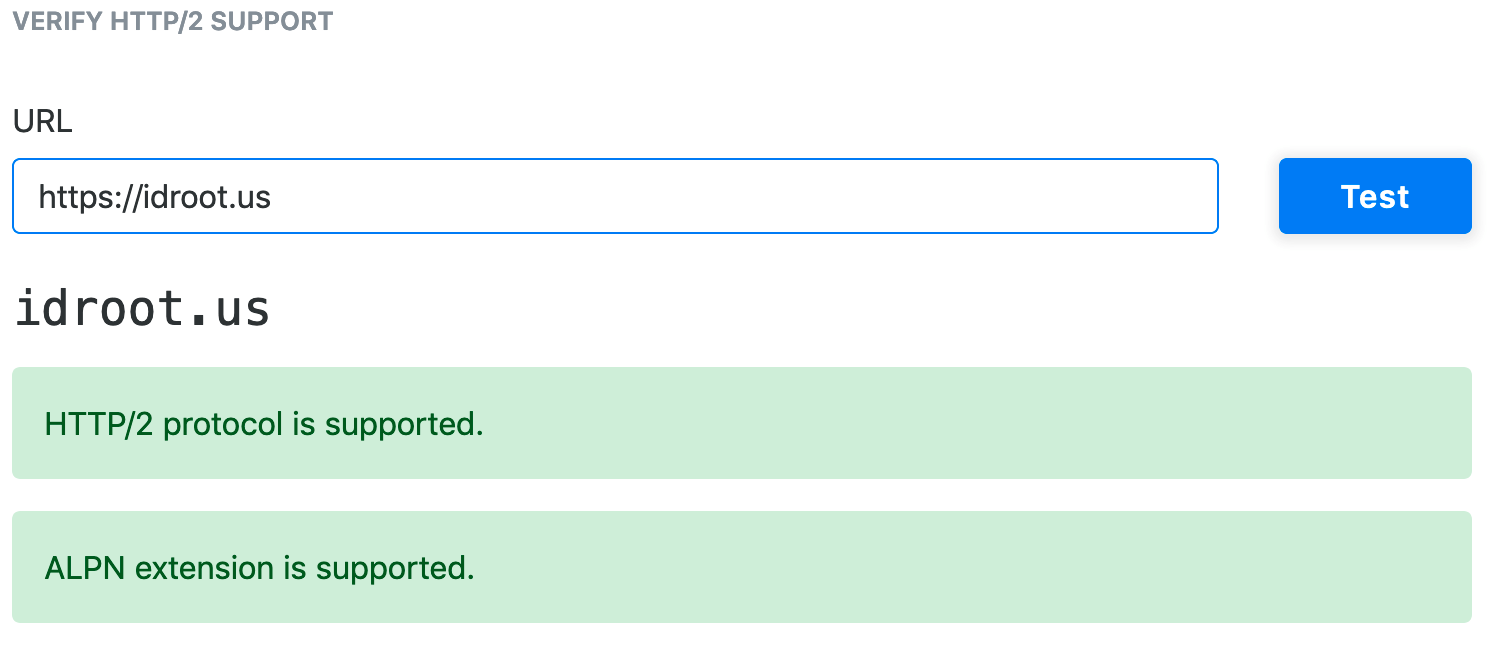
Go to https://tools.keycdn.com/http2-test and test if http/2.0 is detected in your domain:
https://tools.keycdn.com/http2-test

Congratulations! You have successfully enabled the HTTP/2.0 web server. Thanks for using this tutorial to enable HTTP/2.0 support on Nginx running Ubuntu 20.04 LTS Focal Fossa system. For additional help or useful information, we recommend you check the official Nginx website.