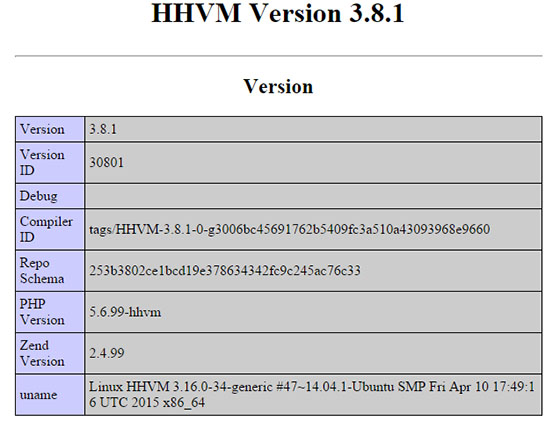
This how-to will help you with your installation and configuration of HHVM on your Ubuntu 14.04. For those of you who didn’t know, HipHop Virtual Machine (HHVM) is a virtual machine developed and open-sourced by Facebook to process and execute programs and scripts written in PHP. Facebook developed HHVM because the regular Zend+Apache combination isn’t as efficient to serve large applications built in PHP.
This article assumes you have at least basic knowledge of Linux, know how to use the shell, and most importantly, you host your site on your own VPS. The installation is quite simple. I will show you the step-by-step installation of HHVM on the Ubuntu 14.04 server.
Prerequisites
- A server running one of the following operating systems: Ubuntu 14.04.
- It’s recommended that you use a fresh OS install to prevent any potential issues.
- SSH access to the server (or just open Terminal if you’re on a desktop).
- A
non-root sudo useror access to theroot user. We recommend acting as anon-root sudo user, however, as you can harm your system if you’re not careful when acting as the root.
Install HHVM on Ubuntu 14.04
Step 1. First of all, make sure that all packages are up to date.
apt-get update
apt-get upgrade
Step 2. Install HHVM.
First, we need to add the HHVM key to your Ubuntu Server with the following command:
sudo wget -O - http://dl.hhvm.com/conf/hhvm.gpg.key | apt-key add -
Then run the commands below to add the HHVM repository to your system:
sudo echo deb http://dl.hhvm.com/ubuntu trusty main | sudo tee /etc/apt/sources.list.d/hhvm.list
Now we can install HHVM with the following command:
sudo apt-get update && sudo apt-get install hhvm
HHVM should have been successfully installed, to make sure to run the following command:
hhvm --version
Make it start on boot by running the command:
sudo update-rc.d hhvm defaults
HHVM includes an excellent script to install FastCGI based on the web server you have installed. This section will help you configure HHVM in the FastCGI mode with the Apache and Nginx servers:
With Apache
Configuring HHVM to work in the FastCGI mode with Apache is extremely simple. All you need to do is execute the following script:
sudo /usr/share/hhvm/install_fastcgi.sh
With Nginx
If you are using Nginx with PHP-FPM, you’ll have to modify the configuration file to disable the use of PHP-FPM. This file is normally located at /etc/nginx/sites-available/default. Look for the following section and make sure it’s all commented (by adding a # at the beginning of each line):
# pass the PHP scripts to FastCGI server listening on 127.0.0.1:9000
#
# location ~ \.php$ {
#       fastcgi_split_path_info ^(.+\.php)(/.+)$;
#       # NOTE: You should have "cgi.fix_pathinfo = 0;" in php.ini
#
#       # With php5-cgi alone:
#       fastcgi_pass 127.0.0.1:9000;
#       # With php5-fpm:
#       fastcgi_pass unix:/var/run/php5-fpm.sock;
#       fastcgi_index index.php;
#       include fastcgi_params;
#}
After doing this, execute the following script:
sudo /usr/share/hhvm/install_fastcgi.sh
Finally, run the commands below to start up HHVM:
service hhvm start
Step 3. Testing HHVM.
To test HHVM, create a test page in the root directory and type these lines in the file and save it:
nano /var/www/html/hhvminfo.php
Then add the following code to your new file:
<?
php phpinfo();
?>
Try to access it at http://your_server_ip_address/hhvminfo.php. If the PHP info page is rendered in your browser then everything looks good and you are ready to proceed further.

Congratulations! You have successfully installed HHVM. Thanks for using this tutorial for installing HHVM (HipHop Virtual Machine) in Ubuntu 14.04 system. For additional help or useful information, we recommend you check the official HHVM website.