In this tutorial, we will show you how to install and configuration of phpVirtualbox on your Ubuntu 15.04 server. For those of you who didn’t know, phpVirtualBox is an open-source, web-based client written using PHP. It can be used to manage and administer Oracle VirtualBox headless instances.
This article assumes you have at least basic knowledge of Linux, know how to use the shell, and most importantly, you host your site on your own VPS. The installation is quite simple. I will show you the step-by-step installation phpVirtualbox on Ubuntu 15.04 server.
Prerequisites
- A server running one of the following operating systems: Ubuntu 15.04.
- It’s recommended that you use a fresh OS install to prevent any potential issues.
- SSH access to the server (or just open Terminal if you’re on a desktop).
- A
non-root sudo useror access to theroot user. We recommend acting as anon-root sudo user, however, as you can harm your system if you’re not careful when acting as the root.
Install PhpVirtualbox on Ubuntu 15.04
Step 1. First, make sure that all your system packages are up-to-date by running the following apt-get commands in the terminal.
sudo apt-get update
sudo apt-get upgrade
Step 2. Install the LAMP server.
A Ubuntu 15.04 LAMP server is required. If you do not have LAMP installed, you can follow our guide here. Also, install the required PHP modules:
sudo apt-get install php5 php5-mysql libapache2-mod-php5 php-soap
Step 3. Install phpVirtualbox.
Download the latest stable version of phpVirtualbox, At the moment of writing this article it is version 5.0-3:
wget http://sourceforge.net/projects/phpvirtualbox/files/phpvirtualbox-5.0-3.zip
sudo unzip phpvirtualbox-5.0-3.zip
sudo rm -f phpvirtualbox-5.0-3.zip
sudo mv phpvirtualbox-5.0-3 /var/www/html/phpvirtualbox
We will need to change some folders permissions:
chown www-data:www-data -R /var/www/html/phpvirtualbox
Step 4. Configure phpVirtualBox.
We need to modify the phpVirtualBox configuration to make successful communication with VirtualBox installation, first, we need to rename the sample config file (config.php-example to config.php):
sudo cp /var/www/html/phpvirtualbox/config.php-example /var/www/html/phpvirtualbox/config.php
sudo nano /var/www/html/phpvirtualbox/config.php
Change the user name and password to the user there is running Virtualbox:
[...]
var $username = 'idroot';
var $password = 'password';
[...]
VirtualBox setup creates an init script vboxweb-service when it is installed, this is used to start and stop the vboxwebserv, before starting the service, we need to have /etc/default/virtualbox file because it contains settings for the service. We need to create it manually if it does not exist:
sudo nano /etc/default/virtualbox
You should add this line in the file:
VBOXWEB_USER=iniranty
Now you should start the vboxweb-service, and make it start automatically on boot:
sudo /etc/init.d/vboxweb-service start
Step 5. Accessing phpVirtualbox.
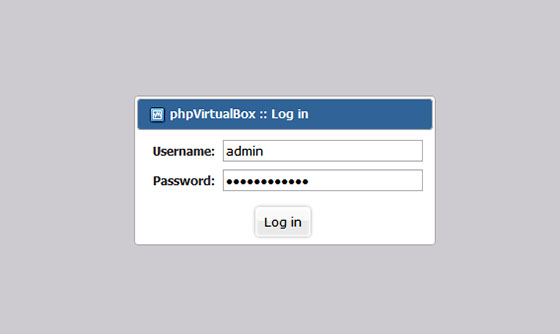
phpVirtualbox will be available on HTTP port 80 by default. Open your favorite browser and navigate to http://your-domain.com/phpvirtualbox or http://server-ip/phpvirtualbox and complete the required steps to finish the installation. Where the default phpVirtualBox username name and password is admin/admin. If you are using a firewall, please open port 80 to enable access to the control panel.

Congratulations! You have successfully installed a phpVirtualbox. Thanks for using this tutorial for installing phpVirtualbox in Ubuntu 15.04 system. For additional help or useful information, we recommend you to check the official phpVirtualbox website.