In this tutorial, we will show you how to install VS Code-Server on AlmaLinux 8. For those of you who didn’t know, Visual Studio Code is an open source cross-platform code editor developed by Microsoft. It has built-in debugging support, embedded Git control, syntax highlighting, code completion, integrated terminal, code refactoring, and snippets. Code-Server is an open source platfrom that includues VS Code to run with a server-side process in the browser. This platform uses is a web server that can be started from any location and then accessed via a browser.
This article assumes you have at least basic knowledge of Linux, know how to use the shell, and most importantly, you host your site on your own VPS. The installation is quite simple and assumes you are running in the root account, if not you may need to add ‘sudo‘ to the commands to get root privileges. I will show you through the step-by-step installation of the VS Code-Server on an AlmaLinux 8. You can follow the same instructions for CentOS and Rocky Linux.
Prerequisites
- A server running one of the following operating systems: AlmaLinux 8, CentOS, and Rocky Linux 8.
- It’s recommended that you use a fresh OS install to prevent any potential issues
- A
non-root sudo useror access to theroot user. We recommend acting as anon-root sudo user, however, as you can harm your system if you’re not careful when acting as the root.
Install VS Code-Server on AlmaLinux 8
Step 1. First, let’s start by ensuring your system is up-to-date.
sudo dnf update
Step 2. Installing VS Code-Server on AlmaLinux 8.
By default, VS Code-Server is not available on the AlmaLinux 8 base repository. Now we run the following command to download the script installer VS Code from the official page:
curl -fsSL https://code-server.dev/install.sh | sh
Once the script completed the process, now enable Nginx (to start automatically upon system boot), start the webserver, and verify the status using the commands below:
sudo systemctl start code-server@$USER
sudo systemctl enable code-server@$USER
Step 3. Configure Code-Server.
By default, the VS code server will only allow accessing its web interface using the localhost, For users that want to connect remotely, you need to modify the configuration file to allow outside connections:
nano ~/.config/code-server/config.yaml
Change 127.0.0.0 to 0.0.0.0:

Save and close the file, then restart the service using the following command:
sudo systemctl restart code-server@$USER
Step 4. Configure Firewall.
AlmaLinux comes with firewalld enabled by default, and it will block other connections from other computers that are trying to access our Fastpanel service. We must open the appropriate ports so that the VS Code-Server resources can be accessed from other machines:
sudo firewall-cmd --add-port={8000,80,443}/tcp --permanent
sudo firewall-cmd --reload
Step 5. Accessing VS Code-Server Web Interface.
Once successfully installed, open your web browser and access the Fastpanel using the URL https://your-IP-address:8080. If you forgot your password, you could quickly print this from the configuration file using the grep command:
grep ~/.config/code-server/config.yaml | password
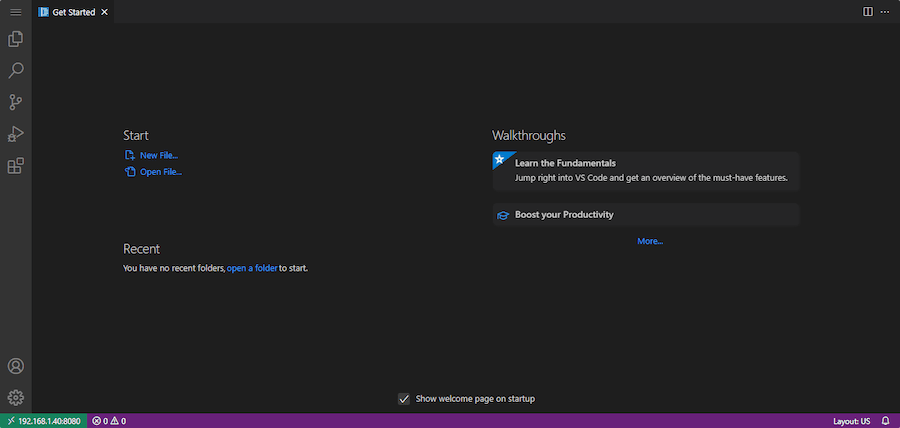
You will be redirected to the VS Code-Server interface page:

Congratulations! You have successfully installed VS Code. Thanks for using this tutorial for installing the Visual Studio Code on your AlmaLinux 8 system. For additional help or useful information, we recommend you check the official VS Code website.