How To Install Adminer on Linux Mint 21

In this tutorial, we will show you how to install Adminer on Linux Mint 21. For those of you who didn’t know, Adminer (formerly phpMinAdmin) is a free and open-source database management tool written in PHP. It is designed to be lightweight and easy to use, and it supports a wide range of database management systems, including MySQL, MariaDB, PostgreSQL, SQLite, and Microsoft SQL Server.
This article assumes you have at least basic knowledge of Linux, know how to use the shell, and most importantly, you host your site on your own VPS. The installation is quite simple and assumes you are running in the root account, if not you may need to add ‘sudo‘ to the commands to get root privileges. I will show you the step-by-step installation of Adminer database management on Linux Mint 21 (Vanessa).
Prerequisites
- A server running one of the following operating systems: Linux Mint 21 (Vanessa).
- It’s recommended that you use a fresh OS install to prevent any potential issues.
- SSH access to the server (or just open Terminal if you’re on a desktop).
- A
non-root sudo useror access to theroot user. We recommend acting as anon-root sudo user, however, as you can harm your system if you’re not careful when acting as the root.
Install Adminer on Linux Mint 21 Vanessa
Step 1. It’s always a good practice to keep your system up to date. Run the following commands in your Terminal to update the system:
sudo apt update
sudo apt install software-properties-common apt-transport-https wget ca-certificates gnupg2
This will ensure that you have the latest security patches and bug fixes installed on your system.
Step 2. Installing the LAMP Server.
A LAMP (Linux, Apache, MySQL, PHP) server is required for Adminer to function properly. If you haven’t already installed a LAMP stack, you can follow a guide like “How to Install LAMP Server on Linux Mint 21” to set it up.
Step 3. Create a Database for Adminer.
The next step is to create a database for Adminer. So, log into the database server:
sudo mysql -u root -p
Now create a database and database user:
Mariadb [(none)])> CREATE DATABASE adminer_db;
Mariadb [(none)])> CREATE USER 'adminer_user'@'localhost' IDENTIFIED BY 'your-strong-passwd';
Mariadb [(none)])> GRANT ALL ON adminer_db.* TO 'adminer_user'@'localhost';
Mariadb [(none)])> FLUSH PRIVILEGES;
Mariadb [(none)])> EXIT;
Step 4. Installing Adminer on Linux Mint 21.
By default, Adminer is available on the Linux Mint 21 base repository. Now run the following command below to install the latest version of Adminer to your Linux Mint system:
sudo apt install adminer
Step 5. Configure Apache.
Now we configure Apache for Adminer using the following command below:
sudo a2enconf adminer
Next, restart Apache to apply the changes made:
sudo systemctl reload apache2
Step 6. Accessing Adminer Web Interface.
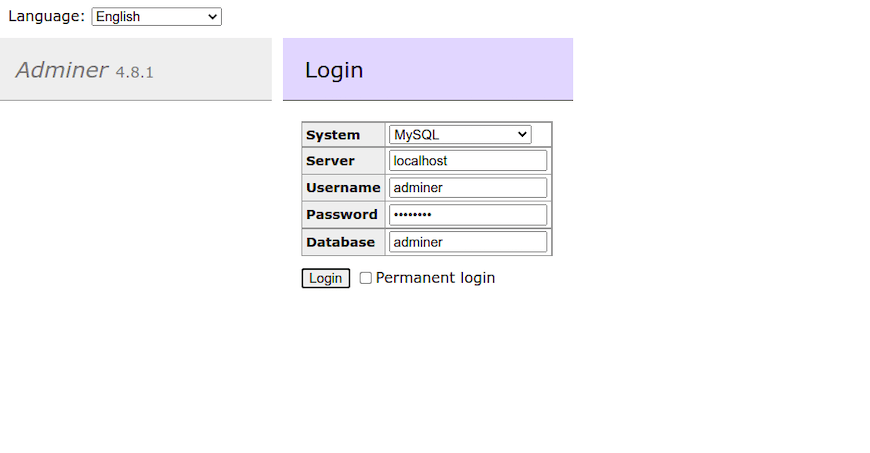
Once successfully installed, now open your favorite browser and navigate to http://your-ip-address/adminer and you should get a page as shown:

You should see the Adminer login screen. Enter the following credentials:
- Server:
localhost - Username:
adminer_user - Password:
your-strong-passwd - Database:
adminer_db
Click the “Login” button to access the Adminer dashboard. If you see the Adminer dashboard, congratulations! You have successfully installed and configured Adminer on your Linux Mint 21 system.
Congratulations! You have successfully installed Adminer. Thanks for using this tutorial for installing the latest version of Adminer database management on the Linux Mint system. For additional help or useful information, we recommend you check the official Adminer website.