How To Install Anaconda on openSUSE

In this tutorial, we will show you how to install Anaconda on openSUSE. Anaconda is a powerful and user-friendly distribution of Python and R programming languages, specifically designed for data science, machine learning, and scientific computing. It provides a comprehensive ecosystem of tools and libraries, making it easier for users to manage packages, environments, and dependencies.
This article assumes you have at least basic knowledge of Linux, know how to use the shell, and most importantly, you host your site on your own VPS. The installation is quite simple and assumes you are running in the root account, if not you may need to add ‘sudo‘ to the commands to get root privileges. I will show you the step-by-step installation of the Anaconda data science on openSUSE.
Prerequisites
- A server running one of the following operating systems: openSUSE (Leap or Tumbleweed)
- Familiarity with basic Linux commands and openSUSE’s package management system (
zypper) is also beneficial, as you’ll be interacting with the command line during the installation process. - You will need access to the terminal to execute commands. openSUSE provides the Terminal application for this purpose. It can be found in your Applications menu.
- You’ll need an active internet connection to download Anaconda and its dependencies.
- You’ll need administrative (root) access or a user account with sudo privileges.
Install Anaconda on openSUSE
Step 1. It is crucial to keep your openSUSE system up to date to ensure compatibility with the latest version of Anaconda. To update your system, open the terminal and run the following command:
sudo zypper refresh
sudo zypper update
Step 2. Installing Anaconda on openSUSE.
To begin the installation process, visit the official Anaconda website. On the download page, select “Linux” as the operating system and choose the appropriate installer for your openSUSE system. For most users, the 64-Bit (x86) installer will be the correct choice.
Anaconda offers two versions of Python: Python 3.x and Python 2.7. It is recommended to choose the Python 3.x installer, as Python 2.7 has reached its end-of-life and is no longer actively maintained. However, if you have specific requirements for Python 2.7, you can select the appropriate installer.
To download the installer directly, use the following link:
wget https://repo.anaconda.com/archive/Anaconda3-2024.02-1-Linux-x86_64.sh
Now that you have downloaded the Anaconda installer, it’s time to install it on your openSUSE system. Open the terminal and navigate to the directory where the installer was downloaded. Typically, this will be the “Downloads” directory in your home folder.
cd ~/Downloads
To start the installation, run the following command, replacing “Anaconda3-2024.02-1-Linux-x86_64.sh” with the name of the installer file you downloaded:
bash Anaconda3-2024.02-1-Linux-x86_64.sh
The installer will display the Anaconda license agreement. Press “Enter” to scroll through the agreement, and type “yes” when prompted to accept the terms.
Next, you will be asked to specify the installation directory. It is recommended to use the default location, which is typically “/home/your_username/anaconda3“. Press “Enter” to confirm the installation directory.
After specifying the installation directory, the installer will ask if you want to initialize Anaconda by running “conda init”. Initializing Anaconda will add the necessary paths to your shell configuration file (e.g., “.bashrc”), allowing you to use Anaconda seamlessly in your terminal.
The installation process may take several minutes, depending on your internet connection speed and system performance. Once the installation is complete, you will see a success message in the terminal.
To verify that Anaconda has been installed correctly, close and re-open your terminal. This ensures that the changes made to your shell configuration file take effect. Alternatively, you can run the following command to reload the shell configuration:
source ~/.bashrc
Now, run the following command to check the installation details:
conda info
This command will display information about your Anaconda installation, including the version number, installation directory, and the list of installed packages.
To check the version of Python and conda, use the following commands:
python --version
conda --version
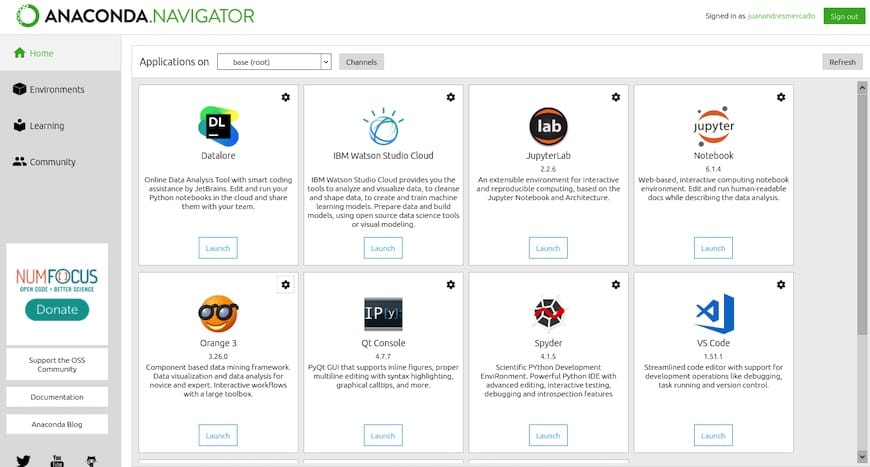
You can also launch Anaconda Navigator, a graphical user interface for managing Anaconda environments and packages. To launch Anaconda Navigator, run the following command:
anaconda-navigator

Step 3. Configure Anaconda.
After installing Anaconda, it’s a good idea to update it to the latest version to ensure you have access to the most recent features and bug fixes. To update Anaconda, run the following commands in the terminal:
conda update conda
conda update anaconda
One of the powerful features of Anaconda is the ability to create and manage separate environments for different projects. Each environment can have its own set of packages and dependencies, allowing you to keep your projects isolated and avoid conflicts.
To create a new conda environment with a specific Python version, use the following command:
conda create --name myenv python=3.12
To activate the newly created environment, run:
conda activate myenv
Once the environment is activated, you can install packages specific to that environment using the conda install command. For example, to install the NumPy package, run:
conda install numpy
If a package is not available in the conda repository, you can use pip to install it within the conda environment. For example:
pip install package_name
It’s important to note that using pip within a conda environment can sometimes lead to dependency conflicts. Therefore, it’s recommended to use conda packages whenever possible and only resort to pip when necessary.
Congratulations! You have successfully installed Anaconda. Thanks for using this tutorial for installing Anaconda on your openSUSE system. For additional or useful information, we recommend you check the official Anaconda website.