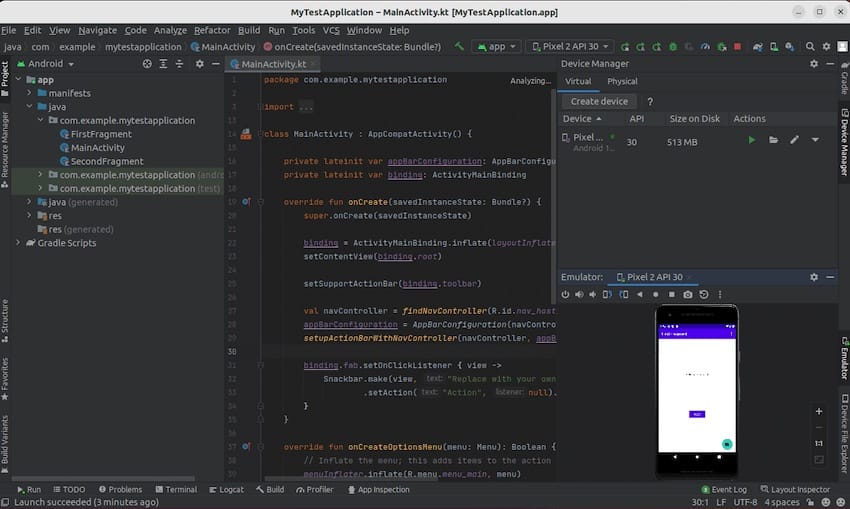
How To Install Android Studio on Fedora 40

Android Studio is the official Integrated Development Environment (IDE) for Android app development, providing a comprehensive set of tools and features to create high-quality Android applications. Fedora 40, a popular Linux distribution known for its stability and performance, is an excellent choice for developers looking to set up their Android development environment. In this article, we will guide you through the process of installing Android Studio on Fedora 40, ensuring a smooth and efficient setup for your Android development needs.
Prerequisites
Before proceeding with the installation of Android Studio on Fedora 40, it’s essential to ensure that your system meets the minimum requirements and has the necessary software dependencies. Android Studio requires a 64-bit operating system with at least 8 GB of RAM and 4 GB of available disk space. Additionally, you’ll need to have the Java Development Kit (JDK) installed on your system.
To ensure a seamless installation process, make sure your Fedora 40 system is up to date with the latest updates and packages. Open a terminal and run the following command:
sudo dnf updateThis command will update your system to the latest available versions of installed packages.
Method 1: Installing Android Studio Using Snap
Snap is a package management system that simplifies the installation and management of software packages on Linux systems. By using Snap to install Android Studio, you can ensure a quick and hassle-free setup process.
Step 1: Install Snap on Fedora
To install Snap on Fedora 40, open a terminal and run the following command:
sudo dnf install snapdOnce the installation is complete, enable the Snap daemon by running:
sudo systemctl enable --now snapd.socketVerify that Snap is installed and working correctly by running:
snap versionStep 2: Install Android Studio via Snap
With Snap installed, you can now easily install Android Studio using a single command. In the terminal, run:
sudo snap install android-studio --classicThe --classic flag allows Android Studio to access the necessary system resources and directories.
Step 3: Initial Setup and Configuration
Once the installation is complete, you can launch Android Studio from the terminal by running:
android-studioAndroid Studio will launch, and you’ll be greeted with the initial setup wizard. Follow the on-screen instructions to complete the setup process, including downloading and installing the necessary SDK components.
Method 2: Installing Android Studio from Archive
If you prefer to install Android Studio manually from the official archive, follow these steps:
Step 1: Downloading the Archive
Visit the official Android Studio website and download the latest stable version of Android Studio for Linux.
Step 2: Installing Java Development Kit (JDK)
Android Studio requires the Java Development Kit (JDK) to be installed on your system. To install OpenJDK on Fedora 40, run the following command in the terminal:
sudo dnf install java-17-openjdk-develVerify the Java installation by running:
java -versionStep 3: Extracting and Setting Up Android Studio
Navigate to the directory where you downloaded the Android Studio archive and extract it using the following command:
tar -xzf android-studio-*.tar.gzMove the extracted directory to a suitable location, such as /opt/, using the command:
sudo mv android-studio /opt/Change to the Android Studio bin directory:
cd /opt/android-studio/binRun the studio.sh script to start the setup wizard:
./studio.shStep 4: Configuring Android Studio
During the setup wizard, you’ll be prompted to configure various settings such as the SDK paths and theme preferences. Follow the on-screen instructions to complete the configuration process.
To create a desktop entry for easier access to Android Studio, you can use the built-in “Create Desktop Entry” option in the setup wizard or manually create a .desktop file.

Post-installation Configuration
After installing Android Studio, you may want to configure your system settings for optimal performance. Here are a few recommendations:
- Increase the amount of RAM allocated to Android Studio by modifying the
studio.vmoptionsfile located in thebindirectory. - Customize the IDE appearance and themes to suit your preferences from the Android Studio settings menu.
- Configure the Android SDK Manager to install additional SDK platforms, tools, and emulator images as needed for your development projects.
Using Android Studio on Fedora
With Android Studio installed on your Fedora 40 system, you’re ready to start developing Android applications. Here are a few tips to get you started:
- Create a new project by selecting “File” > “New” > “New Project” from the Android Studio menu.
- Explore the various features of Android Studio, such as code editing, debugging, and emulator usage, to streamline your development workflow.
- Utilize the built-in tools and wizards to create user interfaces, manage resources, and optimize your app’s performance.
- Take advantage of Fedora’s stability and performance to ensure a smooth development experience.
Troubleshooting Common Issues
If you encounter any issues during the installation or usage of Android Studio on Fedora 40, here are a few troubleshooting tips:
- Ensure that your system meets the minimum requirements for Android Studio and has the necessary dependencies installed.
- Check the official Android Studio documentation and community forums for solutions to common problems and error messages.
- Make sure you have the latest version of Android Studio and the required SDK components installed.
- If you experience performance issues, try adjusting the memory allocation settings in the
studio.vmoptionsfile.
Congratulations! You have successfully installed Android Studio. Thanks for using this tutorial for installing Android Studio on your Fedora 40 system. For additional help or useful information, we recommend you check the official Android Studio website.