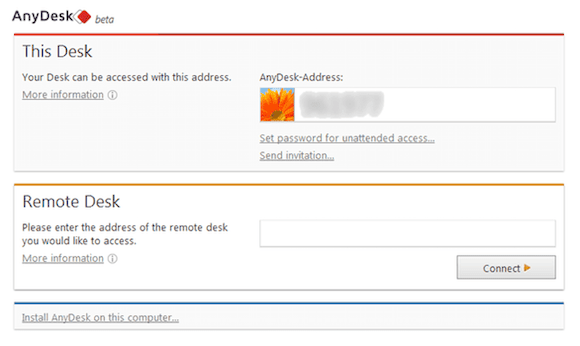
In this tutorial, we will show you how to install AnyDesk on Ubuntu 18.04 LTS. For those of you who didn’t know, AnyDesk is a powerful remote desktop application that enables users to access their computers remotely from any device, including Windows, macOS, Linux, iOS, and Android. It offers a range of features, such as high-performance remote access, secure file transfer, remote printing, and multi-monitor support. AnyDesk is known for its fast and stable connections, making it an ideal choice for both personal and professional use.
This article assumes you have at least basic knowledge of Linux, know how to use the shell, and most importantly, you host your site on your own VPS. The installation is quite simple and assumes you are running in the root account, if not you may need to add ‘sudo‘ to the commands to get root privileges. I will show you the step-by-step installation of AnyDesk remote desktop capabilities on a Ubuntu 18.04 (bionic beaver) server.
Prerequisites
- A server running one of the following operating systems: Ubuntu 18.04 (bionic beaver).
- It’s recommended that you use a fresh OS install to prevent any potential issues.
- SSH access to the server (or just open Terminal if you’re on a desktop).
- An active internet connection is required to download and install AnyDesk.
- A
non-root sudo useror access to theroot user. We recommend acting as anon-root sudo user, however, as you can harm your system if you’re not careful when acting as the root.
Install AnyDesk on Ubuntu 18.04 LTS Bionic Beaver
Step 1. Before proceeding with the installation, it’s always a good practice to ensure that your system’s package index is up-to-date. Open the terminal and run the following command:
sudo apt update
sudo apt upgrade
These commands will refresh the package list and upgrade any outdated packages to their latest versions. This step helps maintain system stability and security.
Step 2. Installing AnyDesk on Ubuntu 18.04.
To install AnyDesk on Ubuntu 18.04 LTS, you’ll need to add the official AnyDesk repository to your system’s sources list.
First, import the AnyDesk GPG key for signing APT packages.
wget -qO - https://keys.anydesk.com/repos/DEB-GPG-KEY | sudo apt-key add -
Then, add AnyDesk repository content to your Ubuntu system:
echo "deb http://deb.anydesk.com/ all main" | sudo tee /etc/apt/sources.list.d/anydesk-stable.list
With the repository added, you can now proceed with the installation of AnyDesk. Run the following command in the terminal:
sudo apt update
sudo apt install anydesk
This command will update the package lists and install the latest version of AnyDesk on your Ubuntu 18.04 LTS system.
After the installation is complete, verify that AnyDesk was successfully installed by running:
anydesk --version
Step 3. Accessing AnyDesk on Ubuntu 18.04.
Once the installation is complete, you can launch AnyDesk from the Ubuntu application menu or by running the following command in the terminal:
anydesk
You will get an AnyDesk ID for connecting from remote systems using AnyDesk. Now, You may need to set a password for unattended access. This will set a fixed password on your system, Which can be used anytime to connect.

Congratulations! You have successfully installed AnyDesk. Thanks for using this tutorial for installing the latest stable version of AnyDesk remote desktop on the Ubuntu 18.04 LTS (bionic beaver) system. For additional help or useful information, we recommend you to check the official AnyDesk website.