In this tutorial, we will show you how to install Apache Guacamole on CentOS 8. For those of you who didn’t know, Guacamole is a free, open-source HTML5 web-based remote desktop gateway developed by the Apache software foundation. It supports standard protocols like VNC, RDP, and SSH.
This article assumes you have at least basic knowledge of Linux, know how to use the shell, and most importantly, you host your site on your own VPS. The installation is quite simple and assumes you are running in the root account, if not you may need to add ‘sudo‘ to the commands to get root privileges. I will show you the step-by-step install of the Apache Guacamole on CentOS 8.
Prerequisites
- A server running one of the following operating systems: CentOS 8.
- It’s recommended that you use a fresh OS install to prevent any potential issues
- A
non-root sudo useror access to theroot user. We recommend acting as anon-root sudo user, however, as you can harm your system if you’re not careful when acting as the root.
Install Apache Guacamole on CentOS 8
Step 1. First, let’s start by ensuring your system is up-to-date.
sudo dnf clean all
sudo dnf update
Step 2. Installing the Required Dependency system.
Run the following commands below:
sudo dnf install nano wget unzip make cmake wget gcc zlib-devel compat-openssl10
sudo dnf config-manager --set-enabled PowerTools
sudo dnf config-manager --enable Devel
sudo dnf install cairo-devel libuv-devel libjpeg-turbo-devel libjpeg-devel libpng-devel libtool uuid-devel freerdp-devel pango-devel libvncserver-devel pulseaudio-libs-devel openssl-devel libvorbis-devel libwebp-devel libssh2-devel libwebsockets-devel libtheora opus lame-libs
sudo dnf config-manager --disable Devel
Step 3. Installing Java.
Run the command to install java-11-OpenJDK:
sudo dnf install java-11-openjdk-devel
Next, create a file and set the Java environment variables:
sudo nano /etc/profile.d/java11.sh
Add the following lines:
export JAVA_HOME=$(dirname $(dirname $(readlink -f $(which javac))))
export PATH=$PATH:$JAVA_HOME/bin
export CLASSPATH=.:$JAVA_HOME/jre/lib:$JAVA_HOME/lib:$JAVA_HOME/lib/tools.jar
Provide the file source to start using it without logging out:
source /etc/profile.d/java11.sh
For additional resources on installing Java, read the post below:
Step 3. Installing Apache Tomcat.
To install Apache Tomcat, please follow our detailed guide on how to install Apache Tomcat on CentOS 8.
Step 4. Installing Apache Guacamole on CentOS 8.
Now we download the latest version of Guacamole with the following command:
wget https://downloads.apache.org/guacamole/1.3.0/source/guacamole-server-1.3.0.tar.gz
tar -xvzf guacamole-server-1.3.0.tar.gz
Next, change the directory to the extracted directory and configure it:
cd guacamole-server-1.3.0
./configure --with-init-dir=/etc/init.d
Once done, install it to your system with the following command:
make
make install
ldconfig
Next, reload the systemd daemon with the following command:
sudo systemctl daemon-reload
sudo systemctl start guacd
sudo systemctl enable guacd
Step 5. Installing Apache Guacamole Client.
Now we download the Guacamole client file with the following command:
mkdir /etc/guacamole
wget https://downloads.apache.org/guacamole/1.3.0/binary/guacamole-1.3.0.war
mv guacamole-1.3.0.war /etc/guacamole/guacamole.war
Next, create a symbolic link of guacamole.war file to the /usr/share/tomcat directory:
ln -s /etc/guacamole/guacamole.war /usr/share/tomcat/webapps/
After that, set the Guacamole home directory with the following command:
echo "GUACAMOLE_HOME=/etc/guacamole" | tee -a /etc/default/tomcat
Then, create a Guacamole configuration file with the following command:
nano /etc/guacamole/guacamole.properties
Add the following lines:
guacd-hostname: localhost
guacd-port:    4822
user-mapping:    /etc/guacamole/user-mapping.xml
auth-provider:    net.sourceforge.guacamole.net.basic.BasicFileAuthenticationProvider
Step 6. Configure Apache Guacamole.
We need to create a Guacamole user mapping file to define the remote server that you want to connect from Guacamole. Now generate a secrete password with the following command:
(stdin)= 36160e235d67eb081741001204798ee37a8s
Next, run the commands below to create a new user-mapping.xml:
sudo nano /etc/guacamole/user-mapping.xml
Then, copy and paste the content below into the file and save:
<user-mapping>
    <authorize
            username="admin"
            password="36160e235d67eb081741001204798ee37a8s"
            encoding="md5">

        <connection name="CentOS-8-Server">
            <protocol>ssh</protocol>
            <param name="hostname">192.168.1.2</param>
            <param name="port">22</param>
            <param name="username">root</param>
        </connection>
        <connection name="Windows Server">
            <protocol>rdp</protocol>
            <param name="hostname">192.168.2.3</param>
            <param name="port">3389</param>
        </connection>
    </authorize>
</user-mapping>
Save and close the file then restart both Guacamole and Tomcat services to apply the changes:
sudo systemctl restart tomcat guacd
Step 7. Configure Firewall.
You will need to allow ports 4822 and 8080 through a firewall. You can allow them with the following command:
sudo firewall-cmd --permanent --add-port={4822,8080}/tcp
sudo firewall-cmd --reload
Step 8. Accessing Apache Guacamole on CentOS.
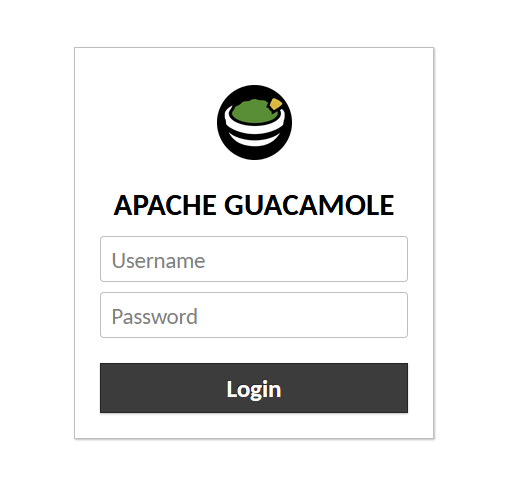
Once successfully installed, you can access it from the web browser using the address http://localhost:8080/guacamole. You should then see the Apache Guacamole portal to log in:

Congratulations! You have successfully installed Apache Guacamole. Thanks for using this tutorial for installing the Apache Guacamole on CentOS 8 systems. For additional help or useful information, we recommend you check the official Apache website.