In this tutorial, we will show you how to install Apache Guacamole on Debian 11. For those of you who didn’t know, Apache Guacamole is a client-less HTML5 web based remote desktop gateway which provides remote access to servers and desktops through a web browser. It supports standard protocols like VNC, RDP, and SSH. Apache Guacamole is maintained by Apache Software Foundation, and licensed with Apache License 2.0.
This article assumes you have at least basic knowledge of Linux, know how to use the shell, and most importantly, you host your site on your own VPS. The installation is quite simple and assumes you are running in the root account, if not you may need to add ‘sudo‘ to the commands to get root privileges. I will show you through the step-by-step installation of the Apache Guacamole remote desktop gateway on a Debian 11 (Bullseye).
Prerequisites
- A server running one of the following operating systems: Debian 10 or Debian 11.
- It’s recommended that you use a fresh OS install to prevent any potential issues
- A
non-root sudo useror access to theroot user. We recommend acting as anon-root sudo user, however, as you can harm your system if you’re not careful when acting as the root.
Install Apache Guacamole on Debian 11 Bullseye
Step 1. Before we install any software, it’s important to make sure your system is up to date by running the following apt commands in the terminal:
sudo apt update
sudo apt upgrade
Step 2. Installing Dependencies for Apache Guacamole.
We need to install the required build tools before you can start to build the guacamole-server component:
sudo apt install -y freerdp2-dev libavcodec-dev libavformat-dev libavutil-dev libswscale-dev libcairo2-dev libjpeg62-turbo-dev libjpeg-dev libpng-dev libtool-bin libpango1.0-dev libpango1.0-0 libssh2-1 libwebsockets16 libwebsocketpp-dev libossp-uuid-dev libssl-dev libwebp-dev libvorbis-dev libpulse-dev libwebsockets-dev libvncserver-dev libssh2-1-dev openssl
Step 3. Installing Apache Tomcat.
Run the following command to install the Apache Tomcat 9 to your Debian system:
sudo apt install -y tomcat9 tomcat9-admin tomcat9-common tomcat9-user
Once the installation is complete, now enable Apache Tomcat (to start automatically upon system boot), and verify the status using the commands below:
sudo systemctl start tomcat9
sudo systemctl enable tomcat9
sudo systemctl status tomcat9
For additional resources on installing Apache Tomcat, read the post below:
Step 4. Installing Apache Guacamole on Debian 11.
By default, Apache Guacamole is not available on Debian 11 base repository. So, now we download the latest stable version of Apache Guacamole from the official page:
cd /usr/src
wget https://downloads.apache.org/guacamole/1.4.0/source/guacamole-server-1.4.0.tar.gz
Next, extract the source code:
tar -xzvf guacamole-server-1.4.0.tar.gz
cd guacamole-server-*/
Now it is time to configure the package by entering an init directory:
./configure --with-systemd-dir=/etc/systemd/system/
After that, we compile and install the Guacamole-server by running the command below:
make
make install
sudo ldconfig
Then reload daemons to find the added guacd service:
sudo systemctl daemon-reload
sudo systemctl start guacd
sudo systemctl enable guacd
Step 5. Configure Guacamole-Server.
First, run the following command below to create a new directory ‘/etc/guacamole/‘ within additional directories ‘extensions‘ and ‘lib‘ inside. Then add the environment variable ‘GUACAMOLE_HOME=/etc/guacamole‘ to the file ‘/etc/default/tomcat9‘. This will tell the Tomcat 9 servlet container to look up the ‘GUACAMOLE_HOME‘ directory to the ‘/etc/guacamole/‘:
mkdir -p /etc/guacamole/{extensions,lib}
echo 'GUACAMOLE_HOME=/etc/guacamole' >> /etc/default/tomcat9
Next, create the main configuration ‘guacamole.properties‘:
sudo nano /etc/guacamole/guacamole.properties
Add the following configuration:
# Hostname and port of guacamole proxy
guacd-hostname: localhost
guacd-port:     4822

# user mapping and user connections
user-mapping:    /etc/guacamole/user-mapping.xml
Save and close the file, then create a new configuration ‘loogback.xml‘ for logging and debugging:
sudo nano /etc/guacamole/logback.xml
Add the following configuration file:
<configuration>

    <!-- Appender for debugging -->
    <appender name="GUAC-DEBUG" class="ch.qos.logback.core.ConsoleAppender">
        <encoder>
            <pattern>%d{HH:mm:ss.SSS} [%thread] %-5level %logger{36} - %msg%n</pattern>
        </encoder>
    </appender>

    <!-- Log at DEBUG level -->
    <root level="debug">
        <appender-ref ref="GUAC-DEBUG"/>
    </root>

</configuration>
Step 6. Configure Guacamole Authentication Method.
Now we generate a new md5 password hash and create a new file for Guacamole user authentication and connections:
echo -n StrongPasswordUserMeilana | openssl md5
Output:
(stdin)= aca100120ffcfb8aa8ad7627195ad4fcp
Next, create a new file ‘user-mapping.xml‘ using your favorite text editor:
sudo nano /etc/guacamole/user-mapping.xml
Then, copy and paste the content below into the file and save:
<user-mapping>

    <!-- Another user, but using md5 to hash the password
         (example below uses the md5 hash of "PASSWORD") -->
    <authorize
            username="johndoe"
            password="aca22211ffcfb8aa8ad7627195ad4fce"
            encoding="md5">

        <!-- First authorized connection -->
        <connection name="SSH localhost">
            <protocol>ssh</protocol>
            <param name="hostname">localhost</param>
            <param name="port">22</param>
            <param name="username">johndoe</param>
            <param name="password">SSHPASSWORD</param>
        </connection>

        <!-- Second authorized connection -->
        <connection name="localhost">
            <protocol>vnc</protocol>
            <param name="hostname">localhost</param>
            <param name="port">5901</param>
            <param name="password">VNCPASS</param>
        </connection>

        <!-- Third authorized connection -->
        <connection name="otherhost">
            <protocol>vnc</protocol>
            <param name="hostname">otherhost</param>
            <param name="port">5900</param>
            <param name="password">VNCPASS</param>
        </connection>

    </authorize>

</user-mapping>
Step 7. Installing Guacamole Client Web Application.
Now we download Guacamole client binary using the following command below:
cd /usr/src
https://downloads.apache.org/guacamole/1.4.0/binary/guacamole-1.4.0.war
sudo cp guacamole-1.4.0.war /var/lib/tomcat9/webapps/guacamole.war
Then, restart the Tomcat 9 service to apply a new web application:
sudo systemctl restart tomcat9
Step 8. Accessing Apache Guacamole Web Interface.
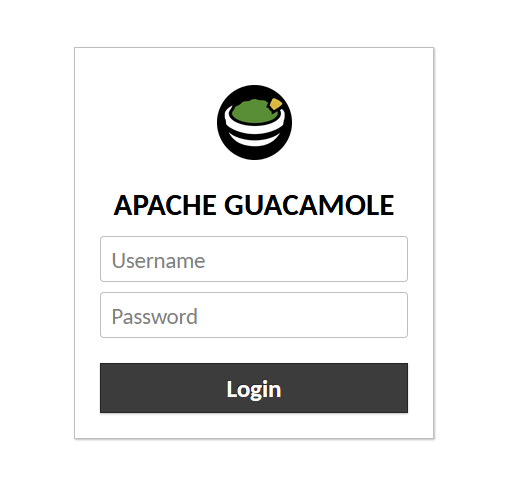
Once successfully installed, open your web browser and access the Matomo using the URL http://your-IP-address:8080. You will be redirected to the Apache Guacamole interface page:

Congratulations! You have successfully installed Apache Guacamole. Thanks for using this tutorial for installing the latest version of the Apache Guacamole remote desktop gateway on Debian 11 Bullseye. For additional help or useful information, we recommend you check the official Apache website.