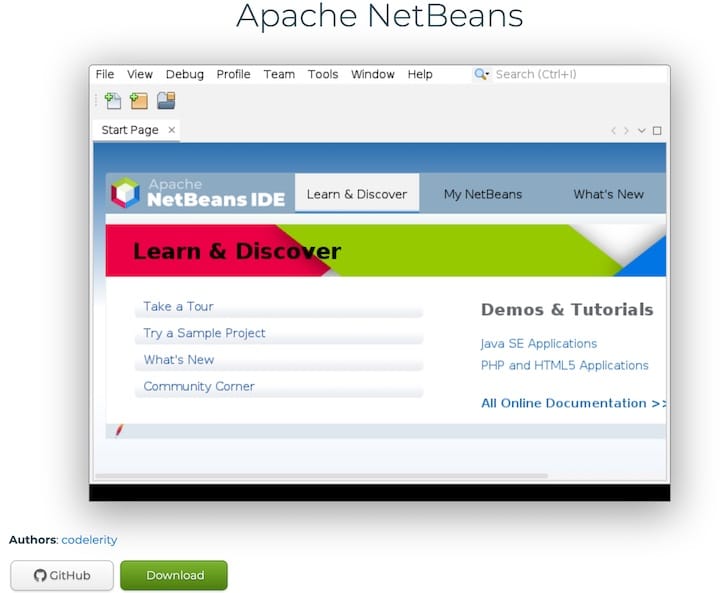
How To Install Apache NetBeans on AlmaLinux 9

Apache NetBeans is a powerful, feature-rich Integrated Development Environment (IDE) that has become an essential tool for developers across various programming languages. As an open-source platform, NetBeans offers a robust set of tools for creating desktop, mobile, and web applications. For developers using AlmaLinux 9, a cutting-edge enterprise-grade Linux distribution, installing NetBeans can significantly enhance their development workflow.
In this comprehensive guide, we’ll walk you through the process of installing Apache NetBeans on AlmaLinux 9. Whether you’re a seasoned developer or just starting your coding journey, this step-by-step tutorial will ensure you have NetBeans up and running smoothly on your system. Let’s dive in and unlock the full potential of your development environment!
Prerequisites
Before we begin the installation process, it’s crucial to ensure your system meets the necessary requirements and has the required software packages. Here’s what you’ll need:
- System Requirements:
- AlmaLinux 9 (64-bit) installed and updated
- At least 4GB of RAM (8GB or more recommended)
- Minimum 1GB of free disk space
- Internet connection for downloading NetBeans and dependencies
- Required Software:
- Java Development Kit (JDK) 8 or later
- Terminal access
- Root or sudo privileges
Ensure you have these prerequisites in place before proceeding with the installation. Having the right foundation will help avoid potential issues and ensure a smooth setup process.
Preparing Your System
To create an optimal environment for Apache NetBeans, let’s start by updating your AlmaLinux 9 system and installing the necessary Java Development Kit.
Updating AlmaLinux 9
Open your terminal and run the following commands to update your system:
sudo dnf update -y
sudo dnf upgrade -y
These commands will ensure your system has the latest packages and security updates.
Installing Java Development Kit (JDK)
NetBeans requires a Java Development Kit to function. Let’s install OpenJDK, an open-source implementation of the Java Platform:
sudo dnf install java-11-openjdk-develThis command installs OpenJDK 11, which is compatible with the latest versions of NetBeans.
Verifying Java Installation
After installation, verify that Java is correctly installed by running:
java -versionYou should see output similar to this:
openjdk version "11.0.XX" 20XX-XX-XX
OpenJDK Runtime Environment (build 11.0.XX+XX-AlmaLinux)
OpenJDK 64-Bit Server VM (build 11.0.XX+XX-AlmaLinux, mixed mode, sharing)
If you see this output, Java is successfully installed on your system.
Downloading Apache NetBeans
Now that your system is prepared, it’s time to download Apache NetBeans. Follow these steps to ensure you get the correct version for your needs.
Official Download Sources
Visit the official Apache NetBeans website. This page provides the latest stable releases of NetBeans.
Choosing the Right Version
On the download page, you’ll find different versions of NetBeans. For AlmaLinux 9, which is a 64-bit system, choose the “Linux x64” version. Look for a file named something like netbeans-XX-bin.zip, where XX represents the version number.
Verifying the Download
After downloading, it’s a good practice to verify the integrity of the file. Apache provides checksums for this purpose. Download the corresponding .sha512 file and use the following command to verify the download:
sha512sum -c netbeans-XX-bin.zip.sha512If the output says “OK”, your download is verified and ready for installation.
Installing Apache NetBeans
With the NetBeans package downloaded and verified, we can proceed with the installation process. Follow these steps carefully to ensure a successful setup.
Extracting the Downloaded Archive
First, let’s extract the downloaded ZIP file. Navigate to the directory where you downloaded NetBeans and run:
unzip netbeans-XX-bin.zipReplace “XX” with the actual version number of your download.
Running the Installer Script
After extraction, you’ll find a directory named netbeans. Enter this directory and run the installer script:
cd netbeans
./bin/netbeans
This will launch the NetBeans installer GUI.
Configuring Installation Options
The installer will guide you through several configuration options:
- Welcome Screen: Click “Next” to proceed.
- License Agreement: Read and accept the terms to continue.
- Installation Location: Choose where to install NetBeans. The default is usually fine.
- JDK Installation: The installer should automatically detect your JDK. If not, browse to its location.
- Glassfish and Apache Tomcat: Choose whether to install these servers. They’re optional for most users.
Completing the Installation Process
After configuring the options:
- Click “Install” to begin the installation process.
- Wait for the installation to complete. This may take several minutes.
- Once finished, click “Finish” to exit the installer.
Congratulations! Apache NetBeans is now installed on your AlmaLinux 9 system.
Post-Installation Setup
To make NetBeans more accessible and optimize its performance, let’s perform some post-installation setup tasks.
Creating Desktop Shortcuts
For easy access, create a desktop shortcut:
cp /path/to/netbeans/netbeans.desktop ~/.local/share/applications/Replace “/path/to/netbeans” with the actual installation path.
Setting Environment Variables
Add NetBeans to your system’s PATH by editing your .bashrc file:
echo 'export PATH="/path/to/netbeans/bin:$PATH"' >> ~/.bashrc
source ~/.bashrc
Configuring NetBeans Preferences
Launch NetBeans and navigate to Tools > Options to configure preferences such as:
- Editor settings (font, color scheme, etc.)
- Code templates
- Keyboard shortcuts
Customize these settings to enhance your development experience.
Verifying the Installation
Let’s ensure that NetBeans is correctly installed and functioning as expected.
Launching NetBeans
Open a terminal and type:
netbeansOr use the desktop shortcut if you created one. NetBeans should launch without any errors.

Checking Version and Components
Once NetBeans is open, go to Help > About to verify the version and installed components.
Creating a Test Project
To ensure everything is working correctly:
- Click File > New Project
- Choose Java with Ant > Java Application
- Name your project and click Finish
- Try running the default “Hello World” program
If you can create and run this project, your NetBeans installation is fully functional.
Troubleshooting Common Issues
Even with careful installation, you might encounter some issues. Here are solutions to common problems:
Java-related Problems
If NetBeans fails to detect Java:
- Ensure Java is correctly installed:
java -version - Set JAVA_HOME environment variable:
export JAVA_HOME=/path/to/jdk - Restart NetBeans after making changes
Permission Errors
If you encounter permission issues:
- Check file permissions:
ls -l /path/to/netbeans - Modify if necessary:
chmod +x /path/to/netbeans/bin/netbeans
Missing Dependencies
For missing library errors:
- Install build essentials:
sudo dnf groupinstall "Development Tools" - Check for specific missing packages and install them using
dnf
Updating and Maintaining NetBeans
To keep your NetBeans installation up-to-date and running smoothly:
Checking for Updates
Regularly check for updates by going to Help > Check for Updates in NetBeans. Install any available updates to ensure you have the latest features and security patches.
Installing Plugins
Enhance NetBeans functionality by installing plugins:
- Go to Tools > Plugins
- Browse available plugins or search for specific ones
- Select desired plugins and click Install
Best Practices for Maintenance
To maintain optimal performance:
- Regularly clean the NetBeans cache (Tools > Options > Miscellaneous > Files)
- Keep your JDK and AlmaLinux system updated
- Periodically review and remove unused plugins
Uninstalling Apache NetBeans
If you need to remove NetBeans from your system:
Steps to Remove NetBeans
- Delete the NetBeans installation directory:
rm -rf /path/to/netbeans - Remove the desktop shortcut:
rm ~/.local/share/applications/netbeans.desktop - Remove NetBeans from PATH in your
.bashrcfile
Cleaning up Residual Files
To ensure a complete removal:
- Delete NetBeans configuration:
rm -rf ~/.netbeans - Remove NetBeans cache:
rm -rf ~/.cache/netbeans
Congratulations! You have successfully installed NetBeans. Thanks for using this tutorial for installing the Apache NetBeans IDE on AlmaLinux 9 system. For additional help or useful information, we recommend you check the official Apache website.