How To Install Apache Nifi on Ubuntu 22.04 LTS

In this tutorial, we will show you how to install Apache Nifi on Ubuntu 22.04 LTS. Are you looking to set up an efficient data processing system for your organization? Look no further than Apache NiFi, an open-source data integration platform that enables seamless data flow between various systems. In this article, we will guide you through the process of installing and configuring Apache NiFi on your Ubuntu 22.04 LTS machine. From the prerequisites needed to the step-by-step installation process, we have got you covered. So, let’s dive in and get started!
This article assumes you have at least basic knowledge of Linux, know how to use the shell, and most importantly, you host your site on your own VPS. The installation is quite simple and assumes you are running in the root account, if not you may need to add ‘sudo‘ to the commands to get root privileges. I will show you the step-by-step installation of Apache Nifi on Ubuntu 22.04 (Jammy Jellyfish). You can follow the same instructions for Ubuntu 22.04 and any other Debian-based distribution like Linux Mint, Elementary OS, Pop!_OS, and more as well.
Prerequisites
- A server running one of the following operating systems: Ubuntu 22.04, 20.04, and any other Debian-based distribution like Linux Mint.
- It’s recommended that you use a fresh OS install to prevent any potential issues.
- SSH access to the server (or just open Terminal if you’re on a desktop).
- An active internet connection. You’ll need an internet connection to download the necessary packages and dependencies for Apache Nifi.
- A
non-root sudo useror access to theroot user. We recommend acting as anon-root sudo user, however, as you can harm your system if you’re not careful when acting as the root.
Install Apache Nifi on Ubuntu 22.04 LTS Jammy Jellyfish
Step 1. Before we begin the installation process, it’s a good practice to update the system to ensure we have the latest software packages. To do so, open the terminal and run the following command:
sudo apt update
sudo apt upgrade
sudo apt install wget apt-transport-https gnupg2
Step 2. Installing Java.
Apache NiFi requires Java to be installed on the system. Run the following command to install OpenJDK 11, which is the recommended version:
sudo apt install openjdk-11-jdk
Verify the installation, by running the following command which will print the Java version:
java -version
For additional resources on installing Java, read the post below:
Step 3. Installing Apache Nifi on Ubuntu 22.04.
By default, Apache Nifi is not available on Ubuntu 22.04 base repository. Now run the following command below to download the latest version of Apache Nifi from the official website:
wget https://archive.apache.org/dist/nifi/1.20.0/nifi-1.20.0-bin.zip
Next, unzip the contents of the file using the following command:
unzip nifi-1.20.0-bin.zip
After extracting the Apache NiFi files, you need to configure the system properties to specify the Java path and the data directory location. Open the nifi.properties file in the conf directory using the following command:
java.home=/usr/lib/jvm/java-11-openjdk-amd64
After that, set the “nifi.flowfile.repository.directory.path” property to specify the data directory location:
nifi.flowfile.repository.directory.path=/data/nifi/data
You can change the directory location to any desired location.
Finally, to start Apache NiFi, navigate to the “bin” directory and run the following command below:
sudo ./nifi.sh start
Step 8. Accessing Apache Nifi Web Interface.
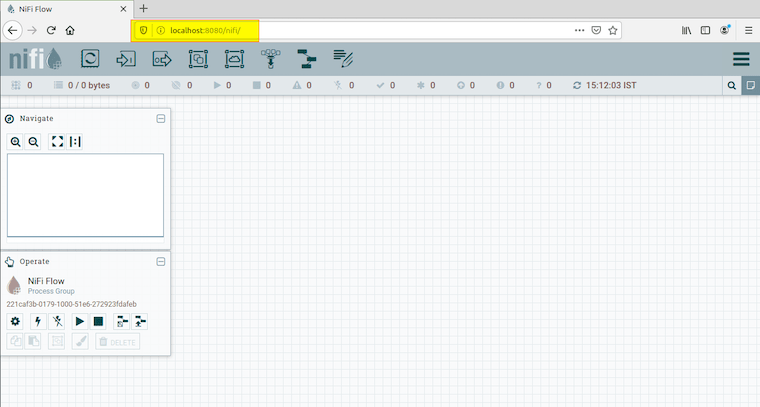
Once successfully installed, now open your web browser and access the Apache Nifi Web UI using the URL http://localhost:8080/nifi. You should see the Apache NiFi interface, and you can start creating data flows:

Congratulations! You have successfully installed Apache Nifi. Thanks for using this tutorial for installing Apache Nifi on Ubuntu 22.04 LTS Jammy Jellyfish system. For additional help or useful information, we recommend you check the Apache website.