How To Install Apache Solr on AlmaLinux 9

In this tutorial, we will show you how to install Apache Solr on AlmaLinux 9. Apache Solr is a powerful open-source search platform that has become an essential tool for enterprise applications requiring advanced search capabilities. With its ability to handle large volumes of data and provide fast, accurate search results, Solr has gained popularity among developers and system administrators alike. AlmaLinux 9, a community-driven, free, and open-source operating system, offers a stable and secure environment for running Apache Solr. In this article, we will guide you through the step-by-step process of installing Apache Solr on AlmaLinux 9, optimizing its performance, and creating your first Solr index.
Prerequisites
Before we begin the installation process, ensure that your AlmaLinux 9 server meets the following hardware and software requirements:
- Hardware: A server with at least 2/4 GB of memory, although 8 GB is recommended for optimal performance.
- Software: A non-root user account with sudo or root privileges.
Step 1: Update System Packages
To ensure a smooth installation process and maintain the security and compatibility of your system, it’s crucial to update the system packages to their latest versions. Run the following command to update the packages using the dnf package manager:
sudo dnf update -yStep 2: Install Java OpenJDK 11
Apache Solr requires Java to run, so we’ll start by installing Java OpenJDK 11. AlmaLinux 9 includes Java OpenJDK 11 in its default repositories, making the installation process straightforward. Follow these steps to install Java:
- Install Java OpenJDK 11 using the following command:
sudo dnf install java-11-openjdk -y- Verify the Java installation by checking the version:
java -versionYou should see output similar to the following, confirming that Java OpenJDK 11 is installed:
openjdk version "11.0.12" 2021-07-20
OpenJDK Runtime Environment 18.9 (build 11.0.12+7)
OpenJDK 64-Bit Server VM 18.9 (build 11.0.12+7, mixed mode, sharing)
Step 3: Download and Install Apache Solr
With Java installed, we can now proceed to download and install Apache Solr. Solr provides binary packages that make the installation process easier. Follow these steps to install Apache Solr:
- Install the necessary packages required for the Solr installation:
sudo dnf install curl lsof chkconfig -y- Download the latest stable version of Apache Solr using
curl. ReplaceX.Y.Zwith the desired version number:
curl -O https://downloads.apache.org/lucene/solr/X.Y.Z/solr-X.Y.Z.tgz- Extract the downloaded package:
tar xzf solr-X.Y.Z.tgz- Change to the extracted directory and run the installer script:
cd solr-X.Y.Z
sudo bash ./bin/install_solr_service.sh ../solr-X.Y.Z.tgz
The installer script will set up Apache Solr as a service and start it automatically.
Step 4: Configure Apache Solr Service
After the installation, you can manage the Apache Solr service using standard system commands. Here’s how to start, stop, and check the status of the Solr service:
- Start the Solr service:
sudo systemctl start solr- Stop the Solr service:
sudo systemctl stop solr- Check the status of the Solr service:
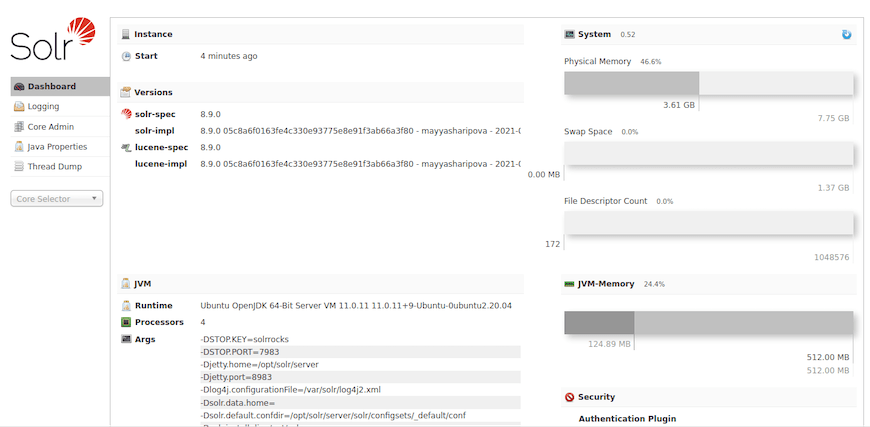
sudo systemctl status solrBy default, Apache Solr runs on port 8983 and uses the /var/solr directory as the SOLR_HOME location. You can access the Solr administration dashboard by opening a web browser and navigating to http://your_server_ip:8983/solr.

Step 5: Optimize Performance and Security
To ensure optimal performance and security for your Apache Solr installation, consider the following configurations:
Set MaxHeapMemory
By default, Solr sets the maximum heap memory to 512 MB. If you have a larger dataset or expect high traffic, increase the heap memory by editing the /etc/default/solr.in.sh file and modifying the SOLR_HEAP variable:
SOLR_HEAP="2g"Configure System Limits
Increase the system limits for the Solr process by creating a new file /etc/systemd/system/solr.service.d/limits.conf with the following content:
[Service]
LimitNOFILE=65000
LimitNPROC=65000
Reload the systemd configuration:
sudo systemctl daemon-reloadSecure Solr with Basic Authentication
To protect your Solr installation from unauthorized access, enable basic authentication by editing the /etc/default/solr.in.sh file and uncommenting the following lines:
SOLR_AUTH_TYPE="basic"
SOLR_AUTHENTICATION_OPTS="-Dsolr.httpclient.builder.factory=org.apache.solr.client.solrj.impl.BasicHttpClientBuilderFactory -Dbasicauth=solr:SolrRocks"
Replace SolrRocks with a strong password of your choice.
Step 6: Configure Firewall Settings
To allow external access to Apache Solr, you need to configure your firewall settings. AlmaLinux 9 uses firewalld as the default firewall management tool. Follow these steps to open the necessary port:
- Add a new firewall rule for Solr’s default port (8983):
sudo firewall-cmd --zone=public --add-port=8983/tcp --permanent- Reload the firewall rules:
sudo firewall-cmd --reloadStep 7: Create Your First Solr Index
With Apache Solr installed and configured, you can now create your first Solr index. An index is a collection of documents that Solr can search and retrieve. Follow these steps to create a new index:
- Create a new Solr index named “myindex”:
sudo su - solr -c "/opt/solr/bin/solr create -c myindex"- Verify the index creation by accessing the Solr administration dashboard at
http://your_server_ip:8983/solr. You should see the “myindex” collection listed.
You can now start indexing documents and performing searches on your newly created Solr index.
Troubleshooting Common Issues
If you encounter any issues during the installation or configuration process, consider the following troubleshooting tips:
- Solr service fails to start: Check the Solr logs in the
/var/solr/logsdirectory for any error messages. Ensure that Java is installed correctly and that the Solr user has the necessary permissions. - Firewall blocking access: Verify that the firewall rules are correctly configured to allow access to the Solr port (8983). Use the
sudo firewall-cmd --list-allcommand to check the current firewall settings. - Out of memory errors: If you encounter out of memory errors, increase the heap memory allocated to Solr by modifying the
SOLR_HEAPvariable in the/etc/default/solr.in.shfile.
Congratulations! You have successfully installed Apache Solr. Thanks for using this tutorial for installing the Apache Solr on your AlmaLinux system. For additional help or useful information, we recommend you check the official Apache website.