How To Install Apache Solr on openSUSE

Apache Solr is a powerful open-source search platform that enables developers to build scalable and efficient search solutions for various applications. With its advanced features and flexibility, Solr has become a popular choice for enterprises and organizations looking to enhance their search capabilities. In this comprehensive guide, we will walk you through the process of installing Apache Solr on openSUSE, a reliable and user-friendly Linux distribution.
Prerequisites
Before diving into the installation process, it’s essential to ensure that your system meets the necessary prerequisites. Apache Solr requires Java Runtime Environment (JRE) version 1.8 or higher to function properly. You can check your Java version by running the command java -version in the terminal. If Java is not installed or the version is outdated, you can easily install it using the following command:
sudo zypper install java-1_8_0-openjdkIn terms of hardware specifications, Apache Solr can run on modest systems, but for optimal performance, it is recommended to have at least 4GB of RAM and a multi-core processor. Additionally, ensure that you have sufficient disk space to accommodate your search index and data.
Downloading Apache Solr
To begin the installation process, you need to download the Apache Solr package from the official website. Visit the official download page and navigate to the download page for the latest stable version of Solr.
Apache Solr offers various packages to suit different requirements. For a typical installation, you can choose the “solr-.tgz” package, which contains the complete Solr distribution. If you have specific needs, you can opt for the “solr–src.tgz” package, which includes the source code, or the “solr–bin.tgz” package, which provides only the binary files.
To download the desired package, you can use the wget command followed by the URL of the package. For example:
wget https://downloads.apache.org/lucene/solr//solr-.tgzReplace with the actual version number of Solr you want to download.
Installing Apache Solr on openSUSE
With the Apache Solr package downloaded, you can now proceed with the installation. openSUSE provides a convenient package manager called zypper, which simplifies the installation process.
First, extract the downloaded Solr package using the following command:
tar xzf solr-.tgzNext, navigate to the extracted directory:
cd solr-Now, you can use zypper to install Apache Solr along with its dependencies. Run the following command:
sudo zypper install solrZypper will resolve the necessary dependencies and install Solr on your openSUSE system.
Alternatively, if you prefer a manual installation approach, you can copy the extracted Solr directory to a suitable location, such as /opt:
sudo cp -r solr- /opt/solrMake sure to grant appropriate permissions to the Solr directory:
sudo chown -R solr:solr /opt/solrConfiguring Apache Solr
After the installation, you need to perform some initial configuration to set up Apache Solr properly. One important step is to configure Solr as a service using systemd, which allows you to easily manage the Solr process.
Create a new file named solr.service in the /etc/systemd/system directory:
sudo nano /etc/systemd/system/solr.serviceAdd the following content to the file:
[Unit]
Description=Apache Solr
After=network.target

[Service]
Type=forking
User=solr
Group=solr
ExecStart=/opt/solr/bin/solr start
ExecStop=/opt/solr/bin/solr stop
Restart=on-failure

[Install]
WantedBy=multi-user.target
Save the file and exit the editor.
Next, reload the systemd configuration:
sudo systemctl daemon-reloadEnable the Solr service to start automatically on system boot:
sudo systemctl enable solrApache Solr has a specific directory layout that you should be familiar with. The main directories are:
/opt/solr/bin: Contains the Solr startup and management scripts./opt/solr/server/solr: Holds the Solr configuration files and core directories./opt/solr/server/solr/configsets: Contains configuration templates for different types of Solr cores.
To ensure optimal performance and security, you can adjust various configuration settings in the solr.in.sh file located in the /opt/solr/bin directory. Some common settings include:
SOLR_HEAP: Specifies the maximum heap size allocated to Solr.SOLR_PORT: Sets the port number on which Solr will listen.SOLR_TIMEZONE: Defines the timezone for Solr.
Modify these settings according to your requirements and save the changes.
Verifying Installation
To verify that Apache Solr is installed correctly and running, you can start the Solr service using the following command:
sudo systemctl start solrCheck the status of the Solr service to ensure it is active and running:
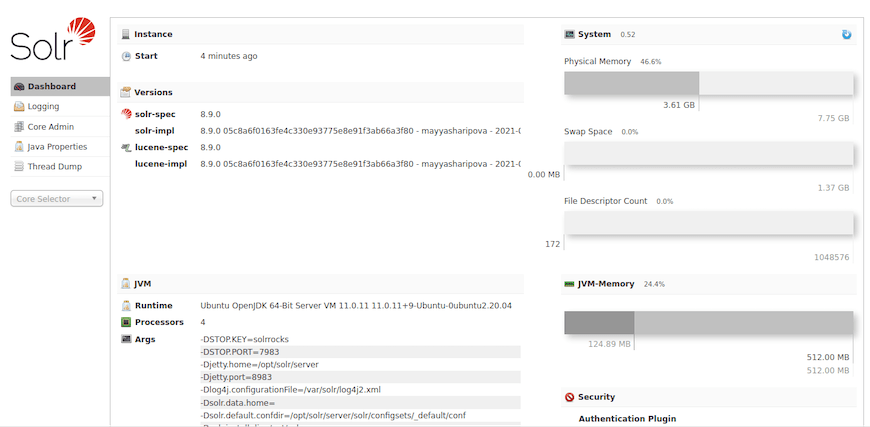
sudo systemctl status solrIf the service is running successfully, you can access the Solr Admin Interface by opening a web browser and navigating to http://localhost:8983/solr/. The Solr Admin Interface provides a user-friendly web-based interface to manage and monitor your Solr installation.

Troubleshooting
While installing Apache Solr on openSUSE is generally straightforward, you may encounter some common issues. Here are a few troubleshooting tips:
- If you encounter Java version errors, ensure that you have installed the correct version of Java and set the
JAVA_HOMEenvironment variable correctly. - If the Solr service fails to start, check the Solr log files located in the
/var/solr/logsdirectory for any error messages or clues. - Ensure that the Solr process has the necessary permissions to read and write files in the Solr directories.
- If you experience performance issues, adjust the memory allocation settings in the
solr.in.shfile based on your system resources.
Congratulations! You have successfully installed Apache Solr. Thanks for using this tutorial for installing the Apache Solr on your openSUSE system. For additional help or useful information, we recommend you check the official Apache website.