In this tutorial, we will show you how to install Apache Spark on Debian 11. For those of you who didn’t know, Apache Spark is a free, open-source, general-purpose framework for clustered computing. It is specially designed for speed and is used in machine learning to stream processing to complex SQL queries. It supports several APIs for streaming, graph processing including, Java, Python, Scala, and R. Spark is mostly installed in Hadoop clusters but you can also install and configure spark in standalone mode.
This article assumes you have at least basic knowledge of Linux, know how to use the shell, and most importantly, you host your site on your own VPS. The installation is quite simple and assumes you are running in the root account, if not you may need to add ‘sudo‘ to the commands to get root privileges. I will show you through the step-by-step installation of Apache Spark on a Debian 11 (Bullseye).
Prerequisites
- A server running one of the following operating systems: Debian 11 (Bullseye).
- It’s recommended that you use a fresh OS install to prevent any potential issues.
- A
non-root sudo useror access to theroot user. We recommend acting as anon-root sudo user, however, as you can harm your system if you’re not careful when acting as the root.
Install Apache Spark on Debian 11 Bullseye
Step 1. Before we install any software, it’s important to make sure your system is up to date by running the following apt commands in the terminal:
sudo apt update
sudo apt upgrade
Step 2. Installing Java.
Run the following command below to install Java and other dependencies:
sudo apt install default-jdk scala git
Verify Java installation using the command:
java --version
Step 3. Installing Apache Spark on Debian 11.
Now we download the latest version of Apache Spark from the official page using wget command:
wget https://dlcdn.apache.org/spark/spark-3.1.2/spark-3.1.2-bin-hadoop3.2.tgz
Next, extract the downloaded file:
tar -xvzf spark-3.1.2-bin-hadoop3.2.tgz
mv spark-3.1.2-bin-hadoop3.2/ /opt/spark
After that, edit the ~/.bashrc file and add the Spark path variable:
nano ~/.bashrc
Add the following line:
export SPARK_HOME=/opt/spark
export PATH=$PATH:$SPARK_HOME/bin:$SPARK_HOME/sbin
Save and close the file, then activate the Spark environment variable using the following command below:
source ~/.bashrc
Step 3. Start Apache Spark Master Server.
At this point, Apache spark is installed. Now let’s start its standalone master server by running its script:
start-master.sh
By default, Apache Spark listens on port 8080. You can check it with the following command:
ss -tunelp | grep 8080
Step 4. Accessing the Apache Spark Web Interface.
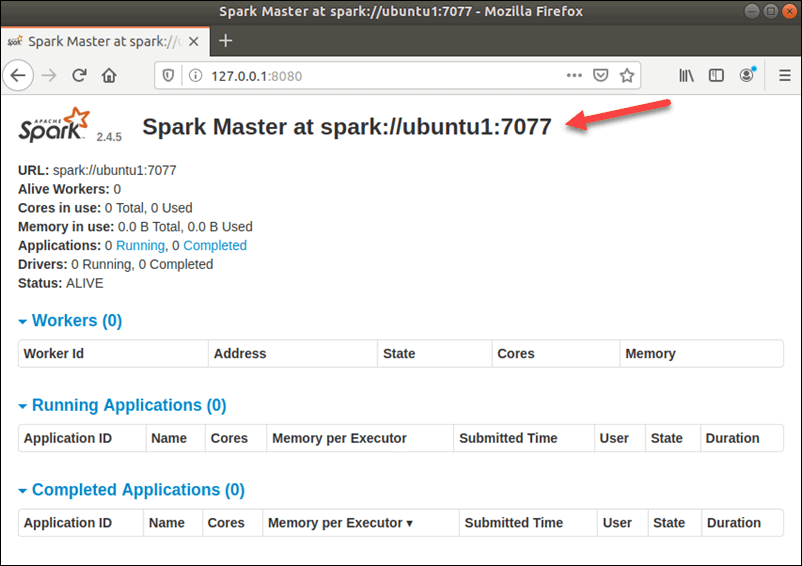
Once successfully configured, now access the Apache Spark web interface using the URL http://your-server-ip-address:8080. You should see the Apache Spark master and slave service on the following screen:

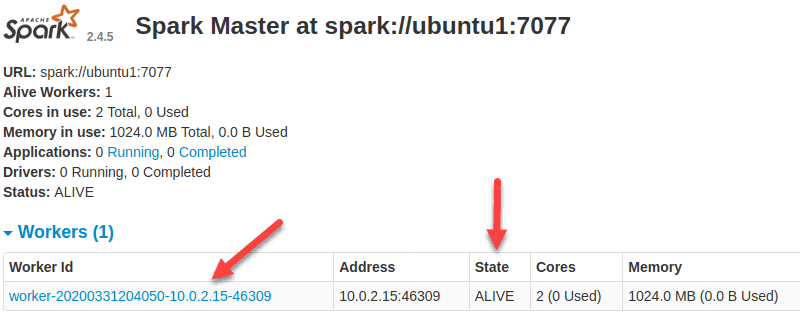
In this single-server, standalone setup, we will start one slave server along with the master server. The start-slave.sh the command is used to start the Spark Worker Process:
start-slave.sh spark://ubuntu1:7077
Now that a worker is up and running, if you reload Spark Master’s Web UI, you should see it on the list:

Once finish the configuration, start the master and slave server, test if the Spark shell works:
spark-shell
You will get the following interface:
Spark session available as 'spark'.
Welcome to
      ____              __
     / __/__  ___ _____/ /__
    _\ \/ _ \/ _ `/ __/  '_/
   /___/ .__/\_,_/_/ /_/\_\   version 3.1.2
      /_/

Using Scala version 2.12.10 (OpenJDK 64-Bit Server VM, Java 11.0.12)
Type in expressions to have them evaluated.
Type :help for more information.

scala>
Congratulations! You have successfully installed Apache Spark. Thanks for using this tutorial for installing the latest version of Apache Spark on Debian 11 Bullseye. For additional help or useful information, we recommend you check the official Apache Spark website.