In this tutorial, we will show you how to install Asterisk on AlmaLinux 8. For those of you who didn’t know, Asterisk is a free and open-source framework for building communications applications and is sponsored by Sangoma. Asterisk powers IP PBX systems, VoIP gateways, and conference servers to create VoIP systems. It comes with various features that will VoIP communication possible and as desired.
This article assumes you have at least basic knowledge of Linux, know how to use the shell, and most importantly, you host your site on your own VPS. The installation is quite simple and assumes you are running in the root account, if not you may need to add ‘sudo‘ to the commands to get root privileges. I will show you through the step-by-step installation of the Asterisk on AlmaLinux 8. You can follow the same instructions for Rocky Linux.
Prerequisites
- A server running one of the following operating systems: AlmaLinux 8, CentOS, or Rocky Linux 8.
- It’s recommended that you use a fresh OS install to prevent any potential issues.
- A
non-root sudo useror access to theroot user. We recommend acting as anon-root sudo user, however, as you can harm your system if you’re not careful when acting as the root.
Install Asterisk on AlmaLinux 8
Step 1. First, let’s start by ensuring your system is up-to-date.
sudo dnf update
sudo dnf install epel-release
sudo dnf config-manager --set-enabled powertools
sudo dnf group install "Development Tools"
sudo dnf install git wget vim net-tools sqlite-devel psmisc ncurses-devel libtermcap-devel newt-devel libxml2-devel libtiff-devel gtk2-devel libtool libuuid-devel subversion kernel-devel kernel-devel-$(uname -r) crontabs cronie-anacron libedit libedit-devel
Step 2. Disable SELinux on the CentOS system.
Set SELinux in Permissive mode by running the commands below:
sudo setenforce 0
sudo sed -i 's/\(^SELINUX=\).*/\SELINUX=permissive/' /etc/selinux/config
Step 3. Setup Hostname.
Set the static hostname for your system using the following command:
sudo hostnamectl set-hostname asterisk.idroot.us
Next, we need to set the correct timezone for our system:
sudo timedatectl set-timezone Indonesia/Jakarta
Step 4. Installing Jansson.
Now download and install Jansson using the following command below:
sudo git clone https://github.com/akheron/jansson.git
cd jansson
autoreconf -i
./configure --prefix=/usr/
make
sudo make install
Step 5. Installing PJSIP.
PJSIP is a free and open-source multimedia communication library written in C language implementing standard-based protocols such as SIP, SDP, RTP, STUN, TURN, and ICE. Run the following command to install it:
cd ~
git clone https://github.com/pjsip/pjproject.git
cd pjproject
./configure CFLAGS="-DNDEBUG -DPJ_HAS_IPV6=1" --prefix=/usr --libdir=/usr/lib64 --enable-shared --disable-video --disable-sound --disable-opencore-amr
make dep
make
sudo make install
sudo ldconfig
Step 6. Installing Asterisk on AlmaLinux 8.
Now that we have all dependency packages installed, we should be ready to download and install Asterisk:
cd ~
wget http://downloads.asterisk.org/pub/telephony/asterisk/asterisk-18-current.tar.gz
tar xvfz asterisk-18-current.tar.gz
cd asterisk-18*/
./configure --libdir=/usr/lib64
Output:
.....
configure: Menuselect build configuration successfully completed

               .$$$$$$$$$$$$$$$=..
            .$7$7..          .7$$7:.
          .$$:.                 ,$7.7
        .$7.     7$$$$           .$$77
     ..$$.       $$$$$            .$$$7
    ..7$   .?.   $$$$$   .?.       7$$$.
   $.$.   .$$$7. $$$$7 .7$$$.      .$$$.
 .777.   .$$$$$$77$$$77$$$$$7.      $$$,
 $$$~      .7$$$$$$$$$$$$$7.       .$$$.
.$$7          .7$$$$$$$7:          ?$$$.
$$$          ?7$$$$$$$$$$I        .$$$7
$$$       .7$$$$$$$$$$$$$$$$      :$$$.
$$$       $$$$$$7$$$$$$$$$$$$    .$$$.
$$$        $$$   7$$$7  .$$$    .$$$.
$$$$             $$$$7         .$$$.
7$$$7            7$$$$        7$$$
 $$$$$                        $$$
  $$$$7.                       $$  (TM)
   $$$$$$$.           .7$$$$$$  $$
     $$$$$$$$$$$$7$$$$$$$$$.$$$$$$
       $$$$$$$$$$$$$$$$.

configure: Package configured for:
configure: OS type  : linux-gnu
configure: Host CPU : x86_64
configure: build-cpu:vendor:os: x86_64 : pc : linux-gnu :
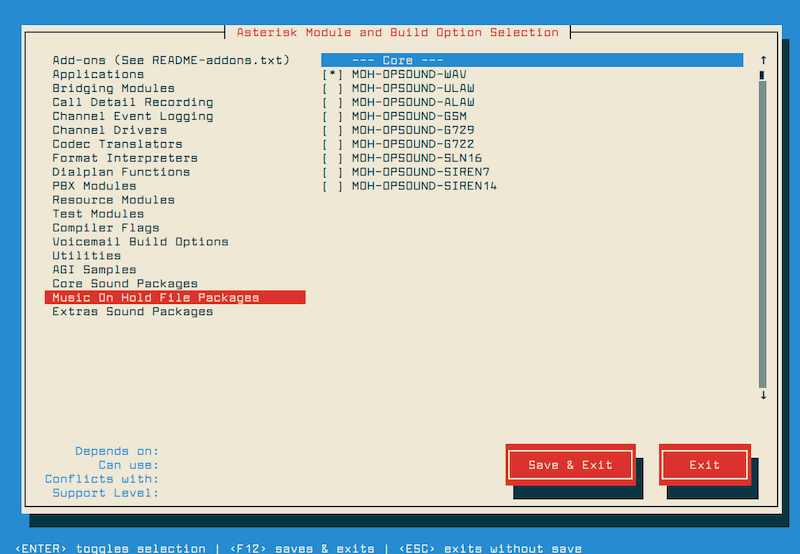
Now, let’s start the build process:
make menuselect

Save your list and download the mp3 decoder into the source tree with the below command:
contrib/scripts/get_mp3_source.sh
Next, build and install Asterisk as below:
make
sudo make install
sudo make samples
sudo make config
sudo ldconfig
Step 7. Create Asterisk User and Start Asterisk.
Create a group and user for asterisk services, and assign appropriate permissions using the following command:
sudo groupadd asterisk
sudo useradd -r -d /var/lib/asterisk -g asterisk asterisk
sudo usermod -aG audio,dialout asterisk
sudo chown -R asterisk.asterisk /etc/asterisk /var/{lib,log,spool}/asterisk /usr/lib64/asterisk
Then, set Asterisk default user:
sudo nano /etc/sysconfig/asterisk
Add the following file:
AST_USER="asterisk"
AST_GROUP="asterisk"
Also, edit/etc/asterisk/asterisk.conf file by using the below command:
sudo nano /etc/asterisk/asterisk.conf
Add the following command:
runuser = asterisk ; The user to run as.
rungroup = asterisk ; The group to run as.
Finally, restart the Asterisk service and enable it on boot:
sudo systemctl restart asterisk
sudo systemctl enable asterisk
sudo systemctl status asterisk
Verify that you can connect to Asterisk CLI by running the below command:
asterisk -rvv
Congratulations! You have successfully installed Asterisk. Thanks for using this tutorial for installing the Asterisk on your AlmaLinux 8 system. For additional help or useful information, we recommend you check the official Asterisk website.