How To Install Audacity on openSUSE

Audacity is a powerful, open-source audio editing software that allows users to record, edit, and manipulate audio files with ease. Whether you are a musician, podcaster, or simply someone who enjoys editing audio for personal projects, Audacity provides a robust set of features to meet your needs. This article will guide you through the process of installing Audacity on openSUSE, ensuring that you have all the necessary tools and configurations for a smooth experience.
Understanding Audacity
What is Audacity?
Audacity is a free, open-source audio editing program that offers a wide range of features for both beginners and advanced users. It supports various audio formats, including WAV, MP3, and OGG, making it versatile for different projects. Key features include multi-track editing, audio effects, and the ability to import and export audio files in multiple formats.
Why Choose Audacity?
Choosing Audacity over other audio editing software comes with several advantages:
- Open Source: Being open-source means that Audacity is continuously improved by a community of developers and users.
- Cross-Platform: It runs on various operating systems including Windows, macOS, and Linux distributions like openSUSE.
- Extensive Features: Audacity offers powerful editing tools comparable to paid software.
Prerequisites for Installation
System Requirements
Before installing Audacity on openSUSE, ensure your system meets the following minimum requirements:
- Processor: 1 GHz or faster
- RAM: 2 GB or more
- Disk Space: At least 100 MB for installation
- Operating System: openSUSE Leap 15.0 or later
Software Dependencies
Audacity requires certain libraries and packages to function correctly. Ensure that you have the following dependencies installed:
- LAME: For MP3 encoding.
- FFmpeg: For importing/exporting various audio formats.
- SNDFile: For handling different sound file formats.
Installation Methods
Using Zypper Package Manager
The Zypper package manager is a powerful command-line tool for managing software on openSUSE. Follow these steps to install Audacity using Zypper:
Add the Multimedia Repository:
This repository contains many multimedia applications including Audacity. Open your terminal and run the following command:
sudo zypper addrepo https://packman.informatik.uni-erlangen.de/suse/openSUSE_Leap_15.0/ packmanRefresh the Repository List:
This step ensures that your package manager is aware of the new repository. Execute the command:
sudo zypper refreshInstall Audacity:
You can now install Audacity by running the following command:
sudo zypper install audacityThe installation process will begin, and you may be prompted to confirm the installation by entering ‘y’ (yes) when asked.
Using YaST
If you prefer a graphical interface for installing software, YaST (Yet another Setup Tool) is an excellent option. Here’s how to install Audacity using YaST:
Open YaST:
You can find YaST in your application menu or launch it from the terminal using:
# sudo yastSelect Software Management:
Navigating through YaST’s interface, find and click on ‘Software Management’. This will allow you to search for available packages.
Search for Audacity:
In the search box, type ‘Audacity’ and press Enter. Once it appears in the list, select it.
Select Installation:
Check the box next to Audacity and click ‘Accept’ to begin the installation process.
Post-Installation Configuration
Setting Up LAME for MP3 Exporting
LAME is essential for exporting audio files in MP3 format. After installing Audacity, you need to ensure LAME is installed as well. To do this, run the following command in your terminal:
sudo zypper install lameIf LAME is installed successfully, you can verify its functionality within Audacity by attempting to export an audio file as an MP3.
Installing FFmpeg for Additional Formats
If you want to work with various audio formats beyond what’s natively supported by Audacity, installing FFmpeg is crucial. To install FFmpeg on openSUSE, execute this command:
sudo zypper install ffmpegThis will enable you to import and export a wider range of audio file types in Audacity.
Common Issues and Troubleshooting
Installation Errors
If you encounter issues during installation, consider these common pitfalls:
- No Internet Connection: Ensure your system has a stable internet connection while adding repositories.
- Mismatched Repository Versions: Make sure you’re adding repositories compatible with your version of openSUSE.
Audacity Fails to Start or Crashes
If Audacity fails to launch or crashes unexpectedly after installation, try these solutions:
- Check Dependencies: Ensure all required libraries are installed by running commands like `sudo zypper verify`.
- User Permissions: Sometimes permission issues can prevent applications from running properly. Check if your user has sufficient permissions.
Performance Issues
If you experience lag or performance issues while using Audacity, consider adjusting these settings:
- Avoid Overloading Tracks: Keep the number of simultaneous tracks manageable to prevent system overload.
- Edit Preferences: Navigating to Edit > Preferences > Audio Settings allows you to adjust buffer sizes which may enhance performance.
Basic Usage of Audacity
Launching Audacity
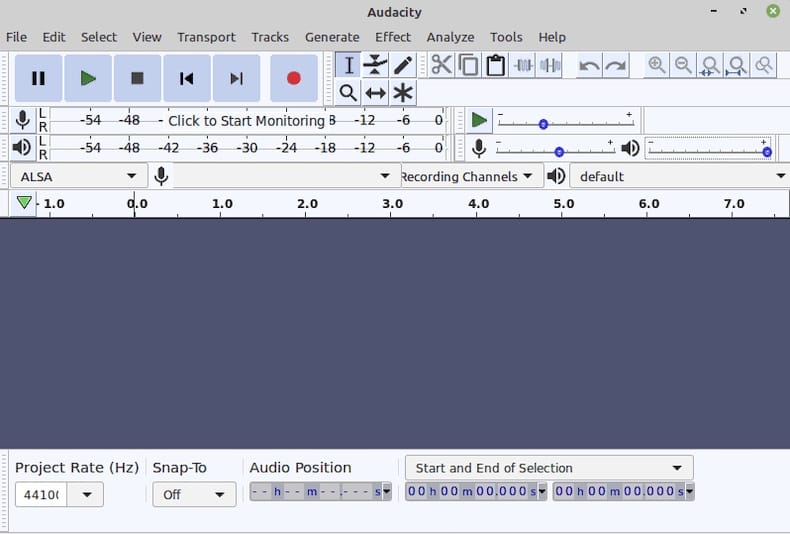
You can launch Audacity from your application menu or by typing `audacity` in your terminal. Upon opening, you’ll be greeted by a user-friendly interface designed for ease of use.

Importing Audio Files
- Select ‘File’ from the top menu.
- Select ‘Import’ and then choose ‘Audio’. This will prompt you to browse your computer for audio files.
- Select your desired file format (WAV, MP3, etc.) and click ‘Open’. The file will appear as a new track in the workspace.
Basic Editing Features
Audacity provides several essential editing tools that are easy to use. Here’s a brief overview of some key features:
- Select Tool (F1): This tool allows you to select portions of your audio track for editing.
- Silence Audio (Ctrl + L): This feature silences selected parts of your track without deleting them.
- Add Effects: You can enhance your audio by selecting ‘Effect’ from the top menu where various options like Echo, Reverb, and Equalization are available.
Congratulations! You have successfully installed Audacity. Thanks for using this tutorial for installing the Audacity audio editor on your openSUSE system. For additional help or useful information, we recommend you check the official Audacity website.