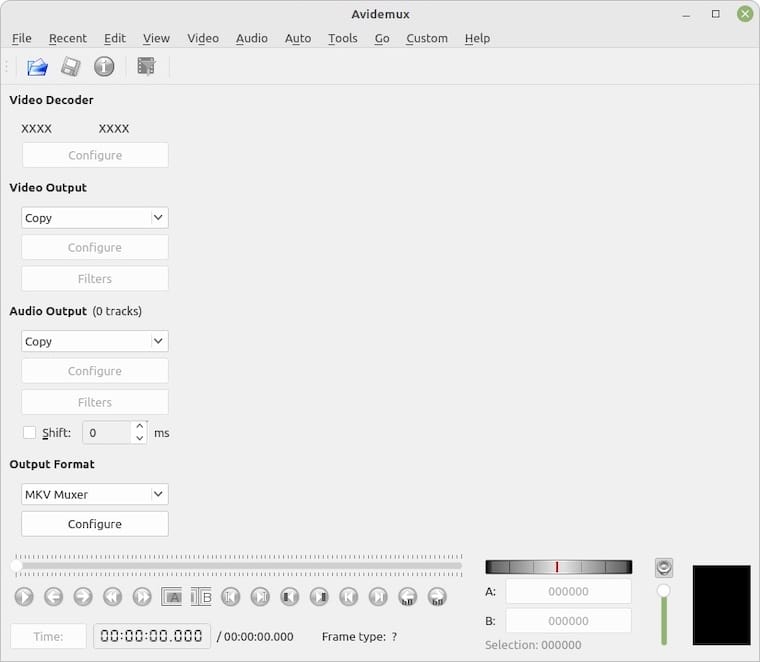
How To Install Avidemux on AlmaLinux 9

In the world of modern computing, video editing has become an essential skill for content creators, educators, and professionals alike. Avidemux, a powerful open-source video editing tool, offers a comprehensive set of features for cutting, filtering, and encoding videos. AlmaLinux 9, a community-driven Linux distribution that focuses on stability and security, provides an ideal platform for running Avidemux. In this article, we will guide you through the process of installing Avidemux on AlmaLinux 9, enabling you to harness its capabilities for your video editing needs.
Prerequisites
Before proceeding with the installation of Avidemux on AlmaLinux 9, ensure that your system meets the following requirements:
- AlmaLinux 9 installed on your computer
- A user account with root or sudo privileges
- A stable internet connection for downloading packages
It is also recommended to update your AlmaLinux 9 system to the latest version to ensure compatibility and security. Open a terminal and run the following command:
sudo dnf updateStep-by-Step Installation Guide
Step 1: Enable Required Repositories
To install Avidemux on AlmaLinux 9, you need to enable the Extra Packages for Enterprise Linux (EPEL) and RPM Fusion repositories. These repositories provide access to a wide range of additional software packages, including multimedia codecs and tools.
First, enable the EPEL repository by running the following command:
sudo dnf install epel-releaseNext, enable the RPM Fusion repositories for both free and non-free packages:
sudo dnf install --nogpgcheck https://download1.rpmfusion.org/free/el/rpmfusion-free-release-9.noarch.rpm
sudo dnf install --nogpgcheck https://download1.rpmfusion.org/nonfree/el/rpmfusion-nonfree-release-9.noarch.rpm
Step 2: Install Multimedia Codecs
Avidemux relies on various multimedia codecs to handle different video and audio formats. To ensure smooth video editing, install the necessary codecs by running the following command:
sudo dnf install gstreamer1-plugins-{bad-\*,good-\*,base} gstreamer1-plugin-openh264 gstreamer1-libav --exclude=gstreamer1-plugins-bad-free-develThis command installs a comprehensive set of GStreamer plugins and codecs, enabling Avidemux to work with a wide range of media formats.
Step 3: Download and Install Avidemux
With the repositories enabled and codecs installed, you can now proceed to install Avidemux. The easiest way to install Avidemux on AlmaLinux 9 is by using the DNF package manager.
Run the following command to install Avidemux:
sudo dnf install avidemuxDNF will resolve the dependencies and download the necessary packages for Avidemux. Confirm the installation when prompted, and wait for the process to complete.
Step 4: Verify Installation
Once the installation is finished, you can verify that Avidemux is installed correctly by launching it from the terminal or the applications menu.
To launch Avidemux from the terminal, simply type:
avidemuxAlternatively, you can find Avidemux in the applications menu under the “Multimedia” or “Video” category, depending on your desktop environment.

Troubleshooting Common Issues
If you encounter any issues during the installation process or while using Avidemux on AlmaLinux 9, here are a few troubleshooting tips:
- Repository Errors: If you experience errors related to repositories, ensure that you have enabled the EPEL and RPM Fusion repositories correctly. Double-check the commands used to enable the repositories and try running the installation again.
- Dependency Issues: In case of missing dependencies, run
sudo dnf updateto update your system packages and try installing Avidemux again. If the issue persists, you can try installing the missing dependencies manually usingsudo dnf install <package-name>. - Codec Support: If Avidemux fails to open or process certain video formats, ensure that you have installed the necessary multimedia codecs as mentioned in Step 2. You can also try installing additional codec packages specific to your requirements.
If the above troubleshooting steps do not resolve your issue, consider seeking further assistance from the Avidemux community forums or the AlmaLinux support channels.
Using Avidemux on AlmaLinux 9
With Avidemux installed on your AlmaLinux 9 system, you can start exploring its powerful video editing features. Here are a few basic usage instructions to get you started:
- Opening a Video: Click on the “File” menu and select “Open” to load a video file into Avidemux.
- Cutting and Trimming: Use the timeline and the “A” and “B” markers to select the portion of the video you want to keep. Then, click on the “Edit” menu and choose “Cut” to remove the unwanted parts.
- Applying Filters: Avidemux offers a wide range of filters for enhancing your videos. Click on the “Video” or “Audio” menus to explore the available filters and adjust their settings according to your needs.
- Encoding and Saving: Once you have made the desired edits, click on the “File” menu and select “Save” to encode and save your edited video. Choose the appropriate output format and settings based on your requirements.
These are just a few basic steps to get you started with Avidemux on AlmaLinux 9. Explore the various menus, options, and settings within the application to discover its full potential for your video editing projects.
Congratulations! You have successfully installed Avidemux. Thanks for using this tutorial for installing the Avidemux video editor on your AlmaLinux 9 system. For additional or useful information, we recommend you check the official Avidemux website.