How To Install BalenaEtcher on CentOS Stream 10

In this tutorial, we will show you how to install BalenaEtcher on CentOS Stream 10. Creating bootable USB drives is a common task for system administrators, developers, and Linux enthusiasts. BalenaEtcher stands out as one of the most reliable and user-friendly tools for this purpose. This comprehensive guide walks you through the complete process of installing BalenaEtcher on CentOS Stream 10, covering multiple installation methods and providing detailed instructions for optimal usage.
Understanding BalenaEtcher and Its Benefits
BalenaEtcher (commonly known simply as Etcher) is an open-source utility designed specifically for flashing OS images to USB drives and SD cards. Unlike traditional methods that might require complex command-line operations, BalenaEtcher provides a straightforward graphical interface that simplifies the process significantly.
Key Features of BalenaEtcher:
- User-friendly graphical interface that requires minimal technical knowledge
- Cross-platform compatibility across Linux, Windows, and macOS systems
- Built-in validation to ensure error-free flashing
- Support for various image formats including ISO, IMG, and BIN files
- Write protection to prevent accidental writes to system drives
- Support for compressed images, eliminating the need for manual extraction
For CentOS Stream 10 users, BalenaEtcher offers particular advantages when creating bootable media for server installations, system recovery, or testing new distributions. The tool’s reliability and validation features help prevent common errors that might occur with other flashing methods.
Prerequisites for Installing BalenaEtcher
Before proceeding with the installation, ensure your CentOS Stream 10 system meets the following requirements:
System Requirements:
- CentOS Stream 10 (64-bit)
- Administrator (sudo) privileges
- Reliable internet connection
- At least 150MB of free disk space
- Updated system packages
Required Dependencies:
BalenaEtcher requires several dependencies to function properly on Linux systems:
- gtk+-2.0
- dbus-1
- x11 and related libraries (xi, xcursor, xdamage, xrandr, etc.)
- gmodule-2.0
- nss
- liblzma (for xz decompression)
To prepare your system, run the following commands to update your existing packages:
sudo dnf update -y
sudo dnf install -y libXScrnSaver libnotify GConf2 libXtst
These commands ensure your system is up-to-date and installs some common dependencies that might be required for BalenaEtcher to work properly.
Method 1: Installing BalenaEtcher Using AppImage
AppImage is one of the simplest ways to install BalenaEtcher on CentOS Stream 10. This method doesn’t require managing dependencies manually and provides a portable installation that can be easily moved or removed.
Step 1: Download the AppImage
First, navigate to BalenaEtcher’s official website or GitHub releases page to download the latest AppImage file:
wget https://github.com/balena-io/etcher/releases/download/v2.1.0/balenaEtcher-2.1.0-x64.AppImageNote: Replace the version number with the latest available version if needed.
Step 2: Make the AppImage Executable
After downloading, you need to make the AppImage file executable:
chmod +x balenaEtcher-2.1.0-x64.AppImageStep 3: Run BalenaEtcher
You can now run BalenaEtcher directly:
./balenaEtcher-2.1.0-x64.AppImageStep 4: Create a Desktop Shortcut (Optional)
To create a desktop shortcut for easier access, create a .desktop file:
cat > ~/.local/share/applications/balena-etcher.desktop << EOF
[Desktop Entry]
Name=BalenaEtcher
Comment=Flash OS images to SD cards & USB drives
Exec=/path/to/balenaEtcher-2.1.0-x64.AppImage
Icon=/path/to/etcher-icon.png
Type=Application
Categories=Utility;
EOF
Replace `/path/to/` with the actual path to your AppImage file.
Advantages of the AppImage Method:
- No need to install dependencies separately
- Easy to update by simply downloading a new AppImage
- Portable installation that can be moved to other locations
- No system-wide changes, making it safer for system stability
Method 2: Installing BalenaEtcher Using RPM Package
For users who prefer managing software through the system’s package manager, installing BalenaEtcher via RPM provides better integration with CentOS Stream 10.
Step 1: Add the BalenaEtcher Repository
First, add the BalenaEtcher repository to your system. This allows you to install and update BalenaEtcher through the DNF package manager:
curl -1sLf 'https://dl.cloudsmith.io/public/balena/etcher/setup.rpm.sh' | sudo -E bashThis command adds the necessary repository information and GPG keys to your system.
Step 2: Install BalenaEtcher
With the repository configured, install BalenaEtcher using DNF:
sudo dnf install -y balena-etcher-electronThis command installs BalenaEtcher and all its dependencies automatically.
Step 3: Verify the Installation
To verify that BalenaEtcher was installed correctly, try launching it:
balena-etcherThe application should start without errors, displaying the main interface for selecting an image and a target drive.
Benefits of the RPM Installation Method:
- Integration with the system’s package manager
- Automatic dependency resolution
- Easier updates through regular system updates
- Better integration with the desktop environment
Method 3: Installing BalenaEtcher from Source Code
For advanced users who prefer customization or need the absolute latest features, building BalenaEtcher from source is an option. This method requires more steps but gives you complete control over the build process.
Step 1: Install Development Dependencies
First, install the necessary development tools and dependencies:
sudo dnf group install "Development Tools"
sudo dnf install -y git nodejs npm
Step 2: Clone the BalenaEtcher Repository
Clone the official repository:
git clone --recursive https://github.com/balena-io/etcher.git
cd etcher
Step 3: Build BalenaEtcher
Build and prepare the application:
rm -rf node_modules
make electron-develop
Step 4: Start BalenaEtcher
Launch the application:
npm startStep 5: Create a Distribution Package (Optional)
To create a distributable package:
make electron-buildThis will create packages in the `dist/` directory that you can install or distribute.
Advantages of Building from Source:
- Access to the latest features and bug fixes
- Ability to customize the application
- Better understanding of the software’s internals
- Opportunity to contribute to the project
Launching and Using BalenaEtcher
After installing BalenaEtcher using any of the methods above, you can start using it to create bootable USB drives.
Starting BalenaEtcher
Command Line Method:
You can launch BalenaEtcher from the terminal:
balena-etcher  # For RPM installation
./balenaEtcher-1.19.0-x64.AppImage  # For AppImage installation
Desktop Environment:
Alternatively, you can find BalenaEtcher in your application menu under “Utilities” or “System Tools”.
First-Run Configuration
The first time you run BalenaEtcher, it might ask for permissions to access removable devices. Grant these permissions to allow proper functionality.
Using BalenaEtcher to Create Bootable USB Drives
Creating a bootable USB drive with BalenaEtcher is straightforward:
Step 1: Select an Image
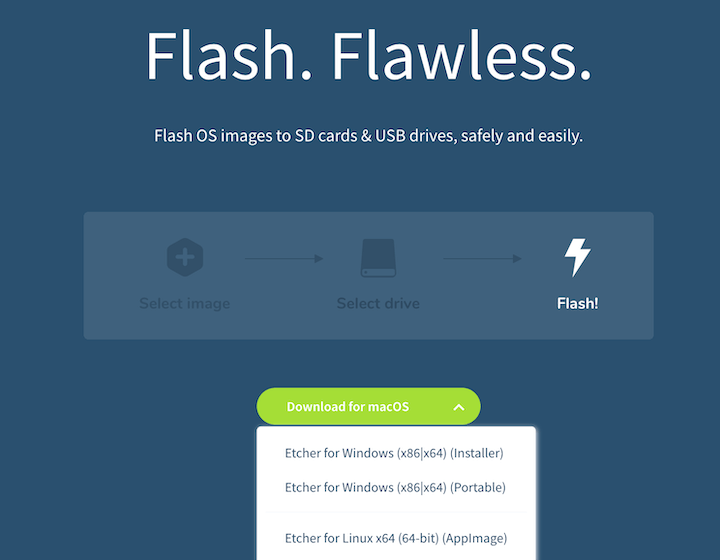
Click on “Flash from file” and browse to the location of your ISO or IMG file. BalenaEtcher supports various image formats, including compressed ones.
Step 2: Select Target Drive
Insert your USB drive, then click on “Select target” and choose your USB drive from the list. BalenaEtcher will automatically hide system drives to prevent accidental overwrites.
Step 3: Flash the Image
Click the “Flash!” button to begin the process. BalenaEtcher will perform the following operations:
- Write the image to the USB drive
- Verify the written data to ensure integrity
- Notify you when the process is complete
The entire process might take several minutes depending on the size of the image and the speed of your USB drive.

Advanced Features and Techniques
BalenaEtcher offers several advanced features for power users:
Command-Line Parameters:
You can use command-line parameters to automate flash operations:
./balenaEtcher-1.19.0-x64.AppImage --no-sandbox --image=/path/to/image.iso --drive=/dev/sdXHandling Large Image Files:
For large image files, ensure your file system supports large files and that you have sufficient free space for temporary files during the flashing process.
Working with Compressed Images:
BalenaEtcher can handle compressed images directly, including .gz, .bz2, and .xz formats, without requiring manual extraction first.
Troubleshooting Common Issues
Despite BalenaEtcher’s reliability, you might encounter some issues during installation or usage. Here are solutions to common problems:
Installation Issues
Dependency Errors:
If you encounter dependency errors during RPM installation, try installing the missing dependencies manually:
sudo dnf install -y gtk2 dbus-glib libXtst libnotify GConf2Permission Denied Errors:
If you get “permission denied” errors when running the AppImage:
chmod +x balenaEtcher-1.19.0-x64.AppImageFlashing Issues
“Something Went Wrong” Error:
If you encounter the “Something Went Wrong” error:
- Run BalenaEtcher with administrator privileges using sudo
- Ensure the image file is not corrupted by verifying its checksum
- Try using the “Flash from file” option instead of URL
- Select “All Files” instead of “OS Images” when browsing for your image file
Flash Failed:
If the flashing process fails:
- Check if your USB drive is compatible and functioning properly
- Ensure there’s enough space on the USB drive
- Try a different USB port or cable
- Use a different USB drive if possible
Drive Becomes Unrecognizable:
After flashing, your USB drive might appear smaller or unrecognizable in Windows or other operating systems. This is normal because:
- The image creates partitions that might not be visible in your OS
- Some partitions use file systems that aren’t recognized by certain operating systems
- The visible partition is often smaller than the full drive capacity
To recover the full capacity after use:
sudo fdisk /dev/sdX # Replace sdX with your deviceThen delete all partitions and create a new one, followed by formatting with a file system of your choice.
Updating and Maintaining BalenaEtcher
To keep BalenaEtcher up-to-date:
AppImage Method:
Download the latest AppImage from the official website and replace your existing file.
RPM Method:
Update through the package manager:
sudo dnf update balena-etcher-electronSource Code Method:
Pull the latest changes and rebuild:
git pull
make electron-develop
Best Practices and Tips
For optimal usage of BalenaEtcher on CentOS Stream 10:
Validate Downloaded Images:
Before flashing, verify the integrity of your downloaded images using checksums:
sha256sum /path/to/image.isoCompare the output with the provided checksum on the download page.
Select Appropriate USB Devices:
Use high-quality USB drives from reputable manufacturers for better reliability and performance.
Backup Important Data:
Always back up important data on USB drives before flashing them, as the process will erase all existing data.
Performance Optimization:
Close unnecessary applications while flashing to ensure optimal system resources for BalenaEtcher.
Security Considerations:
Only download images from trusted sources to prevent malware infections.
Congratulations! You have successfully installed BalenaEtcher. Thanks for using this tutorial for installing the BalenaEtcher on your CentOS Stream 10 system. For additional help or useful information, we recommend you check the official BalenaEtcher website.