How To Install Bitwarden on CentOS Stream 10

In this tutorial, we will show you how to install Bitwarden on CentOS Stream 10. Self-hosting your password manager provides unprecedented control over your sensitive data. Bitwarden stands out as the premier open-source password management solution, offering enterprise-grade security with the flexibility of self-deployment. CentOS Stream 10 delivers the perfect foundation for hosting Bitwarden, combining Red Hat’s enterprise stability with cutting-edge features.
This comprehensive guide walks you through installing Bitwarden on CentOS Stream 10 from start to finish. You’ll learn every step needed to deploy a production-ready Bitwarden instance, from initial system preparation to advanced security hardening. Whether you’re managing passwords for a small team or enterprise environment, this tutorial ensures a secure, reliable deployment.
The benefits of self-hosting Bitwarden extend far beyond simple cost savings. Complete data sovereignty means your encrypted vault never leaves your infrastructure. Enhanced privacy protection shields your credentials from third-party access. Custom compliance requirements become achievable through direct infrastructure control.
Prerequisites and System Requirements
Hardware Specifications
Your CentOS Stream 10 server requires adequate resources to run Bitwarden efficiently. Minimum specifications include 2 CPU cores, 4GB RAM, and 25GB available storage space. Production environments benefit significantly from 4+ CPU cores, 8GB+ RAM, and SSD storage for optimal performance.
Network connectivity demands include stable internet access for initial setup and certificate management. Ports 80 and 443 must remain accessible for HTTP and HTTPS traffic respectively. Consider bandwidth requirements for user synchronization, particularly in environments with multiple active users.
Software Dependencies
CentOS Stream 10 provides the ideal foundation with its modern kernel and updated package repositories. Docker Engine 20.10+ becomes essential for container orchestration, while Docker Compose 2.0+ manages multi-container applications seamlessly. The curl utility enables script downloads and API interactions throughout the installation process.
Administrative access through sudo or root privileges remains mandatory for system-level configurations. A registered domain name pointing to your server’s IP address ensures proper SSL certificate generation and web access functionality.
Initial System Preparation
System Updates and Security Configuration
Begin by updating your CentOS Stream 10 installation to the latest package versions:
sudo dnf update -y
sudo dnf install -y curl wget git
Configure the firewall to allow necessary traffic while maintaining security:
sudo firewall-cmd --permanent --add-service=http
sudo firewall-cmd --permanent --add-service=https
sudo firewall-cmd --permanent --add-port=80/tcp
sudo firewall-cmd --permanent --add-port=443/tcp
sudo firewall-cmd --reload
SELinux configuration requires careful attention on CentOS Stream systems. Verify SELinux status and configure appropriate contexts:
sudo setsebool -P httpd_can_network_connect 1
sudo setsebool -P container_manage_cgroup 1
Domain and DNS Setup
Configure your domain’s DNS records to point to your server’s public IP address. Create both A and AAAA records if using IPv6. Verify DNS propagation using dig or nslookup commands:
dig your-domain.com
nslookup your-domain.com
SSL certificate planning determines your security posture. Let’s Encrypt provides free certificates with automatic renewal, while custom certificates offer enhanced control for enterprise deployments.
Docker Installation and Configuration
Installing Docker Engine
Add the official Docker repository to your CentOS Stream 10 system:
sudo dnf config-manager --add-repo https://download.docker.com/linux/centos/docker-ce.repo
sudo dnf install -y docker-ce docker-ce-cli containerd.io docker-compose-plugin
Start and enable the Docker service for automatic startup:
sudo systemctl start docker
sudo systemctl enable docker
Verify Docker installation by checking the version and running a test container:
docker --version
sudo docker run hello-world
Docker Security Optimization
Configure Docker daemon settings for production environments. Create or modify /etc/docker/daemon.json:
{
  "log-driver": "json-file",
  "log-opts": {
    "max-size": "10m",
    "max-file": "3"
  },
  "storage-driver": "overlay2"
}
Restart Docker to apply configuration changes:
sudo systemctl restart dockerCreating Bitwarden User and Directory Structure
Dedicated User Account Setup
Security best practices mandate running Bitwarden under a dedicated user account. Create the bitwarden user and configure appropriate permissions:
sudo useradd -r -m -s /bin/bash bitwarden
sudo usermod -aG docker bitwarden
The -r flag creates a system user, while -m ensures home directory creation. Adding the user to the docker group enables container management without sudo privileges.
Directory Structure and Permissions
Establish the Bitwarden installation directory with proper security permissions:
sudo mkdir -p /opt/bitwarden
sudo chown bitwarden:bitwarden /opt/bitwarden
sudo chmod 700 /opt/bitwarden
These permissions ensure only the bitwarden user can access installation files and configuration data. Restrictive directory permissions prevent unauthorized access to sensitive Bitwarden data.
Obtaining Installation Credentials
Registration Process
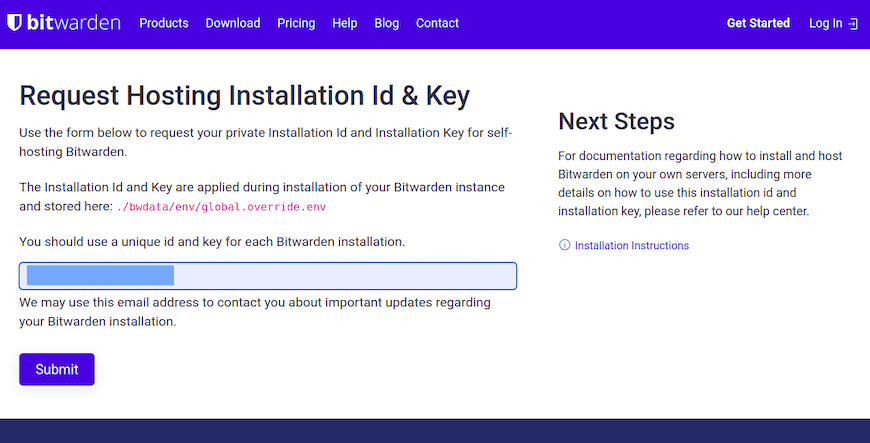
Navigate to the official Bitwarden hosting page at https://bitwarden.com/host to obtain your installation credentials. Email verification completes the registration process, providing access to your unique installation ID and key.

These credentials serve multiple purposes during installation. The installation ID identifies your specific Bitwarden instance, while the installation key authenticates your deployment rights. Store these credentials securely, as they’re required for installation and future updates.
Credential Security
Never share installation credentials or commit them to version control systems. Consider using environment variables or secure configuration management tools for credential storage in automated deployments.
Bitwarden Installation Process
Download and Prepare Installation Script
Switch to the bitwarden user account and navigate to the installation directory:
sudo su - bitwarden
cd /opt/bitwarden
Download the official Bitwarden installation script:
curl -Lso bitwarden.sh https://go.btwrdn.co/bw-sh
chmod 700 bitwarden.sh
The installation script handles container downloads, configuration generation, and service orchestration. Verify script integrity by checking its digital signature if security policies require validation.
Interactive Installation Configuration
Execute the installation script with the install parameter:
./bitwarden.sh installThe script prompts for several configuration parameters:
- Domain Configuration: Enter your fully qualified domain name exactly as configured in DNS. Avoid using IP addresses, as SSL certificate generation requires valid domain names.
- Let’s Encrypt SSL: Choose automatic certificate generation for simplified management. Manual certificate configuration offers greater control but requires additional maintenance overhead.
- Installation Credentials: Provide your installation ID and key obtained from the Bitwarden hosting portal. These authenticate your deployment and enable access to official container images.
- Database Configuration: Accept default settings unless specific requirements mandate custom database configurations. Advanced users may configure external database connections for enhanced scalability.
Container Download and Initialization
The installation process downloads multiple Docker containers including the web vault, API server, and supporting services. Download progress depends on internet connection speed and may require several minutes for completion.
Monitor container status during installation:
docker images | grep bitwardenSuccessful installation creates multiple Bitwarden-related images in your local Docker registry.
Environment Configuration
Global Override Settings
Customize Bitwarden behavior through the global.override.env file. This configuration file controls SMTP settings, database connections, and advanced features:
nano global.override.envEssential SMTP configuration enables email functionality:
globalSettings__mail__replyToEmail=admin@your-domain.com
globalSettings__mail__smtp__host=smtp.your-provider.com
globalSettings__mail__smtp__port=587
globalSettings__mail__smtp__ssl=false
globalSettings__mail__smtp__username=your-smtp-username
globalSettings__mail__smtp__password=your-smtp-password
Advanced Configuration Options
The config.yml file provides granular control over Bitwarden services. Modify container resource limits, custom port mappings, and service dependencies as needed:
version: '3'
services:
  web:
    image: bitwarden/web
    restart: always
    volumes:
      - ./web:/etc/bitwarden/web
Performance tuning options include memory limits, CPU quotas, and storage configurations. Adjust these settings based on your server specifications and expected user load.
Starting and Verifying Bitwarden
Initial Service Startup
Launch all Bitwarden services using the management script:
./bitwarden.sh startService startup follows a specific order to ensure proper dependency resolution. The database initializes first, followed by the API server, and finally the web vault interface.
Monitor container status to verify successful startup:
docker psAll Bitwarden containers should display “Up” status with no restart loops or error conditions.
Web Vault Access
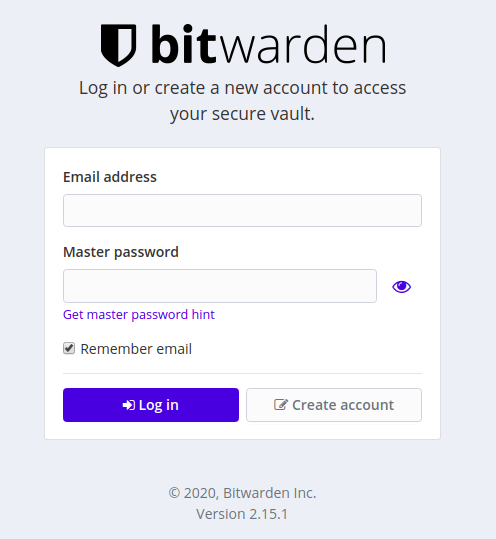
Open your web browser and navigate to your configured domain. The Bitwarden web vault should load with SSL encryption enabled. Create your first administrator account through the registration interface.
Verify email delivery by checking your inbox for the account verification message. Email functionality confirms proper SMTP configuration and ensures password reset capabilities work correctly.

Test basic functionality by creating a sample vault item and verifying synchronization works properly. Browser extension connectivity validates API server functionality and SSL certificate configuration.
Security Hardening and Best Practices
Post-Installation Security
Implement additional security measures to protect your Bitwarden deployment:
# Configure automatic security updates
sudo dnf install -y dnf-automatic
sudo systemctl enable --now dnf-automatic-install.timer
Regular backups ensure data protection against hardware failures or security incidents. Create backup scripts that capture both database content and configuration files:
#!/bin/bash
BACKUP_DIR="/backup/bitwarden/$(date +%Y%m%d)"
mkdir -p $BACKUP_DIR
docker exec bitwarden-mssql bash -c "sqlcmd -S localhost -U sa -P \$SA_PASSWORD -Q 'BACKUP DATABASE [vault] TO DISK = \"/tmp/vault.bak\"'"
docker cp bitwarden-mssql:/tmp/vault.bak $BACKUP_DIR/
cp -r /opt/bitwarden/bwdata $BACKUP_DIR/
SSL Certificate Management
Let’s Encrypt certificates require periodic renewal to maintain continuous service availability. Configure automatic renewal through cron jobs:
0 2 * * 0 cd /opt/bitwarden && ./bitwarden.sh renewcert >> /var/log/bitwarden-renewcert.log 2>&1Monitor certificate expiration dates and renewal success through log file analysis. Failed renewals require immediate attention to prevent service disruption.
Troubleshooting Common Issues
Container Startup Problems
Database connection failures often result from insufficient memory allocation or storage space constraints. Check available system resources:
free -h
df -h
docker logs bitwarden-mssql
Permission errors typically stem from incorrect file ownership or SELinux policy violations. Verify directory permissions and SELinux contexts:
ls -la /opt/bitwarden/
sestatus
SSL Certificate Issues
Certificate generation failures commonly occur due to DNS misconfiguration or firewall restrictions. Verify domain resolution and port accessibility:
dig your-domain.com
telnet your-domain.com 80
Let’s Encrypt rate limits may prevent certificate issuance in development environments with frequent reinstallations. Consider using staging certificates during testing phases.
Performance Optimization
Memory constraints can cause container restarts and service instability. Monitor resource usage patterns:
docker stats
htop
Database optimization improves response times for large vault collections. Configure appropriate database maintenance schedules and index optimization routines.
Maintenance and Updates
Keeping Bitwarden Current
Regular updates ensure security patches and feature enhancements remain current. Update both the management script and container images:
./bitwarden.sh updateself
./bitwarden.sh update
Plan maintenance windows during low-usage periods to minimize user impact. Communicate scheduled maintenance through appropriate channels to set user expectations.
System Maintenance
CentOS Stream 10 security updates require regular application to maintain system security posture:
sudo dnf update -y
sudo needs-restarting -r
Docker maintenance includes pruning unused images and containers to conserve storage space:
docker system prune -f
docker image prune -a -f
Log rotation prevents disk space exhaustion from verbose application logging. Configure logrotate rules for Bitwarden-specific log files.
Advanced Configuration and Scaling
High Availability Setup
Enterprise deployments may require high availability configurations with multiple server instances. Load balancing distributes user requests across multiple Bitwarden instances while maintaining session consistency.
Database clustering provides redundancy and improved performance for large user bases. Consider external database solutions like PostgreSQL or MySQL for enhanced scalability.
Integration Options
LDAP authentication enables centralized user management for enterprise environments. Configure LDAP settings through environment variables:
globalSettings__ldap__server=ldap.company.com
globalSettings__ldap__port=389
globalSettings__ldap__username=cn=bitwarden,ou=services,dc=company,dc=com
SAML single sign-on integration streamlines user access while maintaining security standards. Configure SAML providers through the admin panel after initial deployment completion.
Monitoring and Logging
Service Monitoring
Implement comprehensive monitoring to track Bitwarden service health and performance metrics. Prometheus and Grafana provide excellent visualization capabilities for container-based deployments:
# Monitor container resource usage
docker stats --format "table {{.Container}}\t{{.CPUPerc}}\t{{.MemUsage}}"
Set up alerting for critical events including certificate expiration, database connectivity issues, and storage space warnings. Proactive monitoring prevents service disruptions and maintains user confidence.
Log Analysis
Centralized logging aggregates information from multiple Bitwarden components. Configure log forwarding to external systems for analysis and retention:
# View Bitwarden service logs
docker logs bitwarden-web
docker logs bitwarden-api
Regular log analysis identifies usage patterns, security events, and performance bottlenecks. Automated log parsing detects anomalous behavior and potential security threats.
Congratulations! You have successfully installed Bitwarden. Thanks for using this tutorial for installing the Bitwarden open-source password management on your CentOS Stream 10 system. For additional or useful information, we recommend you check the official Bitwarden website.