How To Install Bitwarden on Linux Mint 22

In today’s digital age, managing passwords securely is more crucial than ever. With the increasing number of online accounts we use daily, it’s becoming challenging to create and remember unique, strong passwords for each one. This is where password managers like Bitwarden come into play. Bitwarden is an open-source password management solution that offers robust security features and cross-platform compatibility, making it an excellent choice for Linux Mint users.
In this comprehensive guide, we’ll walk you through the process of installing Bitwarden on Linux Mint 22. We’ll explore different installation methods, discuss their pros and cons, and provide step-by-step instructions to ensure a smooth setup. Whether you’re a Linux novice or an experienced user, this article will help you enhance your online security with Bitwarden.
What is Bitwarden?
Bitwarden is a free and open-source password management service that stores sensitive information such as website credentials in an encrypted vault. It stands out from other password managers due to its commitment to transparency, robust security features, and user-friendly interface.
Key features of Bitwarden include:
- End-to-end encryption
- Two-factor authentication
- Secure password generation
- Cross-platform synchronization
- Self-hosting option for advanced users
- Browser extensions for easy access
- Open-source codebase for community review
Compared to other password managers like LastPass or 1Password, Bitwarden offers a more transparent and customizable experience. Its open-source nature allows for continuous improvement and security audits by the community, making it a trustworthy choice for privacy-conscious users.
System Requirements
Before we dive into the installation process, let’s ensure your system meets the necessary requirements:
- Linux Mint 22 (or later) installed on your computer
- An active internet connection for downloading and syncing
- At least 100 MB of free disk space
- 1 GB of RAM (2 GB recommended for smoother performance)
- A modern web browser for accessing the Bitwarden vault
Linux Mint 22, being a user-friendly and stable distribution, provides an excellent foundation for running Bitwarden. Its compatibility with various software installation methods makes it easy to get Bitwarden up and running quickly.
Installation Methods
There are several ways to install Bitwarden on Linux Mint 22. We’ll cover three popular methods in this guide:
- Installing via Snap
- Using AppImage
- Installing as a Flatpak
Each method has its advantages, and the best choice depends on your specific needs and preferences. Let’s explore each option in detail.
Method 1: Installing Bitwarden via Snap
What is Snap?
Snap is a software deployment and package management system developed by Canonical for Linux operating systems. It allows developers to package their applications with all the necessary dependencies, ensuring they run consistently across different Linux distributions.
Advantages of using Snap
- Easy installation and automatic updates
- Sandboxed applications for improved security
- Consistent behavior across different Linux distributions
Step-by-step installation process
- Open the terminal on your Linux Mint 22 system. You can do this by pressing
Ctrl + Alt + Tor searching for “Terminal” in the application menu. - Ensure that Snap is installed on your system by running:
snap --versionIf it’s not installed, you can install it with:
sudo apt install snapd - Once Snap is installed, you can install Bitwarden using the following command:
sudo snap install bitwarden - Wait for the installation to complete. The terminal will display the progress and confirm when the installation is finished.
Verifying the installation
To verify that Bitwarden has been installed correctly, you can run:
snap list | grep bitwardenThis should display information about the installed Bitwarden snap package.
Method 2: Installing Bitwarden via AppImage
What is AppImage?
AppImage is a universal software package format for Linux that allows applications to run without installation on various Linux distributions. It bundles the application and its dependencies into a single file, making it portable and easy to use.
Benefits of using AppImage
- No installation required – just download and run
- Portable across different Linux distributions
- Easy to update and manage
Downloading the AppImage file
- Open your web browser and navigate to the Bitwarden download page.
- Scroll down to the “Linux” section and click on the “Download AppImage” button.
- Choose a location to save the file, such as your Downloads folder.
Making the AppImage executable
- Open the terminal and navigate to the directory where you downloaded the AppImage file:
cd ~/Downloads - Make the AppImage file executable with the following command:
chmod +x Bitwarden-*.AppImage
Running Bitwarden
To run Bitwarden, simply double-click the AppImage file in your file manager, or execute it from the terminal:
./Bitwarden-*.AppImageThe Bitwarden application should now launch, ready for you to set up your account.
Method 3: Installing Bitwarden as a Flatpak
Introduction to Flatpak
Flatpak is another universal package management system for Linux, similar to Snap. It allows for sandboxed applications and provides a consistent runtime environment across different Linux distributions.
Advantages of Flatpak installation
- Sandboxed applications for improved security
- Easy to manage and update
- Wide compatibility across Linux distributions
Step-by-step installation process
- First, ensure that Flatpak is installed on your Linux Mint 22 system. Open the terminal and run:
flatpak --versionIf it’s not installed, you can install it with:
sudo apt install flatpak - Add the Flathub repository, which hosts many Flatpak applications:
flatpak remote-add --if-not-exists flathub https://flathub.org/repo/flathub.flatpakrepo - Install Bitwarden using Flatpak:
flatpak install flathub com.bitwarden.desktop - Follow the prompts to complete the installation.
Launching Bitwarden
After installation, you can launch Bitwarden from your application menu or by running the following command in the terminal:
flatpak run com.bitwarden.desktopSetting Up Bitwarden
Now that you have Bitwarden installed on your Linux Mint 22 system, it’s time to set it up:
- Launch the Bitwarden application.
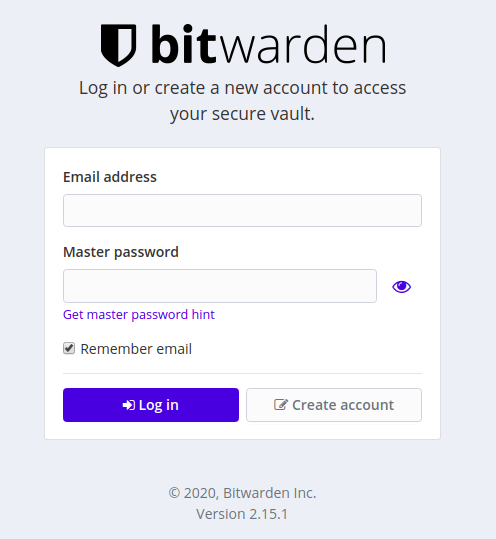
- Click on “Create Account” if you’re new to Bitwarden, or “Log In” if you already have an account.
- Follow the on-screen instructions to create your account, including:
- Entering your email address
- Creating a strong master password
- Verifying your email address
- Once logged in, you can start adding your passwords and other sensitive information to your vault.
If you’re migrating from another password manager, Bitwarden offers import options for various formats. You can access this feature by going to “Tools” > “Import Data” in the Bitwarden web vault.
Using Bitwarden on Linux Mint 22
Bitwarden offers several ways to access and manage your passwords on Linux Mint 22:
Desktop Application
The desktop application provides full access to your vault, allowing you to add, edit, and organize your passwords and other sensitive information.
Browser Extensions
Bitwarden offers extensions for popular browsers like Firefox, Chrome, and Brave. To install a browser extension:
- Open your preferred browser.
- Navigate to the Bitwarden website or your browser’s extension store.
- Search for “Bitwarden” and click “Add to [Browser Name]”.
- Follow the prompts to complete the installation.
The browser extension allows you to autofill passwords and quickly access your vault while browsing.
Command-Line Interface (CLI)
For advanced users, Bitwarden also offers a CLI tool. You can install it using npm:
npm install -g @bitwarden/cliThe CLI allows you to manage your vault, generate passwords, and perform other tasks directly from the terminal.
Troubleshooting Common Issues
While installing and using Bitwarden on Linux Mint 22 is generally straightforward, you might encounter some issues. Here are solutions to common problems:
Installation Problems
- If you’re having trouble with Snap installation, ensure that snapd is up to date:
sudo snap refresh - For AppImage issues, make sure you’ve made the file executable and have the necessary permissions to run it.
- If Flatpak installation fails, try updating your system and Flatpak:
sudo apt update && sudo apt upgrade
flatpak update
Sync Issues
If you’re experiencing synchronization problems:
- Check your internet connection
- Ensure you’re logged in with the correct account
- Try logging out and back in
- Manually trigger a sync from the application settings
Performance Concerns
If Bitwarden is running slowly:
- Check your system resources to ensure you have enough free RAM and CPU
- Try clearing the application cache
- Ensure you’re running the latest version of Bitwarden
Keeping Bitwarden Updated
Regularly updating Bitwarden is crucial for security and performance. The update process depends on your installation method:
- For Snap installations, updates are automatic by default.
- AppImage users should download the latest version from the Bitwarden website and replace the old file.
- Flatpak users can update Bitwarden along with other Flatpak applications using:
flatpak update
Security Best Practices
To maximize the security of your Bitwarden vault:
- Create a strong, unique master password. Use a combination of uppercase and lowercase letters, numbers, and symbols.
- Enable two-factor authentication (2FA) for an extra layer of security.
- Regularly audit your passwords and update weak or compromised ones.
- Use the password generator to create strong, unique passwords for each account.
- Avoid accessing your vault on public or unsecured networks.
- Keep your operating system and Bitwarden application up to date.
Congratulations! You have successfully installed Bitwarden. Thanks for using this tutorial for installing the latest version of Bitwarden password manager on the Linux Mint system. For additional help or useful information, we recommend you check the official Bitwarden website.
