How To Install Bitwarden Password Manager on Ubuntu 22.04 LTS

In this tutorial, we will show you how to install Bitwarden Password Manager on Ubuntu 22.04 LTS. Bitwarden is an open-source password manager that provides a secure and convenient way to store and manage all your passwords and sensitive information. It is designed to be accessible from any platform, including Linux operating systems, and offers a variety of features to enhance security and user experience.
This article assumes you have at least basic knowledge of Linux, know how to use the shell, and most importantly, you host your site on your own VPS. The installation is quite simple and assumes you are running in the root account, if not you may need to add ‘sudo‘ to the commands to get root privileges. I will show you the step-by-step installation of Bitwarden Password Manager on Ubuntu 22.04. You can follow the same instructions for Ubuntu 22.04 and any other Debian-based distribution like Linux Mint, Elementary OS, Pop!_OS, and more as well.
Prerequisites
- A server running one of the following operating systems: Ubuntu 22.04, 20.04, and any other Debian-based distribution like Linux Mint.
- It’s recommended that you use a fresh OS install to prevent any potential issues.
- SSH access to the server (or just open Terminal if you’re on a desktop).
- An active internet connection. You’ll need an internet connection to download the necessary packages and dependencies for Bitwarden.
- A
non-root sudo useror access to theroot user. We recommend acting as anon-root sudo user, however, as you can harm your system if you’re not careful when acting as the root.
Install Bitwarden Password Manager on Ubuntu 22.04 LTS Jammy Jellyfish
Step 1. First, make sure that all your system packages are up-to-date by running the following apt commands in the terminal.
sudo apt update
sudo apt upgrade
Step 2. Installing Docker.
By default, Docker is not available on Ubuntu 22.04 base repository. Now run the following command below to add the Docker repository to the system:
echo "deb [arch=$(dpkg --print-architecture) signed-by=/usr/share/keyrings/docker-archive-keyring.gpg] https://download.docker.com/linux/ubuntu $(lsb_release -cs) stable" | sudo tee /etc/apt/sources.list.d/docker.list
Next, import the GPG key to your system:
curl -fsSL https://download.docker.com/linux/ubuntu/gpg | sudo gpg --dearmor -o /usr/share/keyrings/docker-archive-keyring.gpg
After the repository is enabled, now install the latest version of the Docker package using the below command:
sudo apt update
sudo apt install docker-ce docker-ce-cli containerd.io docker-compose-plugin
You can verify that Docker is installed and about the current version:
docker -v
After successfully installed, enable Docker (to start automatically upon system boot), start, and verify the status using the commands below:
sudo systemctl enable docker
sudo systemctl start docker
sudo systemctl status docker
For additional resources on installing and managing Docker, read the post below:
Step 3. Create a User for Bitwarden.
Now create a new user and add it to the sudo and docker groups with the following command:
useradd -G docker,sudo -s /bin/bash -m -d /opt/bitwarden bitwarden
Next, set a user password with the following command:
passwd bitwarden
After that, change the ownership to the Bitwarden directory:
chown -R bitwarden: /opt/bitwarden
Step 4. Installing Bitwarden Password Manager on Ubuntu 22.04.
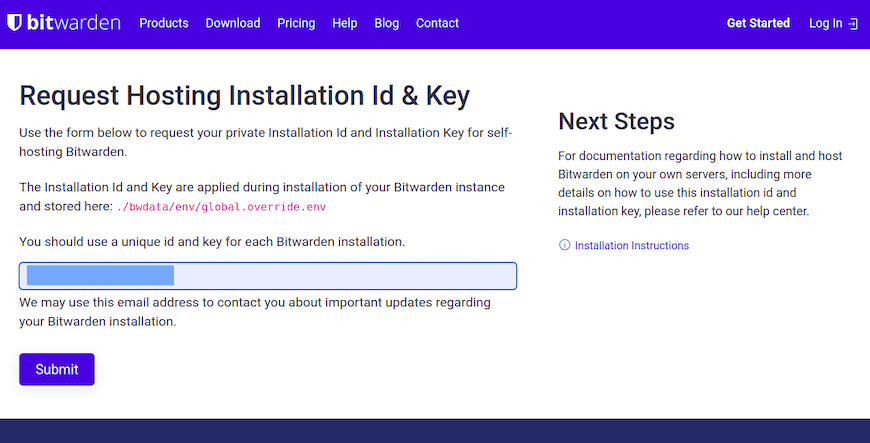
Before installing Bitwarden, you will need to enter your email ID and click submit. Such a page is loaded.

Next, switch the user to Bitwarden and download the Bitwarden installation script using the following command:
su - bitwarden
curl -Lso bitwarden.sh https://go.btwrdn.co/bw-sh
Set execution permission to the downloaded script:
chmod +x bitwarden.sh
Finally, install the Bitwarden password manager with the following command below:
sudo ./bitwarden.sh install
Output:
| |__ (_) |___      ____ _ _ __ __| | ___ _ __
| '_ \| | __\ \ /\ / / _` | '__/ _` |/ _ \ '_ \
| |_) | | |_ \ V  V / (_| | | | (_| |  __/ | | |
|_.__/|_|\__| \_/\_/ \__,_|_|  \__,_|\___|_| |_|

Open source password management solutions
Copyright 2015-2024, 8bit Solutions LLC
https://bitwarden.com, https://github.com/bitwarden

===================================================

bitwarden.sh version 2024.2.4
Docker version 20.10.19, build 100c708
docker-compose version 1.29.7, build 5beceabc

(!) Enter the domain name for your Bitwarden instance (ex. bitwarden.example.com): 192.168.77.21

(!) Do you want to use Let's Encrypt to generate a free SSL certificate? (y/n): n

(!) Enter the database name for your Bitwarden instance (ex. vault): bitwarden
Once is done, start the Bitwarden service using the following command:
sudo ./bitwarden.sh start
Output:
bitwarden.sh version 2024.2.4
Docker version 20.10.19, build 100c708
docker-compose version 1.29.2, build 5beceabc

Pulling mssql         ... done
Pulling web           ... done
Pulling attachments   ... done
Pulling api           ... done
Pulling identity      ... done
Pulling sso           ... done
Pulling admin         ... done
Pulling icons         ... done
Pulling notifications ... done
Pulling events        ... done
Pulling nginx         ... done
You can verify all downloaded docker images using the following command:
sudo docker images
To check all running containers, run the following command:
sudo docker ps
Step 4. Accessing Bitwarden Password Manager Web Interface.
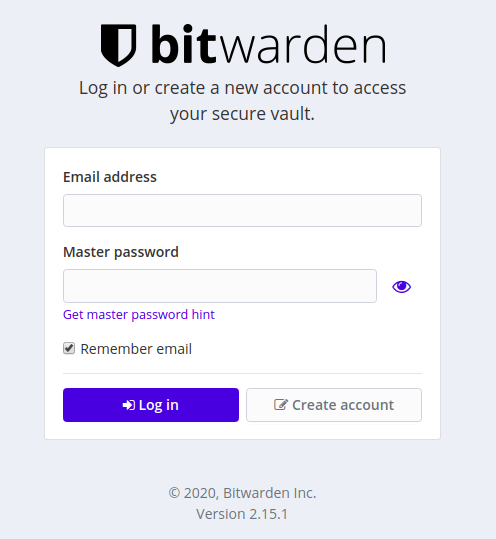
Now open your web browser and access the Bitwarden Web UI using the URL https://your-IP-address. If everything is working correctly, you should see the Bitwarden login page:

Congratulations! You have successfully installed Bitwarden. Thanks for using this tutorial for installing the Bitwarden Password Manager on the Ubuntu system. For additional help or useful information, we recommend you check the official Bitwarden website.