How To Install Bolt CMS on Ubuntu 24.04 LTS

Bolt CMS is a modern, user-friendly, and open-source content management system that helps deliver dynamic, content-rich websites with ease. It leverages PHP, Composer, and well-structured configuration files to offer a flexible and efficient experience for developers and editors alike. Ubuntu 24.04 LTS, a stable and secure operating system, provides the perfect environment to host Bolt CMS. Below is a step-by-step guide to walk through a successful installation and configuration of Bolt on Ubuntu 24.04 LTS.
This guide covers every essential requirement, from installing and configuring a web server to securely finalizing the setup. Read through each section carefully to ensure a seamless installation. The instructions include recommendations for both Apache and Nginx, along with best practices for database configuration, file permissions, and security.
Prerequisites
Before beginning, confirm that the system meets the basic prerequisites for running Bolt CMS on Ubuntu 24.04 LTS:
- Operating System: A fresh install of Ubuntu 24.04 LTS (64-bit) with administrator (sudo) access.
- Server Requirements:
- A web server such as Apache or Nginx.
- PHP (version 7.2.9 or higher) and extensions including
pdo,openssl,curl,gd,mbstring,xml, andzip. - A database server (MySQL or MariaDB) or the option to use SQLite.
- Composer, the PHP dependency manager, to install Bolt’s dependencies.
- A Non-Root User with Sudo Privileges: It is safer to log in as a regular user with sudo permissions instead of root.
Additionally, ensure all packages are up to date before proceeding:
sudo apt update && sudo apt upgrade
Step 1: Install Required Dependencies
This step involves installing the primary components needed to run Bolt CMS. The essential packages include the web server (Apache or Nginx), PHP, Composer, and a database server such as MariaDB or MySQL.
1.1 Install Apache or Nginx
Apache is often favored for its straightforward configuration, whereas Nginx usually boasts higher performance under heavy loads. Choose one based on project requirements.
- To install Apache:
sudo apt install apache2 sudo systemctl enable apache2 sudo systemctl start apache2 - To install Nginx:
sudo apt install nginx
sudo systemctl enable nginx
sudo systemctl start nginx
1.2 Install PHP and Extensions
Bolt CMS requires PHP 7.2.9 or higher with specific extensions enabled. Install PHP along with the necessary extensions:
sudo apt install php php-cli php-common php-curl php-gd php-json \
php-mbstring php-mysql php-xml php-zip
Confirm the PHP version after installation:
php -v
1.3 Install MariaDB or MySQL
Either MariaDB or MySQL can serve as the database manager. The commands below install MariaDB and set it to run automatically on boot:
sudo apt install mariadb-server mariadb-client
sudo systemctl enable mariadb
sudo systemctl start mariadb
Secure the database setup:
sudo mysql_secure_installation
Follow the on-screen prompts to configure the root password, remove anonymous users, disable remote root login, and remove the test database for improved security.
1.4 Install Composer
Composer is crucial for fetching all of Bolt’s dependencies. Install it using the following commands:
sudo apt install curl git
curl -sS https://getcomposer.org/installer | sudo php -- --install-dir=/usr/local/bin --filename=composer
After this, Composer should be available globally on the system. Confirm its availability:
composer --version
Step 2: Configure Database for Bolt CMS
Bolt uses MySQL or MariaDB by default, though SQLite can also be used for smaller projects. For a typical production environment, create a dedicated database and user to keep things organized and separate from other system databases.
sudo mysql -u root -p
After entering the root password, type the following commands to create a database and user:
CREATE DATABASE boltdb;
CREATE USER 'bolt'@'localhost' IDENTIFIED BY 'secure_password';
GRANT ALL PRIVILEGES ON boltdb.* TO 'bolt'@'localhost';
FLUSH PRIVILEGES;
EXIT;
- boltdb is the name of the database.
- bolt is the user with full privileges on that database.
- secure_password should be replaced with a strong, unique password.
This creates everything needed for Bolt CMS to store all content, configuration, and user details within the boltdb database.
Step 3: Download and Install Bolt CMS
With the dependencies in place and the database configured, proceed to download Bolt CMS and set up the necessary files. According to various installation resources, including official documentation, Bolt can be cloned from GitHub.
3.1 Cloning Bolt Repository
Navigate to the /var/www directory (typical document root on Ubuntu). Then clone the latest version of Bolt from its GitHub repository:
cd /var/www
sudo git clone https://github.com/bolt/bolt.git
This creates a folder named bolt containing all the source code and configuration files. To remain organized, verify that these files are placed correctly inside /var/www/bolt.
3.2 Installing Dependencies with Composer
Navigate inside the bolt directory and install the Bolt dependencies using Composer:
cd /var/www/bolt
sudo composer install
This command fetches all the required packages and sets them up in the relevant directories. Expect a brief wait while composer processes the installation. If any warnings occur, ensure that the correct PHP extensions are installed and configured.
3.3 Adjusting File Permissions
Permissions on Ubuntu typically default to root ownership. Adjust them so the web server user (www-data) can read and write the necessary files:
sudo chown -R www-data:www-data /var/www/bolt
sudo chmod -R 755 /var/www/bolt
If Nginx is used but runs under a different user, confirm that the correct user or group is specified. Proper permissions minimize file access errors and protect project data.
Step 4: Configure the Web Server
Configuring the web server is crucial to ensure traffic can reach Bolt CMS. Choose between Apache or Nginx based on site and performance requirements.
4.1 Apache Configuration
Apache mod_rewrite is essential to generate SEO-friendly URLs and handle route mapping for Bolt. Enable the rewrite module first:
sudo a2enmod rewrite
Create a new virtual host file for Bolt:
sudo nano /etc/apache2/sites-available/bolt.conf
Insert the following snippet:
<VirtualHost *:80>
    ServerName your-domain.com
    DocumentRoot /var/www/bolt

    <Directory /var/www/bolt>
        Options FollowSymLinks
        AllowOverride All
        Require all granted
    </Directory>

    ErrorLog ${APACHE_LOG_DIR}/bolt_error.log
    CustomLog ${APACHE_LOG_DIR}/bolt_access.log combined
</VirtualHost>
- ServerName: Replace
your-domain.comwith the domain or subdomain assigned to the server. - DocumentRoot: Points to
/var/www/bolt, the Bolt installation directory.
Save and exit, then disable the default virtual host and enable the new configuration:
sudo a2dissite 000-default.conf
sudo a2ensite bolt.conf
sudo systemctl restart apache2
4.2 Nginx Configuration
For those opting to use Nginx, ensure that both PHP-FPM and Nginx are installed and running. Create a new server block for Bolt CMS:
sudo nano /etc/nginx/sites-available/bolt
Include the following contents:
server {
    listen 80;
    server_name your-domain.com;

    root /var/www/bolt;
    index index.php index.html index.htm;

    location / {
        try_files $uri $uri/ /index.php?$query_string;
    }

    location ~ \.php$ {
        include snippets/fastcgi-php.conf;
        fastcgi_pass unix:/run/php/php-fpm.sock;
    }

    location ~ /\.ht {
        deny all;
    }
}
Adjust the server_name parameter, then create a symbolic link to enable the configuration and restart Nginx:
sudo ln -s /etc/nginx/sites-available/bolt /etc/nginx/sites-enabled/
sudo systemctl restart nginx
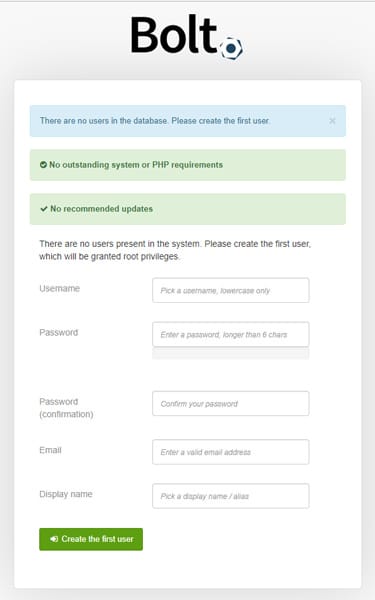
Step 5: Finalize Installation via Web Interface
After configuring Apache or Nginx, point a browser to the server’s IP address or domain name. If everything is configured correctly, the Bolt CMS setup wizard should appear. Provide the following details:
- Database Credentials: Enter the database name, username, and password previously configured in the
config.ymlif prompted. - Administrator Account: Create an admin username and password for logging into the Bolt backend.
Upon submitting the correct information, Bolt CMS finalizes the installation. The dashboard eventually appears, indicating a successful installation. Test the front-end view of the site by navigating back to the root URL. Then, log in to the Bolt administrative panel by appending /bolt to the site URL.

Step 6: Secure the Installation
Securing any production site is a critical practice. Hardening the server and protecting user traffic improves reliability and trustworthiness.
6.1 Enable HTTPS with SSL/TLS
An SSL certificate helps encrypt traffic between the server and users, preventing data leaks. Tools like Let’s Encrypt provide free certificates:
- For Apache:
sudo apt install certbot python3-certbot-apache sudo certbot --apache -d your-domain.com - For Nginx:
sudo apt install certbot python3-certbot-nginx
sudo certbot --nginx -d your-domain.com
Once Let’s Encrypt is configured, the virtual host is updated automatically with the SSL certificate. Renewals occur automatically unless configured otherwise.
6.2 Keep the System Updated
Regularly update Ubuntu, PHP, and Bolt CMS itself. This helps apply security patches and new features promptly:
sudo apt update && sudo apt upgrade
Also, monitor composer.json dependencies by running composer update within the Bolt directory when a new Bolt release appears. Verify compatibility by checking the release notes.
6.3 Firewall and Additional Security
Use ufw (Uncomplicated Firewall) to manage connections on Ubuntu. For a basic configuration permitting HTTP (port 80), HTTPS (port 443), and SSH (port 22):
sudo ufw allow OpenSSH
sudo ufw allow 'Apache Full'  # or Nginx Full
sudo ufw enable
Enable further security measures such as Fail2ban for intrusion protection, strong passwords, secure SSH access, and regular backups.
Troubleshooting Common Issues
Occasionally, minor obstacles may occur during installation:
- File Permission Errors: If Bolt cannot write to
app/cacheorpublic/files, confirm that the correct user owns these directories. - Database Connection Problems: Verify that credentials in
config.ymlmatch the username, password, and database name created. Check that MariaDB or MySQL is running. - HTTP/HTTPS Redirection Loops: Misconfigurations in Apache or Nginx can cause conflicts with the server block or VirtualHost settings. Double-check for
AllowOverride All,try_files, andrewritesto ensure correct routing. - Composer Dependencies Outdated: If errors occur during
composer installorcomposer update, ensure your Composer is at a stable version or update your vendor libraries. Confirm your PHP version and modules are current.
Congratulations! You have successfully installed Bolt. Thanks for using this tutorial for installing the Bolt Content Management System (CMS) on Ubuntu 24.04 LTS system. For additional help or useful information, we recommend you check the official Bolt CMS website.