In this tutorial, we will show you how to install Bugzilla on Debian 11. For those of you who didn’t know, Bugzilla is a free and open-source bug tracking system that allows us to track the bugs and collaborate with developers and other teams in our organization. Defect-tracking systems allow teams of developers to keep track of outstanding bugs, problems, issues, enhancement, and other change requests in their products effectively.
This article assumes you have at least basic knowledge of Linux, know how to use the shell, and most importantly, you host your site on your own VPS. The installation is quite simple and assumes you are running in the root account, if not you may need to add ‘sudo‘ to the commands to get root privileges. I will show you through the step-by-step installation of the Bugzilla
Bug Tracker on a Debian 11 (Bullseye).
Prerequisites
- A server running one of the following operating systems: Ubuntu 20.04, 18.04, 16.04, and any other Debian-based distribution like Linux Mint.
- It’s recommended that you use a fresh OS install to prevent any potential issues.
- A
non-root sudo useror access to theroot user. We recommend acting as anon-root sudo user, however, as you can harm your system if you’re not careful when acting as the root.
Install Bugzilla on Debian 11 Bullseye
Step 1. Before we install any software, it’s important to make sure your system is up to date by running the following apt commands in the terminal:
sudo apt update
sudo apt upgrade
Step 2. Installing Perl and Other Package Dependencies.
Now install all the required Perl modules using the following command below:
sudo apt install build-essential libdatetime-timezone-perl libappconfig-perl libdate-calc-perl libtemplate-perl libmime-tools-perl libdatetime-perl libemail-sender-perl libemail-mime-perl libemail-mime-perl libdbi-perl libdbd-mysql-perl libcgi-pm-perl libmath-random-isaac-perl libmath-random-isaac-xs-perl libapache2-mod-perl2 libapache2-mod-perl2-dev libchart-perl libxml-perl libxml-twig-perl perlmagick libgd-graph-perl libtemplate-plugin-gd-perl libsoap-lite-perl libhtml-scrubber-perl libjson-rpc-perl libdaemon-generic-perl libtheschwartz-perl libtest-taint-perl libauthen-radius-perl libhtml-formattext-withlinks-perl libgd-dev graphviz sphinx-common rst2pdf libemail-address-perl libemail-reply-perl libfile-slurp-perl libencode-detect-perl libmodule-build-perl libnet-ldap-perl libfile-which-perl libauthen-sasl-perl libfile-mimeinfo-perl
Step 3. Installing Apache Web Server.
By default, the Apache webserver package is included in the Debian repository. Run the following command to install it:
sudo apt install apache2 apache2-utils
Check apache build and version:
apache2 -v
Once Apache is installed, check the service status using the following command below:
sudo systemctl status apache2
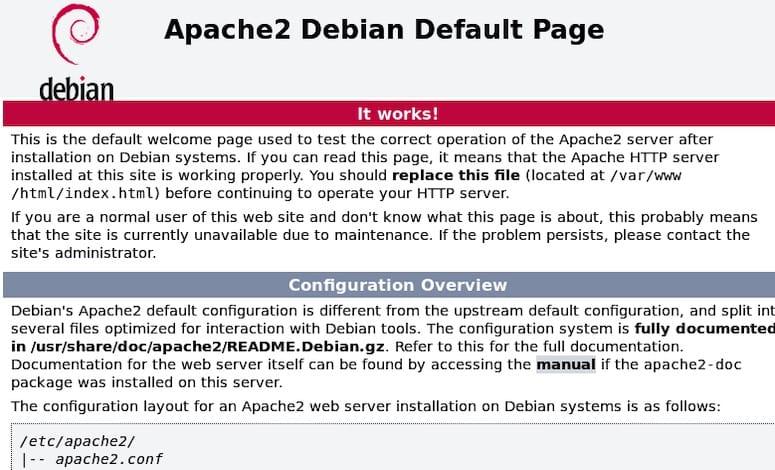
You can also check the Apache installation by browsing the URL http://your-ip-address. You should see the Apache test page on the following screen:

Step 4. Installing MariaDB database server.
To get started with MariaDB installation, follow the below steps:
sudo apt install mariadb-server mariadb-client
Once the installation is complete, check whether the database server is running by issuing the command:
sudo systemctl status mariadb
By default, MariaDB is not hardened. You can secure MariaDB using the mysql_secure_installation script. you should read and below each step carefully which will set a root password, remove anonymous users, disallow remote root login, and remove the test database and access to secure MariaDB:
mysql_secure_installation
Configure it like this:
- Set root password? [Y/n] y
- Remove anonymous users? [Y/n] y
- Disallow root login remotely? [Y/n] y
- Remove test database and access to it? [Y/n] y
- Reload privilege tables now? [Y/n] y
To log into MariaDB, use the following command (note that it’s the same command you would use to log into a MySQL database):
mysql -u root -p
Next, you will need to create a database and user for Bugzilla:
MariaDB [(none)]> CREATE DATABASE bugzilladb;
MariaDB [(none)]> CREATE USER 'buguser'@'localhost' IDENTIFIED BY 'your-strong-password';
MariaDB [(none)]> GRANT ALL PRIVILEGES ON bugzilladb.* TO 'buguser'@'localhost';
MariaDB [(none)]> FLUSH PRIVILEGES;
MariaDB [(none)]> EXIT;
Step 5. Installing Bugzilla on Debian 11.
By default, Bugzilla is not available on Debian 11 base repository. Now we download and executes the installation script using the following command below:
wget https://ftp.mozilla.org/pub/mozilla.org/webtools/bugzilla-5.0.6.tar.gz
Next, create a directory for Bugzilla and extract the downloaded file:
mkdir /var/www/html/bugzilla
tar xf bugzilla-5.0.6.tar.gz -C /var/www/html/bugzilla --strip-components=1
After that, edit the localconfig the file inside the Bugzilla directory:
cd /var/www/html/bugzilla
nano localconfig
Add the following configuration:
$create_htaccess = 1;
$webservergroup = 'www-data';
$use_suexec = 1;
$db_driver = 'mysql';
$db_host = 'localhost';
$db_name = 'bugzilladb';
$db_user = 'buguser';
$db_pass = 'your-strong-password';
Save and close the file then run the following command to set up Bugzilla:
./checksetup.pl
Output:
Enter the e-mail address of the administrator: admin@your-domian.com
Enter the real name of the administrator: GoDeT fr3akz
Enter a password for the administrator account:
Please retype the password to verify:
admin@your-domian.com is now set up as an administrator.
Creating initial dummy product 'TestProduct'...

Now that you have installed Bugzilla, you should visit the 'Parameters'
page (linked in the footer of the Administrator account) to ensure it
is set up as you wish - this includes setting the 'urlbase' option to
the correct URL.
checksetup.pl complete.
Next, run the following command to install all required Perl modules:
/usr/bin/perl install-module.pl --all
After that, set the ownership of the Bugzilla directory to www-data:
chown -R www-data:www-data /var/www/html/bugzilla/
Then, verify the Bugzilla setup using the following command:
./checksetup.pl
Step 6. Configure Apache for Bugzilla.
Now we create an Apache virtual host configuration file for Bugzilla:
nano /etc/apache2/sites-available/bugzilla.conf
Add the following lines:
<VirtualHost *:80>
ServerName your-domain.com
DocumentRoot /var/www/html/bugzilla/

<Directory /var/www/html/bugzilla/>
AddHandler cgi-script .cgi
Options +Indexes +ExecCGI
DirectoryIndex index.cgi
AllowOverride Limit FileInfo Indexes Options AuthConfig
</Directory>

ErrorLog /var/log/apache2/bugzilla.error_log
CustomLog /var/log/apache2/bugzilla.access_log common
</VirtualHost>
Save and close the file then restart the Apache service to apply the configuration changes:
sudo a2ensite bugzilla.conf
sudo a2enmod headers env rewrite expires cgi
sudo systemctl restart apache2
Step 7. Accessing Bugzilla Web Interface.
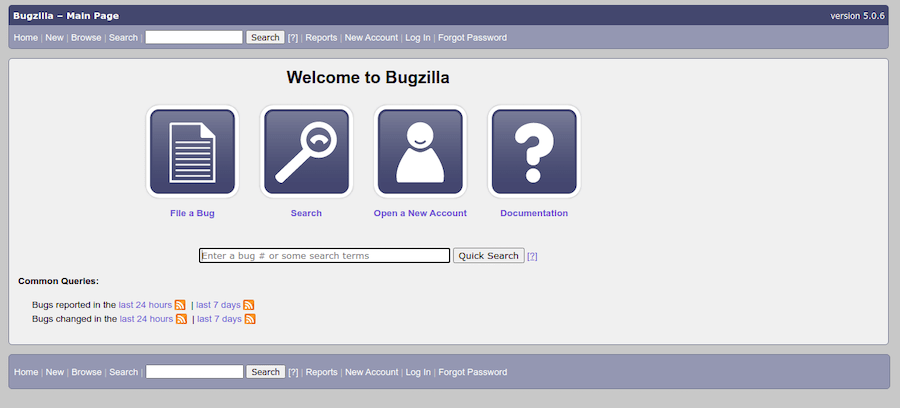
Once successfully installed, open your web browser and access the Bugzilla web interface using the URL http://your-domian.com. You should see the following screen:

Congratulations! You have successfully installed Bugzilla. Thanks for using this tutorial for installing the latest version of Bugzilla Bug Tracker on Debian 11 Bullseye. For additional help or useful information, we recommend you check the official Bugzilla website.