How To Install Cacti on AlmaLinux 10

Cacti stands as one of the most powerful open-source network monitoring and graphing tools available today. This comprehensive network monitoring solution leverages RRDTool’s robust data storage capabilities to provide detailed visualization of network performance metrics. AlmaLinux 10, being a stable enterprise-grade Linux distribution, serves as an excellent platform for hosting Cacti installations.
Network administrators and system engineers increasingly rely on Cacti for monitoring network infrastructure, tracking bandwidth utilization, and generating detailed performance reports. The combination of Cacti’s web-based interface with AlmaLinux 10’s reliability creates a monitoring solution that scales from small networks to enterprise environments.
This guide provides detailed instructions for installing and configuring Cacti on AlmaLinux 10, ensuring you have a fully functional network monitoring system ready for production use.
Prerequisites and System Requirements
Before beginning the Cacti installation process, ensure your AlmaLinux 10 system meets the necessary requirements. Your server should have a minimum of 2 GB RAM and 20 GB available disk space for optimal performance. These specifications allow Cacti to handle moderate network monitoring loads effectively.
Administrative access with sudo privileges is essential for completing this installation. Fresh AlmaLinux 10 installations work best, minimizing potential conflicts with existing software packages. A stable internet connection enables downloading required packages and dependencies throughout the installation process.
Network connectivity requirements include accessible SNMP-enabled devices for monitoring. Basic understanding of Linux command-line operations, database management, and web server configuration proves beneficial when following these instructions.
System Preparation and Updates
Initial system preparation involves updating all packages to their latest versions. Execute the following commands to ensure your AlmaLinux 10 system has current security patches and package updates:
sudo dnf clean all
sudo dnf update -y
Enable the EPEL repository, which provides additional packages required for Cacti installation:
sudo dnf install epel-release -yInstall essential development tools that support various Cacti components:
sudo dnf groupinstall "Development Tools" -yConfigure time synchronization to ensure accurate timestamp data in monitoring graphs. Install and configure chrony for time synchronization:
sudo dnf install chrony -y
sudo systemctl enable --now chronyd
Installing and Configuring Apache Web Server
Apache HTTP server provides the web interface foundation for Cacti’s browser-based management console. Install Apache using the following command:
sudo dnf install httpd httpd-devel -yStart and enable Apache to automatically launch at system boot:
sudo systemctl start httpd
sudo systemctl enable httpd
Verify Apache installation by checking service status:
systemctl status httpdConfigure firewall rules to allow HTTP and HTTPS traffic through the system firewall:
sudo firewall-cmd --permanent --add-service=http
sudo firewall-cmd --permanent --add-service=https
sudo firewall-cmd --reload
Remove the default Apache welcome page to prevent information disclosure:
sudo rm -f /var/www/html/index.htmlCreate a basic security configuration for Apache by editing the main configuration file. This prevents exposure of sensitive server information in HTTP headers.
Installing and Configuring MariaDB Database
MariaDB serves as Cacti’s database backend, storing configuration data, device information, and historical monitoring data. Install MariaDB server and client packages:
sudo dnf install mariadb-server mariadb -yStart and enable MariaDB service:
sudo systemctl start mariadb
sudo systemctl enable mariadb
Secure the MariaDB installation using the built-in security script:
sudo mysql_secure_installationFollow the interactive prompts to set a strong root password, remove anonymous users, disable remote root login, and remove test databases. Answer ‘Y’ to all security-related questions for optimal protection.
Create a dedicated database and user account for Cacti. Access the MariaDB console:
sudo mysql -u root -pExecute the following SQL commands to establish the Cacti database environment:
CREATE DATABASE cacti;
CREATE USER 'cactiuser'@'localhost' IDENTIFIED BY 'StrongPassword123!';
GRANT ALL PRIVILEGES ON cacti.* TO 'cactiuser'@'localhost';
GRANT SELECT ON mysql.time_zone_name TO 'cactiuser'@'localhost';
FLUSH PRIVILEGES;
EXIT;
Configure timezone information for proper timestamp handling in monitoring data:
mysql_tzinfo_to_sql /usr/share/zoneinfo | sudo mysql -u root -p mysqlInstalling PHP and Required Extensions
Cacti requires PHP with specific extensions for database connectivity, SNMP communication, and graph generation. Install PHP and necessary modules:
sudo dnf install php php-mysqlnd php-cli php-gd php-ldap php-odbc php-pdo php-pear php-xml php-xmlrpc php-mbstring php-snmp php-curl php-zip php-gmp php-intl -yConfigure PHP settings for optimal Cacti performance. Edit the PHP configuration file:
sudo nano /etc/php.iniModify the following settings:
memory_limit = 800M
max_execution_time = 60
date.timezone = America/New_York
max_input_vars = 3000
post_max_size = 50M
upload_max_filesize = 50M
Replace “America/New_York” with your appropriate timezone. Restart Apache and PHP-FPM services to apply configuration changes:
sudo systemctl restart httpd
sudo systemctl restart php-fpm
Enable PHP-FPM service for automatic startup:
sudo systemctl enable php-fpmInstalling SNMP and RRDTool
SNMP (Simple Network Management Protocol) enables Cacti to collect data from network devices, while RRDTool handles time-series data storage and graph generation:
sudo dnf install net-snmp net-snmp-utils net-snmp-libs rrdtool -yStart and enable the SNMP daemon:
sudo systemctl start snmpd
sudo systemctl enable snmpd
Configure basic SNMP community strings by editing the SNMP configuration:
sudo nano /etc/snmp/snmpd.confAdd or modify community string configuration:
com2sec readonly default public
group readgroup v2c readonly
view all included .1.3.6.1
access readgroup "" any noauth exact all none none
Restart SNMP service to apply configuration changes:
sudo systemctl restart snmpdTest SNMP functionality locally:
snmpwalk -v2c -c public localhost systemDownloading and Installing Cacti
Download the latest Cacti version from the official repository. Navigate to the temporary directory and retrieve the installation package:
cd /tmp
wget https://www.cacti.net/downloads/cacti-latest.tar.gz
Extract the Cacti archive to the Apache document root:
sudo tar -xzf cacti-latest.tar.gz -C /var/www/html/
sudo mv /var/www/html/cacti-* /var/www/html/cacti
Set appropriate ownership and permissions for Cacti files:
sudo chown -R apache:apache /var/www/html/cacti
sudo chmod -R 755 /var/www/html/cacti
Create necessary directories for Cacti logs and temporary files:
sudo mkdir -p /var/www/html/cacti/log
sudo chown apache:apache /var/www/html/cacti/log
Configure the Cacti database connection by editing the configuration file:
sudo vi /var/www/html/cacti/include/config.phpUpdate database connection parameters:
$database_type = "mysql";
$database_default = "cacti";
$database_hostname = "localhost";
$database_username = "cactiuser";
$database_password = "StrongPassword123!";
$database_port = "3306";
$database_ssl = false;
Import the Cacti database schema into the previously created database:
sudo mysql -u cactiuser -p cacti < /var/www/html/cacti/cacti.sqlWeb-Based Installation Wizard
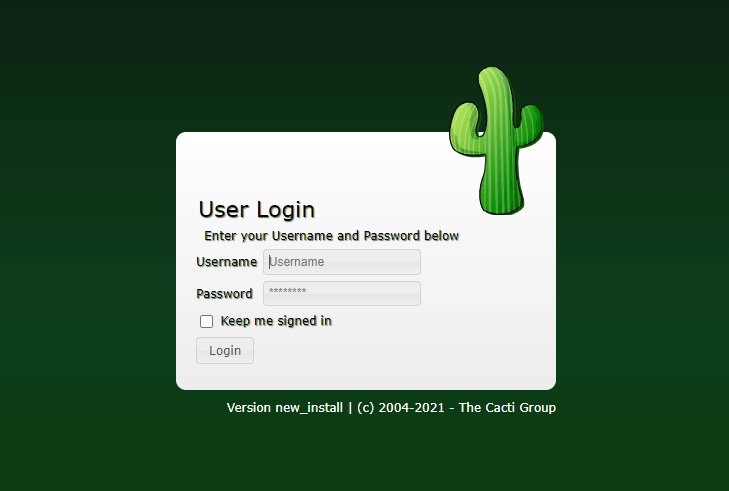
Access the Cacti web installer through your browser by navigating to http://your_server_ip/cacti. The initial login screen appears with default credentials:
- Username: admin
- Password: admin

Upon first login, Cacti requires changing the default password for security purposes. Choose a strong password containing uppercase letters, lowercase letters, numbers, and special characters.
Accept the GNU General Public License (GPL) agreement and click “Begin” to start the installation wizard. Cacti performs comprehensive pre-installation checks, verifying PHP module availability, database connectivity, and file permissions.
The installation wizard validates several critical components:
- Required PHP extensions
- Database connection parameters
- Directory permissions
- Binary path locations
Select “New Primary Server” as the installation type for a fresh Cacti deployment. This option configures Cacti as the primary monitoring server capable of managing multiple pollers.
Review directory permission checks to ensure proper file access. The installer verifies that the web server can read configuration files and write to log directories.
Post-Installation Configuration
Configure automated data collection by setting up cron jobs for regular polling. Edit the system crontab to enable periodic data collection:
echo "*/5 * * * * apache /usr/bin/php /var/www/html/cacti/poller.php > /dev/null 2>&1" | sudo tee -a /etc/crontabThis cron job executes every five minutes, collecting data from monitored devices and updating RRD databases.
Install default device templates that provide pre-configured monitoring profiles for common network equipment. The installation wizard presents various template options including:
- Generic SNMP Device
- Cisco Router
- Linux Machine
- Windows Host
- Network Switch

Select all relevant templates to maximize monitoring capabilities. Additional templates can be installed later through the Cacti interface.
Configure data input methods and polling intervals based on your network monitoring requirements. Standard polling intervals range from one minute for critical devices to five minutes for general monitoring.
Adding Monitoring Devices
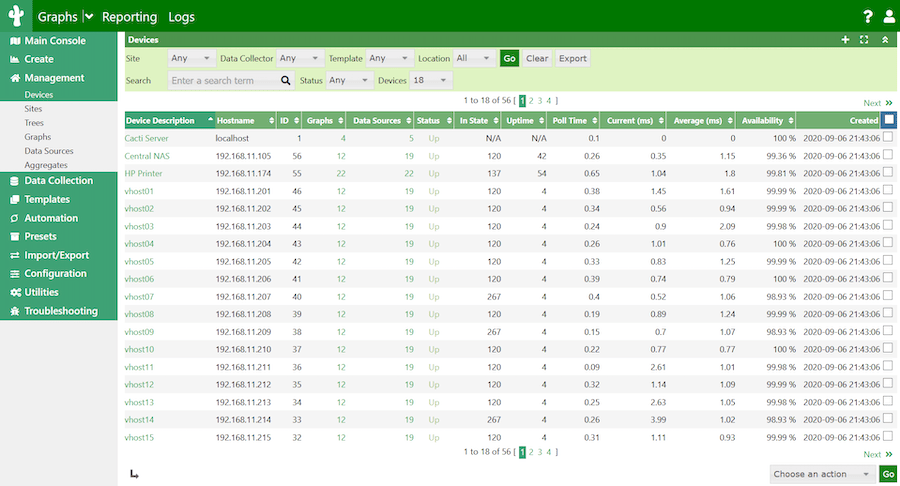
Begin monitoring by adding your first devices through the Cacti web interface. Navigate to “Management” > “Devices” and click “Add” to create new device entries.
Configure local machine monitoring by adding the localhost as the first monitored device:
- Description: Local AlmaLinux Server
- Hostname: localhost
- SNMP Community: public
- SNMP Version: Version 2
For network device monitoring, ensure SNMP is enabled on target devices with matching community strings. Common SNMP configuration includes:
- Read-only community strings
- Appropriate SNMP version (v2c or v3)
- Network accessibility between Cacti server and target devices
Create device graphs by associating appropriate graph templates with each monitored device. Standard graphs include CPU utilization, memory usage, network interface traffic, and disk space monitoring.
Organize devices using Cacti’s tree structure for logical grouping. Create categories such as “Servers,” “Network Equipment,” and “Remote Sites” for efficient management.
Security Hardening and Best Practices
Implement SSL/TLS encryption to protect web interface communications. Generate SSL certificates and configure Apache for HTTPS access:
sudo dnf install mod_ssl -y
sudo systemctl restart httpd
Configure user access controls through Cacti’s built-in user management system. Create individual user accounts with appropriate permissions rather than sharing the admin account.
Regular security updates maintain system protection against vulnerabilities. Establish automated update procedures:
sudo dnf install dnf-automatic -y
sudo systemctl enable --now dnf-automatic.timer
Implement firewall restrictions to limit access to essential ports only. Configure iptables or firewalld rules permitting HTTP/HTTPS traffic from authorized networks exclusively.
Database security involves regular backups and restricted access credentials. Create automated backup scripts for the Cacti database:
#!/bin/bash
mysqldump -u cactiuser -p cacti > /backup/cacti_$(date +%Y%m%d).sql
Troubleshooting Common Issues
Database connection errors often result from incorrect credentials or network connectivity issues. Verify database configuration in /var/www/html/cacti/include/config.php and test connectivity using the mysql command-line client.
PHP module missing errors indicate incomplete package installation. Install missing extensions using dnf and restart Apache services. Common missing modules include php-snmp, php-gd, and php-mbstring.
File permission problems prevent Cacti from writing logs or updating configuration files. Ensure the apache user owns Cacti directories with appropriate read/write permissions:
sudo chown -R apache:apache /var/www/html/cacti
sudo chmod -R 755 /var/www/html/cacti
SNMP connectivity issues often stem from firewall restrictions or incorrect community strings. Test SNMP access using snmpwalk commands and verify firewall rules permit UDP port 161 traffic.
Performance optimization addresses slow graph generation and delayed data collection. Increase PHP memory limits, optimize database queries, and consider implementing the Spine poller for improved performance.
Log file analysis provides insights into system errors and performance bottlenecks. Monitor Cacti logs located in /var/www/html/cacti/log/ and system logs in /var/log/ for troubleshooting information.
Maintenance and Monitoring
Regular maintenance ensures optimal Cacti performance and data integrity. Establish weekly maintenance procedures including database optimization, log rotation, and performance monitoring.
Update procedures involve backing up configuration and data before applying software updates. Test updates in development environments before production deployment.
Database maintenance includes optimizing tables, removing obsolete data, and monitoring storage utilization. Configure automatic log rotation to prevent disk space exhaustion:
sudo nano /etc/logrotate.d/cactiPerformance monitoring tracks system resource utilization, response times, and data collection success rates. Monitor CPU usage, memory consumption, and disk I/O to identify potential bottlenecks.
Backup verification ensures data recovery capabilities in case of system failures. Test backup restoration procedures regularly to validate backup integrity and recovery processes.
Congratulations! You have successfully installed Cacti. Thanks for using this tutorial for installing the Cacti on your AlmaLinux OS 10 system. For additional help or useful information, we recommend you check the official Cacti website.