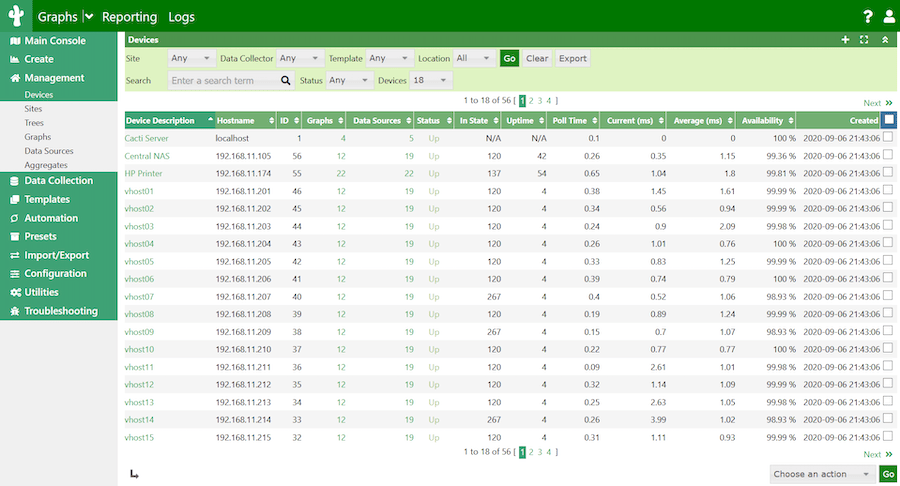
How To Install Cacti on Ubuntu 22.04 LTS

In this tutorial, we will show you how to install Cacti on Ubuntu 22.04 LTS. Cacti is a powerful, open-source, web-based network monitoring tool that allows system administrators and IT professionals to monitor network devices and system metrics effectively. It provides a user-friendly interface for collecting and visualizing data from various devices, making it easier to identify performance issues and ensure optimal network health. In this comprehensive guide, we will walk you through the step-by-step process of installing Cacti on Ubuntu 24.04 LTS, enabling you to set up a robust network monitoring solution for your infrastructure.
Prerequisites
Before proceeding with the Cacti installation, ensure that your system meets the following requirements:
- A server running Ubuntu 24.04 LTS
- At least 2GB of RAM
- A minimum of 20GB of disk space
- Access to the command line with sudo privileges
Step 1: Update System Packages
To begin, update your system packages to ensure you have the latest versions and security patches. Open a terminal and run the following commands:
sudo apt update
sudo apt upgrade
Keeping your system up-to-date is crucial for maintaining stability and security.
Step 2: Install LAMP Stack
Cacti requires a LAMP (Linux, Apache, MariaDB, PHP) stack to function properly. Let’s install each component:
Install Apache
To install the Apache web server, run the following command:
sudo apt install apache2Once installed, start and enable the Apache service:
sudo systemctl start apache2
sudo systemctl enable apache2
Install MariaDB
Install MariaDB, a popular open-source database server, by running:
sudo apt install mariadb-serverAfter installation, secure your MariaDB installation by running the security script:
sudo mysql_secure_installationFollow the prompts to set a root password and configure other security options.
Install PHP
Install PHP and the necessary extensions for Cacti:
sudo apt install php php-mysql php-snmp php-gd php-xmlVerify your PHP installation by creating a test file:
echo "" | sudo tee /var/www/html/info.phpAccess the test file in your browser at http://your_server_ip/info.php. If PHP is installed correctly, you should see the PHP information page.
Step 3: Configure MariaDB for Cacti
Create Cacti Database
Log in to the MariaDB shell:
sudo mysql -u root -pCreate a database and user for Cacti:
CREATE DATABASE cacti;
GRANT ALL PRIVILEGES ON cacti.* TO 'cacti_user'@'localhost' IDENTIFIED BY 'your_password';
FLUSH PRIVILEGES;
EXIT;
Replace your_password with a strong password of your choice.
Import Timezone Data
Import the timezone data into MariaDB:
sudo mysql_tzinfo_to_sql /usr/share/zoneinfo | sudo mysql -u root mysql -pStep 4: Install and Configure Cacti
Download Cacti
Download the latest version of Cacti from the official website:
wget https://www.cacti.net/downloads/cacti-latest.tar.gzExtract and Move Files
Extract the downloaded archive and move the files to the web directory:
tar xzf cacti-latest.tar.gz
sudo mv cacti-* /var/www/html/cacti
Configure Cacti Database Settings
Edit the Cacti configuration file to set the database credentials:
sudo nano /var/www/html/cacti/include/config.phpLocate the following lines and update them with your database information:
$database_type = 'mysql';
$database_default = 'cacti';
$database_hostname = 'localhost';
$database_username = 'cacti_user';
$database_password = 'your_password';
Save and close the file.
Set Permissions
Set the correct permissions for the Cacti directory:
sudo chown -R www-data:www-data /var/www/html/cacti/
sudo chmod -R 755 /var/www/html/cacti/
Step 5: Configure Apache for Cacti
Create Virtual Host Configuration
Create an Apache virtual host configuration file for Cacti:
sudo nano /etc/apache2/sites-available/cacti.confAdd the following content:
<VirtualHost *:80>
    ServerName your_domain.com
    DocumentRoot /var/www/html/cacti

    <Directory /var/www/html/cacti>
        AllowOverride All
        Require all granted
    </Directory>

    ErrorLog ${APACHE_LOG_DIR}/cacti_error.log
    CustomLog ${APACHE_LOG_DIR}/cacti_access.log combined
</VirtualHost>
Replace your_domain.com with your domain name or server IP address.
Enable the virtual host:
sudo a2ensite cacti.confRestart Apache
Restart the Apache web server to apply the changes:
sudo systemctl restart apache2Step 6: Access Cacti Web Interface
Initial Setup via Web Browser
Open a web browser and navigate to http://your_domain.com/cacti or http://your_server_ip/cacti.
You will be redirected to the Cacti setup wizard.
Complete Installation Wizard
Follow the on-screen instructions to complete the installation wizard:
- Verify the installation paths and click “Next”.
- Configure the database settings and click “Finish”.
- Log in using the default credentials: username “admin” and password “admin”.
- Change the default password when prompted.
Step 7: Post-Installation Configuration
Add Devices for Monitoring
To start monitoring your network devices:
- Click on “Devices” in the Cacti menu.
- Click “Add” to create a new device.
- Enter the device details, such as hostname or IP address, SNMP settings, and device template.
- Click “Create” to add the device.
Set Up Alerts
Configure alerts to receive notifications when specific network events occur:
- Click on “Thresholds” in the Cacti menu.
- Click “Add” to create a new threshold.
- Define the threshold conditions and actions to be taken when the conditions are met.
- Click “Create” to save the threshold.

Troubleshooting Common Issues
If you encounter any issues during the Cacti installation or setup, consider the following troubleshooting tips:
- Permission Errors: Ensure that the Cacti directory and its subdirectories have the correct ownership and permissions. Refer to Step 4 for the appropriate commands.
- Database Connection Errors: Double-check your database credentials in the Cacti configuration file (
/var/www/html/cacti/include/config.php). Verify that the username, password, and database name are correct. - Graphs Not Displaying: Check if the necessary SNMP settings are configured correctly for your devices. Ensure that the SNMP service is running on the monitored devices and that the SNMP community string is properly set.
Congratulations! You have successfully installed Cacti. Thanks for using this tutorial for installing Cacti’s free and open-source web-based network monitoring and graphing tool on Ubuntu 24.04 LTS system. For additional help or useful information, we recommend you check the official Cacti website.