In this tutorial, we will show you how to install CloudPanel on Ubuntu 20.04 LTS. For those of you who didn’t know, CloudPanel is an open-source server management control panel designed to be fast, easy to use, and customizable. This piece of software supports the management of Domains, Linux services, Cron jobs, FTP services, System security through IP and Bots blocking, User management, and Cloud platforms support, among many others.
This article assumes you have at least basic knowledge of Linux, know how to use the shell, and most importantly, you host your site on your own VPS. The installation is quite simple and assumes you are running in the root account, if not you may need to add ‘sudo‘ to the commands to get root privileges. I will show you the step-by-step installation of the CloudPanel Control Panel on Ubuntu 20.04 (Focal Fossa). You can follow the same instructions for Ubuntu 18.04, 16.04, and any other Debian-based distribution like Linux Mint.
Prerequisites
- A server running one of the following operating systems: Ubuntu 20.04, 18.04, and any other Debian-based distribution like Linux Mint or elementary OS.
- It’s recommended that you use a fresh OS install to prevent any potential issues.
- A
non-root sudo useror access to theroot user. We recommend acting as anon-root sudo user, however, as you can harm your system if you’re not careful when acting as the root.
Install CloudPanel on Ubuntu 20.04 LTS Focal Fossa
Step 1. First, make sure that all your system packages are up-to-date by running the following apt commands in the terminal.
sudo apt update
sudo apt upgrade
Step 2. Installing Postfix.
CloudPanel requires a Postfix mail transport agent to handle emails. Run the following command to install it:
sudo apt install gnupg apt-transport-https
sudo apt install postfix
During the installation, you’ll be prompted to select the configuration settings. Choose an Internet Site:
                    ┌──────┤ Postfix Configuration ├───────┐
                    │ General type of mail configuration:  │
                    │                                      │
                    │       No configuration               │
                    │       Internet Site                  │
                    │       Internet with smarthost        │
                    │       Satellite system               │
                    │       Local only                     │
                    │                                      │
                    │                                      │
                    │       <Ok>           <Cancel>        │
                    │                                      │
                    └──────────────────────────────────────┘
Step 3. Installing Node.js.
Now we add the Node.js repository to Ubuntu 20.04:
curl -s https://deb.nodesource.com/gpgkey/nodesource.gpg.key | sudo apt-key add -
curl -sS https://dl.yarnpkg.com/debian/pubkey.gpg | sudo apt-key add -
echo 'deb https://deb.nodesource.com/node_14.x focal main' | sudo tee /etc/apt/sources.list.d/nodesource.list
echo 'deb https://dl.yarnpkg.com/debian/ stable main' | sudo tee /etc/apt/sources.list.d/yarn.list
Step 4. Installing PHP.
Now we add the PHP PPA repository:
sudo add-apt-repository ppa:ondrej/php
sudo apt-get update
Step 5. Installing Percona.
Now we add the Percona APT repository:
wget https://repo.percona.com/apt/percona-release_latest.$(lsb_release -sc)_all.deb
sudo apt install ./percona-release_latest.$(lsb_release -sc)_all.deb
sudo percona-release setup ps57
Step 6. Installing CloudPanel Dependencies.
Now that you have added the repositories above, install these dependencies to support CloudPanel:
cd /tmp
wget http://ftp.us.debian.org/debian/pool/main/s/startpar/startpar_0.64-3_amd64.deb
wget http://ftp.us.debian.org/debian/pool/main/s/sysvinit/sysvinit-utils_2.96-6_amd64.deb
wget http://ftp.us.debian.org/debian/pool/main/l/lsb/lsb-base_11.1.0_all.deb
wget http://ftp.us.debian.org/debian/pool/main/i/insserv/insserv_1.21.0-1_amd64.deb
wget http://ftp.us.debian.org/debian/pool/main/s/sysvinit/sysv-rc_2.96-6_all.deb
wget http://ftp.us.debian.org/debian/pool/main/r/rcconf/rcconf_3.2+nmu1_all.deb
sudo dpkg -i *.deb
Step 7. Installing CloudPanel on Ubuntu 20.04.
First, add CloudPanel’s Debian Buster repository to Ubuntu:
echo "deb https://d17k9fuiwb52nc.cloudfront.net/ buster main" | sudo tee /etc/apt/sources.list.d/packages.cloudpanel.io.list
sudo curl -Lks https://d17k9fuiwb52nc.cloudfront.net/key.gpg | sudo apt-key add -
sudo apt update
Next, run the commands below to download the CloudPanel file:
wget https://github.com/cloudpanel-io/cloudpanel-ce/releases/download/v1.0.5/cloudpanel.deb
Then, install package Cloudpanel package on Ubuntu 20.04:
sudo apt install ./cloudpanel.deb
Set root user database password when asked.

*If you get an error after the installation, simply run the commands below to force installation:
sudo apt install -f
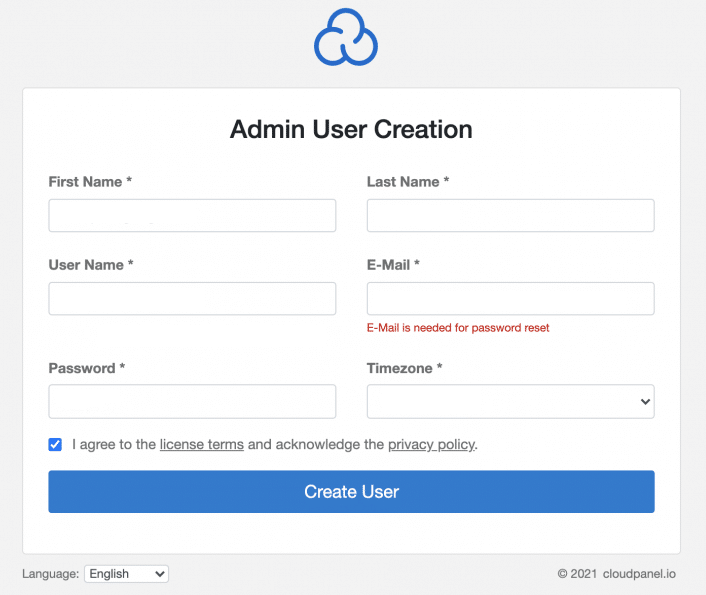
Step 8. Accessing CloudPanel Dashboard on Ubuntu.
Once successfully installed, open your web browser and browser to the server hostname or IP address followed by 8443:
https://your-ip-address:8443

Congratulations! You have successfully installed CloudPanel. Thanks for using this tutorial for installing the CloudPanel Control Panel on your Ubuntu 20.04 LTS Focal Fossa system. For additional help or useful information, we recommend you check the official CloudPanel website.