How To Install CockroachDB on Ubuntu 24.04 LTS

CockroachDB is a distributed SQL database designed to provide scalability, resilience, and consistency across multiple nodes. It offers a powerful solution for businesses seeking to manage large-scale, mission-critical data with high availability and automatic failover. CockroachDB’s architecture ensures that your data remains accessible even in the face of node failures or network partitions. In this comprehensive guide, we will walk you through the step-by-step process of installing CockroachDB on Ubuntu 24.04 LTS, enabling you to harness its capabilities for your database needs.
Prerequisites
System Requirements
Before proceeding with the installation, ensure that your Ubuntu 24.04 LTS system meets the minimum hardware requirements. CockroachDB recommends at least 4GB of RAM and 2 CPU cores for optimal performance. However, the actual requirements may vary depending on your specific workload and data size.
Initial Setup
To begin, make sure your Ubuntu 24.04 LTS system is up to date by running the following commands:
sudo apt update
sudo apt upgrade
It is also recommended to create a non-root user with sudo privileges to run CockroachDB. This practice enhances security by avoiding the use of the root account for database operations.
Step-by-Step Installation Guide
1. Update System and Install Dependencies
Begin by updating the package lists and installing the necessary dependencies. Run the following command:
sudo apt install apt-transport-https ca-certificates curlThese packages are required for securely downloading and installing CockroachDB.
2. Download CockroachDB Binary
Visit the official CockroachDB download page and download the latest stable version for Linux. Alternatively, you can use the wget command to download the binary directly from the command line. For example:
wget https://binaries.cockroachdb.com/cockroach-v22.1.7.linux-amd64.tgzOnce the download is complete, extract the archive using the following command:
tar xvf cockroach-v22.1.7.linux-amd64.tgz3. Move Binary to PATH
To make the cockroach binary accessible system-wide, move it to a directory in your system’s PATH. A common location is /usr/local/bin. Use the following command:
sudo mv cockroach-v22.1.7.linux-amd64/cockroach /usr/local/bin/4. Verify Installation
To verify that CockroachDB is installed correctly, run the following command:
cockroach versionIf the installation was successful, you should see the version number of CockroachDB displayed in the output.
5. Initialize the CockroachDB Cluster
Create a dedicated directory to store CockroachDB data. For example:
mkdir /var/lib/cockroachNext, start a single-node cluster using the cockroach start-single-node command with the appropriate flags for storage and network settings:
cockroach start-single-node --insecure --store=/var/lib/cockroach --listen-addr=localhost:26257 --http-addr=localhost:8080This command starts CockroachDB in insecure mode, specifies the storage directory, and sets the listening addresses for the database and Admin UI.
6. Configure Systemd Service
To run CockroachDB as a background service and ensure it starts automatically on system boot, create a systemd service file. Open a new file with a text editor:
sudo nano /etc/systemd/system/cockroachdb.serviceAdd the following content to the file:
[Unit]
Description=CockroachDB
After=network.target

[Service]
Type=notify
User=<username>
ExecStart=/usr/local/bin/cockroach start-single-node --store=/var/lib/cockroach --listen-addr=localhost:26257 --http-addr=localhost:8080
Restart=always
RestartSec=5

[Install]
WantedBy=default.target
Replace <username> with the non-root user you created earlier. Save the file and exit the editor.
7. Start and Enable the Service
Reload the systemd manager configuration to recognize the new service file:
sudo systemctl daemon-reloadStart the CockroachDB service:
sudo systemctl start cockroachdbEnable the service to start automatically on system boot:
sudo systemctl enable cockroachdb8. Accessing the Admin UI
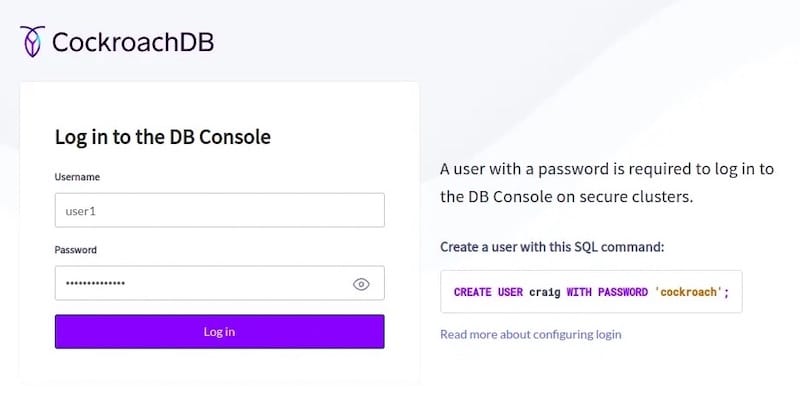
CockroachDB provides a web-based Admin UI for monitoring and managing your cluster. By default, it is accessible at http://localhost:8080. Open a web browser and navigate to this URL to access the Admin UI.
The Admin UI offers a range of features, including:
-
- Overview of cluster health and performance metrics
-
- Detailed information about nodes, databases, and tables
-
- SQL query monitoring and execution statistics
-
- Troubleshooting and diagnostic tools

Post-Installation Configuration
1. Secure the Installation
By default, CockroachDB is installed in insecure mode. To secure your installation, you should enable secure connections using certificates and create an admin user with a strong password.
Generate a self-signed certificate and key using the cockroach cert command:
cockroach cert create-node localhost --certs-dir=certs --ca-key=my-safe-directory/ca.keyCreate an admin user with a password:
cockroach sql --certs-dir=certs --execute="CREATE USER admin WITH PASSWORD 'strongpassword';"Update the systemd service file to use the secure configuration:
ExecStart=/usr/local/bin/cockroach start-single-node --certs-dir=certs --store=/var/lib/cockroach --listen-addr=localhost:26257 --http-addr=localhost:8080Restart the CockroachDB service for the changes to take effect:
sudo systemctl restart cockroachdb2. Basic Database Operations
With CockroachDB installed and running, you can perform basic database operations using the built-in SQL shell. Connect to the shell using the following command:
cockroach sql --certs-dir=certs --user=adminOnce connected, you can create databases, tables, and execute SQL queries. For example:
CREATE DATABASE mydb;
USE mydb;
CREATE TABLE users (id INT PRIMARY KEY, name STRING);
INSERT INTO users VALUES (1, 'John Doe'), (2, 'Jane Smith');
SELECT * FROM users;
Troubleshooting Common Issues
If you encounter any issues during the installation or operation of CockroachDB, here are a few common problems and their solutions:
-
- Network connectivity issues: Ensure that the specified listening addresses and ports are accessible and not blocked by firewalls.
-
- Permission errors: Make sure the user running CockroachDB has the necessary permissions to access the specified directories and files.
-
- Insufficient resources: Verify that your system meets the minimum hardware requirements and allocate additional resources if needed.
Congratulations! You have successfully installed CockroachDB. Thanks for using this tutorial for installing CockroachDB on the Ubuntu system. For additional help or useful information, we recommend you check the official CockroachDB website.