How To Install CodeIgniter on openSUSE

In this tutorial, we will show you how to install CodeIgniter on openSUSE. CodeIgniter, a powerful PHP framework, offers a simple and elegant toolkit to create full-featured web applications. With its exceptional performance, nearly zero configuration, and straightforward documentation, CodeIgniter stands out in the PHP community.
This article assumes you have at least basic knowledge of Linux, know how to use the shell, and most importantly, you host your site on your own VPS. The installation is quite simple and assumes you are running in the root account, if not you may need to add ‘sudo‘ to the commands to get root privileges. I will show you the step-by-step installation of the CodeIgniter PHP framework on openSUSE.
Prerequisites
- A server running one of the following operating systems: openSUSE.
- It’s recommended that you use a fresh OS install to prevent any potential issues.
- You will need access to the terminal to execute commands. openSUSE provides the Terminal application for this purpose. It can be found in your Applications menu.
- You’ll need an active internet connection to download CodeIgniter and its dependencies.
- You’ll need administrative (root) access or a user account with sudo privileges.
Install CodeIgniter on openSUSE
Step 1. Starting with an updated system is a best practice in Linux administration. It ensures that all software packages are up-to-date, minimizing potential security vulnerabilities. To update your openSUSE system, open the terminal and execute the following commands:
sudo zypper refresh
sudo zypper update
Step 2. Installing Apache Web Server and PHP.
Apache is a popular web server that will serve your CodeIgniter application, while PHP is the language in which CodeIgniter is written. To install Apache and PHP, run the following commands:
sudo zypper install apache2
sudo zypper install php
After installation, start and enable Apache to run on the system boot with these commands:
sudo systemctl start apache2
sudo systemctl enable apache2
Step 3. Installing Composer.
Composer is a dependency manager for PHP. It simplifies the process of managing and integrating external PHP libraries in your projects, including CodeIgniter. To install Composer on openSUSE, execute the following commands:
php -r "copy('https://getcomposer.org/installer', 'composer-setup.php');"
php composer-setup.php
php -r "unlink('composer-setup.php');"
sudo mv composer.phar /usr/local/bin/composer
Step 4. Installing CodeIgniter on openSUSE.
With Composer installed you can now download and install CodeIgniter. Navigate to your desired directory and use Composer to create a new CodeIgniter project:
cd /path/to/your/directory
composer create-project codeigniter4/appstarter codeigniter
After installation, configure your application by editing the application/config/config.php file. This file contains various settings that control your CodeIgniter application.
Step 5. Configure Apache for CodeIgniter.
Apache, a popular web server, needs to be configured to serve your CodeIgniter application. Create a new Apache configuration file for CodeIgniter and edit it to match your application’s requirements:
sudo nano /etc/apache2/conf.d/codeigniter.conf
Ensure that the DocumentRoot directive points to your CodeIgniter project’s public directory.
Finally, restart Apache to apply the changes:
sudo systemctl restart apache2
Step 6. Test the Installation.
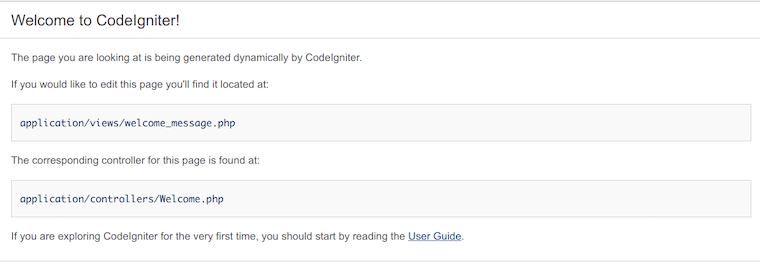
After setting up Apache, test your installation by accessing your application in a web browser. If everything is set up correctly, you should see the default CodeIgniter welcome page.

Congratulations! You have successfully installed CodeIgniter. Thanks for using this tutorial for installing the CodeIgniter PHP framework on your openSUSE system. For additional or useful information, we recommend you check the official CodeIgniter website.