How To Install Concrete CMS on Fedora 41

Concrete CMS (formerly known as Concrete5) is a powerful, user-friendly content management system that enables website creation and management without extensive technical knowledge. Its intuitive interface features a drag-and-drop page builder, making it an excellent choice for businesses, educational institutions, and individual developers. Fedora 41, with its cutting-edge features and robust package management system, provides an ideal environment for running Concrete CMS. This comprehensive guide walks through the complete installation process, from setting up prerequisites to configuring your first Concrete CMS site on Fedora 41.
Prerequisites and System Requirements
Before diving into the installation process, ensuring your system meets all requirements will help avoid complications later. Concrete CMS runs optimally on Fedora 41 with specific hardware and software configurations.
Hardware Requirements:
- Minimum 2GB RAM (4GB recommended for production environments)
- 20GB free disk space (more for larger websites)
- 64-bit processor architecture (x86_64)
- Stable internet connection for downloading packages
Software Prerequisites:
- Fedora 41 with up-to-date packages
- Apache HTTP Server 2.4 or newer
- PHP 8.1 or higher (with specific extensions)
- MariaDB 10.5 or higher
- Required PHP extensions: gd, mysqlnd, xml, dom, mbstring, zip
Permission Requirements:
- Root access or sudo privileges for installing packages
- Appropriate file permissions for web directories
- SELinux knowledge for proper security context configuration
Starting with a fresh Fedora 41 installation ensures compatibility with current package versions and reduces potential conflicts during the installation process.
Step 1: Preparing Your Fedora 41 System
Begin by ensuring your Fedora system is fully updated with the latest packages and security patches. This step is crucial for stability and compatibility.
sudo dnf check-update
sudo dnf upgrade -y
Configure your system’s hostname if you haven’t already. This helps identify your server on the network and is particularly important if you’re setting up multiple web servers.
sudo hostnamectl set-hostname concrete-cms-serverVerify your hostname configuration:
hostnameNext, configure firewall rules to allow web traffic through ports 80 (HTTP) and 443 (HTTPS):
sudo firewall-cmd --permanent --add-service=http
sudo firewall-cmd --permanent --add-service=https
sudo firewall-cmd --reload
Review SELinux status and ensure it’s properly configured. While you could disable SELinux, it’s better to configure it correctly for enhanced security:
sudo sestatusFor optimal performance, consider adjusting system swappiness for web server environments:
sudo echo "vm.swappiness=10" >> /etc/sysctl.conf
sudo sysctl -p
Step 2: Installing Apache Web Server
Apache is the recommended web server for Concrete CMS on Fedora 41. Install it using DNF:
sudo dnf install httpd -yAfter installation, start Apache and enable it to launch automatically at boot:
sudo systemctl start httpd
sudo systemctl enable httpd
Verify Apache is running correctly:
sudo systemctl status httpdTest your Apache installation by accessing your server’s IP address in a web browser. You should see the default Apache test page. Find your server’s IP address using:
ip addr showConfigure Apache’s main configuration file for optimal performance:
sudo nano /etc/httpd/conf/httpd.confAdd or modify these settings for better performance:
ServerTokens Prod
ServerSignature Off
KeepAlive On
MaxKeepAliveRequests 100
KeepAliveTimeout 5
If you plan to host multiple websites, set up Apache virtual hosts:
sudo mkdir -p /var/www/concrete
sudo nano /etc/httpd/conf.d/concrete.conf
Add the following virtual host configuration:
<VirtualHost *:80>
    ServerAdmin webmaster@yourdomain.com
    DocumentRoot /var/www/concrete
    ServerName yourdomain.com
    ServerAlias www.yourdomain.com
    ErrorLog /var/log/httpd/concrete-error.log
    CustomLog /var/log/httpd/concrete-access.log combined
    <Directory /var/www/concrete>
        Options -Indexes +FollowSymLinks
        AllowOverride All
        Require all granted
    </Directory>
</VirtualHost>
Save the file and restart Apache:
sudo systemctl restart httpdStep 3: Installing PHP and Required Modules
Concrete CMS relies on PHP and several PHP extensions. Install PHP and all necessary modules with:
sudo dnf install php php-mysqlnd php-gd php-pecl-zip php-mbstring php-xml php-dom php-cli php-json php-intl php-curl -yAfter installation, verify PHP is working correctly:
php -vConfigure PHP for optimal performance with Concrete CMS by editing the php.ini file:
sudo nano /etc/php.iniModify these settings for better performance and security:
memory_limit = 256M
upload_max_filesize = 64M
post_max_size = 64M
max_execution_time = 300
max_input_time = 300
date.timezone = "Your/Timezone"
expose_php = Off
Replace “Your/Timezone” with your actual timezone (e.g., “America/New_York”). Save the file and restart Apache to apply the changes:
sudo systemctl restart httpdCreate a simple PHP info file to test if PHP is functioning properly:
echo "<?php phpinfo(); ?>" | sudo tee /var/www/html/info.phpAccess this file by navigating to http://your-server-ip/info.php in your web browser. If PHP is correctly installed, you’ll see detailed information about your PHP configuration.
Step 4: Installing and Configuring MariaDB
MariaDB serves as the database backend for Concrete CMS. Install it using:
sudo dnf install mariadb-server -yStart MariaDB and enable it to launch at boot:
sudo systemctl start mariadb
sudo systemctl enable mariadb
Verify MariaDB is running:
sudo systemctl status mariadbSecure your MariaDB installation:
sudo mysql_secure_installationDuring this process, you’ll be prompted to:
- Set a root password
- Remove anonymous users
- Disallow root login remotely
- Remove test database
- Reload privilege tables
For a production environment, answer “Y” to all these questions.
Next, create a database and user for Concrete CMS:
sudo mysql -u root -pEnter the root password you created earlier. At the MariaDB prompt, execute these commands:
CREATE DATABASE concrete;
CREATE USER 'concrete'@'localhost' IDENTIFIED BY 'strong_password';
GRANT ALL PRIVILEGES ON concrete.* TO 'concrete'@'localhost';
FLUSH PRIVILEGES;
EXIT;
Replace ‘strong_password’ with a secure password. These credentials will be used during the Concrete CMS installation process.
Step 5: Downloading Concrete CMS
Download the latest version of Concrete CMS directly from the official website:
cd /tmp
wget https://www.concretecms.org/application/files/6517/1693/2287/concrete-cms-9.3.2.zip
If the URL changes, visit the official Concrete CMS website to get the latest download link. Once downloaded, install the unzip utility if it’s not already installed:
sudo dnf install unzip -yExtract the downloaded archive:
unzip concrete-cms-9.3.2.zipMove the extracted files to your web server directory:
sudo mv concrete-cms-*/* /var/www/concrete/For a standard Apache setup without virtual hosts, you might use:
sudo mv concrete-cms-*/* /var/www/html/Set appropriate ownership and permissions:
sudo chown -R apache:apache /var/www/concrete/
sudo find /var/www/concrete/ -type d -exec chmod 755 {} \;
sudo find /var/www/concrete/ -type f -exec chmod 644 {} \;
Ensure these directories are writable by the web server:
sudo chmod -R 775 /var/www/concrete/application/files/
sudo chmod -R 775 /var/www/concrete/application/config/
sudo chmod -R 775 /var/www/concrete/packages/
sudo chmod -R 775 /var/www/concrete/updates/
Configure SELinux contexts appropriately:
sudo chcon -R -t httpd_sys_content_rw_t /var/www/concrete/Step 6: Installing Concrete CMS Files
With the files in place and permissions set, it’s time to configure Apache to serve Concrete CMS. If you’ve set up a virtual host as shown earlier, you’re already set. Otherwise, ensure your DocumentRoot points to the correct directory.
For SELinux, you may need additional configuration to allow Apache to connect to the database:
sudo setsebool -P httpd_can_network_connect_db 1To allow Concrete CMS to send emails, configure:
sudo setsebool -P httpd_can_sendmail 1If you’re using the default Apache configuration, create a symbolic link if needed:
sudo ln -s /var/www/concrete /var/www/html/concreteRestart Apache to apply all changes:
sudo systemctl restart httpdStep 7: Web-Based Installation Process
Now access your Concrete CMS installation through a web browser by navigating to your server’s IP address or domain name. If you installed in a subdirectory, include that in the URL:
http://your-server-ip/or
http://your-domain.com/
You’ll be presented with the Concrete CMS installation wizard. Follow these steps:
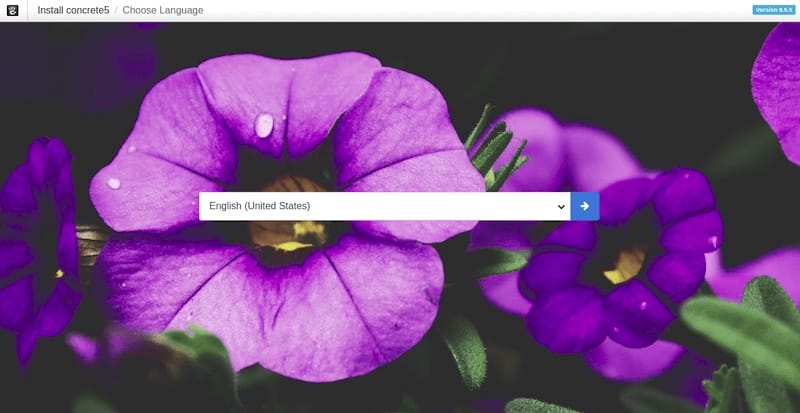
- Language Selection: Choose your preferred language from the dropdown menu.
- Environment Check: The system will automatically check if your server meets all requirements. Address any issues that appear before proceeding.
- Database Configuration:
- Server: localhost
- Username: concrete (or the database user you created)
- Password: your_password
- Database: concrete (or your database name)
- Site Configuration:
- Site Name: Enter your website name
- Administrator Email: Your email address
- Administrator Password: Create a strong password
- Starting Point: Choose a starting template for your site
- Click “Install Concrete CMS” to begin the installation process.
The installation may take several minutes to complete. Once finished, you’ll see a success message and can begin using your new Concrete CMS website.
Step 8: Post-Installation Configuration
After successful installation, implement these security and performance enhancements:
Security Hardening:
- Update your Fedora system regularly
- Configure regular backups of your database and files
- Set up a firewall with minimal necessary ports open
- Consider implementing HTTPS with Let’s Encrypt:
sudo dnf install certbot python3-certbot-apache
sudo certbot --apache
Set Up Cron Jobs for scheduled tasks:
sudo nano /etc/cron.d/concreteAdd these lines:
# Run Concrete CMS maintenance tasks every hour
0 * * * * apache /usr/bin/php /var/www/concrete/concrete/bin/concrete5 c5:job run -v
Configure Backups:
sudo mkdir -p /var/backups/concrete
sudo chown apache:apache /var/backups/concrete
Create a backup script:
sudo nano /usr/local/bin/concrete-backup.shAdd your backup logic, then make it executable and schedule it:
sudo chmod +x /usr/local/bin/concrete-backup.sh
sudo nano /etc/cron.d/concrete-backup
Add a line to run backups daily:
0 2 * * * root /usr/local/bin/concrete-backup.shStep 9: Managing SELinux for Concrete CMS
SELinux provides enhanced security but requires proper configuration for web applications. For Concrete CMS on Fedora 41:
Monitor SELinux alerts:
sudo tail -f /var/log/audit/audit.log | grep deniedCreate custom SELinux policies for Concrete CMS operations:
sudo ausearch -c 'httpd' --raw | audit2allow -M concrete_policy
sudo semodule -i concrete_policy.pp
If you encounter persistent SELinux issues, consider using these commands:
sudo semanage fcontext -a -t httpd_sys_rw_content_t "/var/www/concrete/application/files(/.*)?"
sudo semanage fcontext -a -t httpd_sys_rw_content_t "/var/www/concrete/application/config(/.*)?"
sudo semanage fcontext -a -t httpd_sys_rw_content_t "/var/www/concrete/packages(/.*)?"
sudo semanage fcontext -a -t httpd_sys_rw_content_t "/var/www/concrete/updates(/.*)?"
sudo restorecon -Rv /var/www/concrete/
Step 10: Troubleshooting Common Installation Issues
Database Connection Problems:
- Verify database credentials are correct
- Ensure MariaDB is running:
sudo systemctl status mariadb - Check database user privileges:
SHOW GRANTS FOR 'concrete'@'localhost'; - Test connection:
mysql -u concrete -p concrete
Permission Errors:
- Check Apache ownership:
ls -la /var/www/concrete/ - Verify SELinux contexts:
ls -Z /var/www/concrete/ - Fix permissions:
sudo chown -R apache:apache /var/www/concrete/
PHP Configuration Issues:
- Verify PHP version:
php -v - Check PHP modules:
php -m - Adjust PHP settings in php.ini if needed
Apache Server Errors:
- Check error logs:
sudo tail -f /var/log/httpd/error_log - Verify Apache configuration:
sudo apachectl configtest - Restart Apache:
sudo systemctl restart httpd
SELinux Blocks:
- Check SELinux status:
getenforce - Review SELinux logs:
sudo ausearch -m avc -ts recent - Adjust SELinux boolean values as needed
Step 11: Updating and Maintaining Concrete CMS
Maintaining your Concrete CMS installation is crucial for security and performance:
Keep Concrete CMS Updated:
- Log in to the admin dashboard
- Navigate to Dashboard > System & Settings > Update Concrete
- Follow the prompts to install available updates
System Updates:
- Regularly update Fedora:
sudo dnf update -y - Restart services after significant updates:
sudo systemctl restart httpd mariadb
Backup Strategy:
- Database backups:
mysqldump -u concrete -p concrete > backup.sql - File backups:
tar -czf concrete-files.tar.gz /var/www/concrete/ - Test restore procedures periodically
Monitor Server Health:
- Check disk space:
df -h - Monitor memory usage:
free -m - Track system load:
top
Congratulations! You have successfully installed Concrete. Thanks for using this tutorial for installing Concrete CMS on Fedora 41 system. For additional help or useful information, we recommend you check the Concrete website.