In this tutorial, we will show you how to install and configure Squid 3 on CentOS. For those of you who didn’t know, Squid is a caching proxy for the Web supporting HTTP, HTTPS, FTP, and more. Squid proxy is used by various organizations and internet providers to reduce bandwidth and increase response time.
This article assumes you have at least basic knowledge of Linux, know how to use the shell, and most importantly, you host your site on your own VPS. The installation is quite simple and assumes you are running in the root account, if not you may need to add ‘sudo‘ to the commands to get root privileges. I will show you the step-by-step installation of Squid on the CentOS Linux server.
Prerequisites
- A server running one of the following operating systems: CentOS or RHEL-based.
- It’s recommended that you use a fresh OS install to prevent any potential issues.
- SSH access to the server (or just open Terminal if you’re on a desktop).
- An active internet connection. You’ll need an internet connection to download the necessary packages and dependencies for Squid.
- A
non-root sudo useror access to theroot user. We recommend acting as anon-root sudo user, however, as you can harm your system if you’re not careful when acting as the root.
Install and Configure Squid 3 on CentOS
Step 1. First, you must update yum the repository and packages by typing the below command:
sudo yum -y update
Step 2. Install and Configure Squid 3 on CentOS.
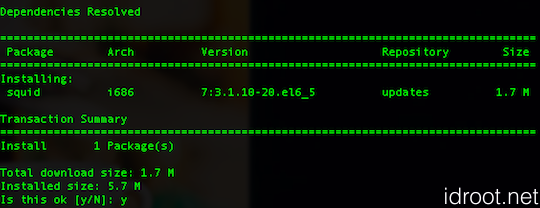
Install the squid package and dependencies using the below command :
sudo yum -y install squid

Step 3. Configuration Squid.
Edit squid configuration file ‘/etc/squid/squid.conf’
nano /etc/squid/squid.conf
# Recommended minimum configuration:
auth_param basic program /usr/lib/squid/ncsa_auth /etc/squid/squid_passwd
acl ncsa_users proxy_auth REQUIRED
http_access allow ncsa_users

acl manager proto cache_object
acl localhost src 127.0.0.1/32
acl to_localhost dst 127.0.0.0/8 0.0.0.0/32
acl SSL_ports port 443
acl Safe_ports port 80        # http
acl Safe_ports port 21        # ftp
acl Safe_ports port 443        # https
acl Safe_ports port 1025-65535    # unregistered ports
acl Safe_ports port 280        # http-mgmt
acl Safe_ports port 488        # gss-http
acl Safe_ports port 591        # filemaker
acl Safe_ports port 777        # multiling http
acl CONNECT method CONNECT

http_access allow manager localhost
http_access deny manager
http_access deny !Safe_ports
http_access deny CONNECT !SSL_ports
http_access deny all
http_port 3128

hierarchy_stoplist cgi-bin ?
coredump_dir /var/spool/squid
cache deny all

refresh_pattern ^ftp:        1440    20%    10080
refresh_pattern ^gopher:    1440    0%    1440
refresh_pattern -i (/cgi-bin/|\?) 0    0%    0
refresh_pattern .        0    20%    4320

icp_port 3130

forwarded_for off

request_header_access Allow allow all
request_header_access Authorization allow all
request_header_access Proxy-Authorization allow all
request_header_access Proxy-Authenticate allow all
request_header_access Cache-Control allow all
request_header_access Content-Encoding allow all
request_header_access Content-Length allow all
request_header_access Content-Type allow all
request_header_access Date allow all
request_header_access Expires allow all
request_header_access Host allow all
request_header_access If-Modified-Since allow all
request_header_access Last-Modified allow all
request_header_access Location allow all
request_header_access Pragma allow all
request_header_access Accept allow all
request_header_access Accept-Charset allow all
request_header_access Accept-Encoding allow all
request_header_access Accept-Language allow all
request_header_access Content-Language allow all
request_header_access Mime-Version allow all
request_header_access Retry-After allow all
request_header_access Title allow all
request_header_access Connection allow all
request_header_access Proxy-Connection allow all
request_header_access User-Agent allow all
request_header_access Cookie allow all
request_header_access All deny all
visible_hostname idroot.us
Step 4. Create our authentication file which Squid can use to verify user authentications:
htpasswd -b /etc/squid/squid_passwd username password
Example:
htpasswd -b -c /etc/squid/squid_passwd ranty ratna
Congratulations! You have successfully installed squid. Thanks for using this tutorial for installing squid proxy on the CentOS system. For additional help or useful information, we recommend you check the official squid website.