How To Install DirectAdmin on Debian 12

DirectAdmin stands as one of the most efficient and cost-effective web hosting control panels available for Linux-based servers. Its lightweight nature, user-friendly interface, and comprehensive feature set make it an excellent choice for server administrators and hosting providers looking to streamline their operations. This guide provides detailed instructions for installing DirectAdmin on Debian 12 (Bookworm), ensuring you can set up and configure this powerful control panel without hassle.
What is DirectAdmin?
DirectAdmin is a web-based hosting control panel designed to simplify server management and administration tasks. Unlike other control panels that consume significant server resources, DirectAdmin offers a lightweight alternative without compromising functionality.
The control panel features three distinct access levels:
- Admin: Full control over the entire server
- Reseller: Ability to create and manage user accounts
- User: Management of individual websites, emails, and related services
When compared to alternatives like cPanel or Plesk, DirectAdmin distinguishes itself through its affordability, minimal resource requirements, and straightforward interface. The control panel provides comprehensive tools for managing domains, email accounts, databases, DNS settings, and file systems, all through an intuitive web interface.
Another significant advantage is DirectAdmin’s stability and regular update cycle, ensuring you always have access to the latest features and security patches.
System Requirements for DirectAdmin on Debian 12
Before proceeding with installation, verify that your server meets the following minimum requirements:
- CPU: A modern processor with at least 1 GHz (dual-core or better recommended)
- RAM: Minimum 1GB, though 2GB or more is recommended for optimal performance
- Storage: At least 10GB of free disk space for installation and basic operation
- Network: A static IP address is essential for proper operation
- Architecture: 64-bit architecture (Debian 12 only supports 64-bit)
DirectAdmin officially supports Debian 11 and newer versions, making Debian 12 Bookworm a perfect candidate for installation. A clean installation is recommended to avoid conflicts with existing software.
For optimal performance, consider implementing a simple partition structure:
- /boot: 500 MB
- swap: Twice your RAM (maximum 16GB)
- / (root): Remainder of the drive
Prerequisites Before Installation
Before installing DirectAdmin on your Debian 12 server, several preliminary steps are necessary:
Creating a DirectAdmin Client Account
First, you’ll need to register an account on the DirectAdmin website. This account will allow you to manage your license and access support resources.
- Visit the DirectAdmin official website
- Click on “Register” under the Account section
- Complete the registration form with your information
- Record the login credentials sent to your email address
Obtaining a License Key
DirectAdmin offers both paid licenses and trial options. For testing purposes, you can request a trial license:
- Log in to your DirectAdmin account
- Navigate to the license management section
- Select “Create Trial License”
- Add your server’s IP address to the license details
For production environments, purchasing a full license is recommended for continued access to updates and support.
Setting Up a Proper Hostname
DirectAdmin requires a properly configured Fully Qualified Domain Name (FQDN) for your server:
- Verify your current hostname:
hostname -f - If needed, set a proper hostname:
hostnamectl set-hostname server.yourdomain.com - Edit the /etc/hosts file to include your hostname:
nano /etc/hostsAdd the following line:
YOUR_SERVER_IP server.yourdomain.com server
Basic Firewall Configuration
A basic firewall setup is recommended before installing DirectAdmin:
apt install ufw
ufw allow ssh
ufw allow 2222/tcp
ufw enable
This configuration ensures SSH access remains available and opens port 2222, which DirectAdmin uses for its web interface.
Step 1: Update Your Debian 12 System
Before installing any new software, it’s crucial to ensure your system is fully up-to-date:
- Update package repositories:
apt update - Upgrade all installed packages:
apt upgrade -y - If kernel updates are installed, reboot the system:
[ -f /var/run/reboot-required ] && reboot -f
This ensures all system components are current and compatible with the DirectAdmin installation.
Step 2: Install Required Dependencies
DirectAdmin requires several packages to function correctly on Debian 12:
apt install wget perl gcc g++ make openssl libssl-dev bind9 libsasl2-dev libxml2-dev libaio-dev libmysqlclient-dev -yThese dependencies provide essential functionality:
- Development tools (gcc, g++, make) for compiling components
- Network tools and libraries for connectivity features
- Database and authentication libraries for backend operations
After installation, verify that all packages were installed correctly:
dpkg -l | grep -E "wget|perl|gcc|make|openssl|bind9|libsasl2|libxml2|libaio|libmysqlclient"Step 3: DirectAdmin License Activation
With your license key ready, you’ll need to prepare it for the installation process:
- Record your license information:
- Client ID (provided when you created your DirectAdmin account)
- License ID (provided when you activated your license)
- Keep this information handy as you’ll need it during the installation process.
For KnownHost licenses and certain other providers, IP-based licensing may be available, potentially simplifying this step.
Step 4: Download the DirectAdmin Installation Script
The installation process begins with obtaining the official setup script:
- Download the installation script:
wget http://www.directadmin.com/setup.sh - Make the script executable:
chmod 755 setup.sh - Verify the script permissions:
ls -la setup.sh
You should see executable permissions indicated by the “x” in the permission string.
Alternative method using a one-line command:
bash <(curl -LSs https://download.directadmin.com/setup.sh || curl -LSs https://download-alt.directadmin.com/setup.sh)This alternative approach downloads and executes the script in a single operation.
Step 5: Run the DirectAdmin Installation Script
With the script downloaded, you can now proceed with installation:
- For trial or purchased licenses, run:
./setup.sh YOUR_LICENSE_KEYReplace YOUR_LICENSE_KEY with your actual license key.
- For IP-based licenses through providers like KnownHost:
bash <(curl -Ss https://www.directadmin.com/setup.sh || wget -O - https://www.directadmin.com/setup.sh) 'auto'
During installation, you’ll be prompted to install required pre-installation packages. Type “Y” to proceed.
The installation process typically takes 15-30 minutes depending on your server’s specifications. The script will:
- Install required packages
- Configure essential services (DNS, MySQL, etc.)
- Set up DirectAdmin components
- Create initial admin credentials
When completed, the script will display your admin username and password. Make sure to record these credentials as they’re needed to access the control panel.
Step 6: Configure Firewall for DirectAdmin
After installation, ensure your firewall allows traffic to DirectAdmin’s web interface:
- If using UFW (recommended):
ufw allow 2222/tcp ufw reload - Verify firewall status:
ufw status
Port 2222 must be open for DirectAdmin to function properly. Additionally, consider opening these common service ports:
- HTTP (80/tcp)
- HTTPS (443/tcp)
- FTP (21/tcp)
- SMTP (25/tcp, 587/tcp)
- IMAP (143/tcp, 993/tcp)
- POP3 (110/tcp, 995/tcp)
Step 7: Access the DirectAdmin Control Panel
With installation complete and firewall properly configured, you can now access the DirectAdmin web interface:
- Open your web browser and navigate to:
http://YOUR_SERVER_IP:2222Replace YOUR_SERVER_IP with your server’s actual IP address.

- Log in using the admin credentials provided at the end of the installation process.
- Upon first login, you may be prompted to change your password for security reasons. Choose a strong, unique password to protect your server.
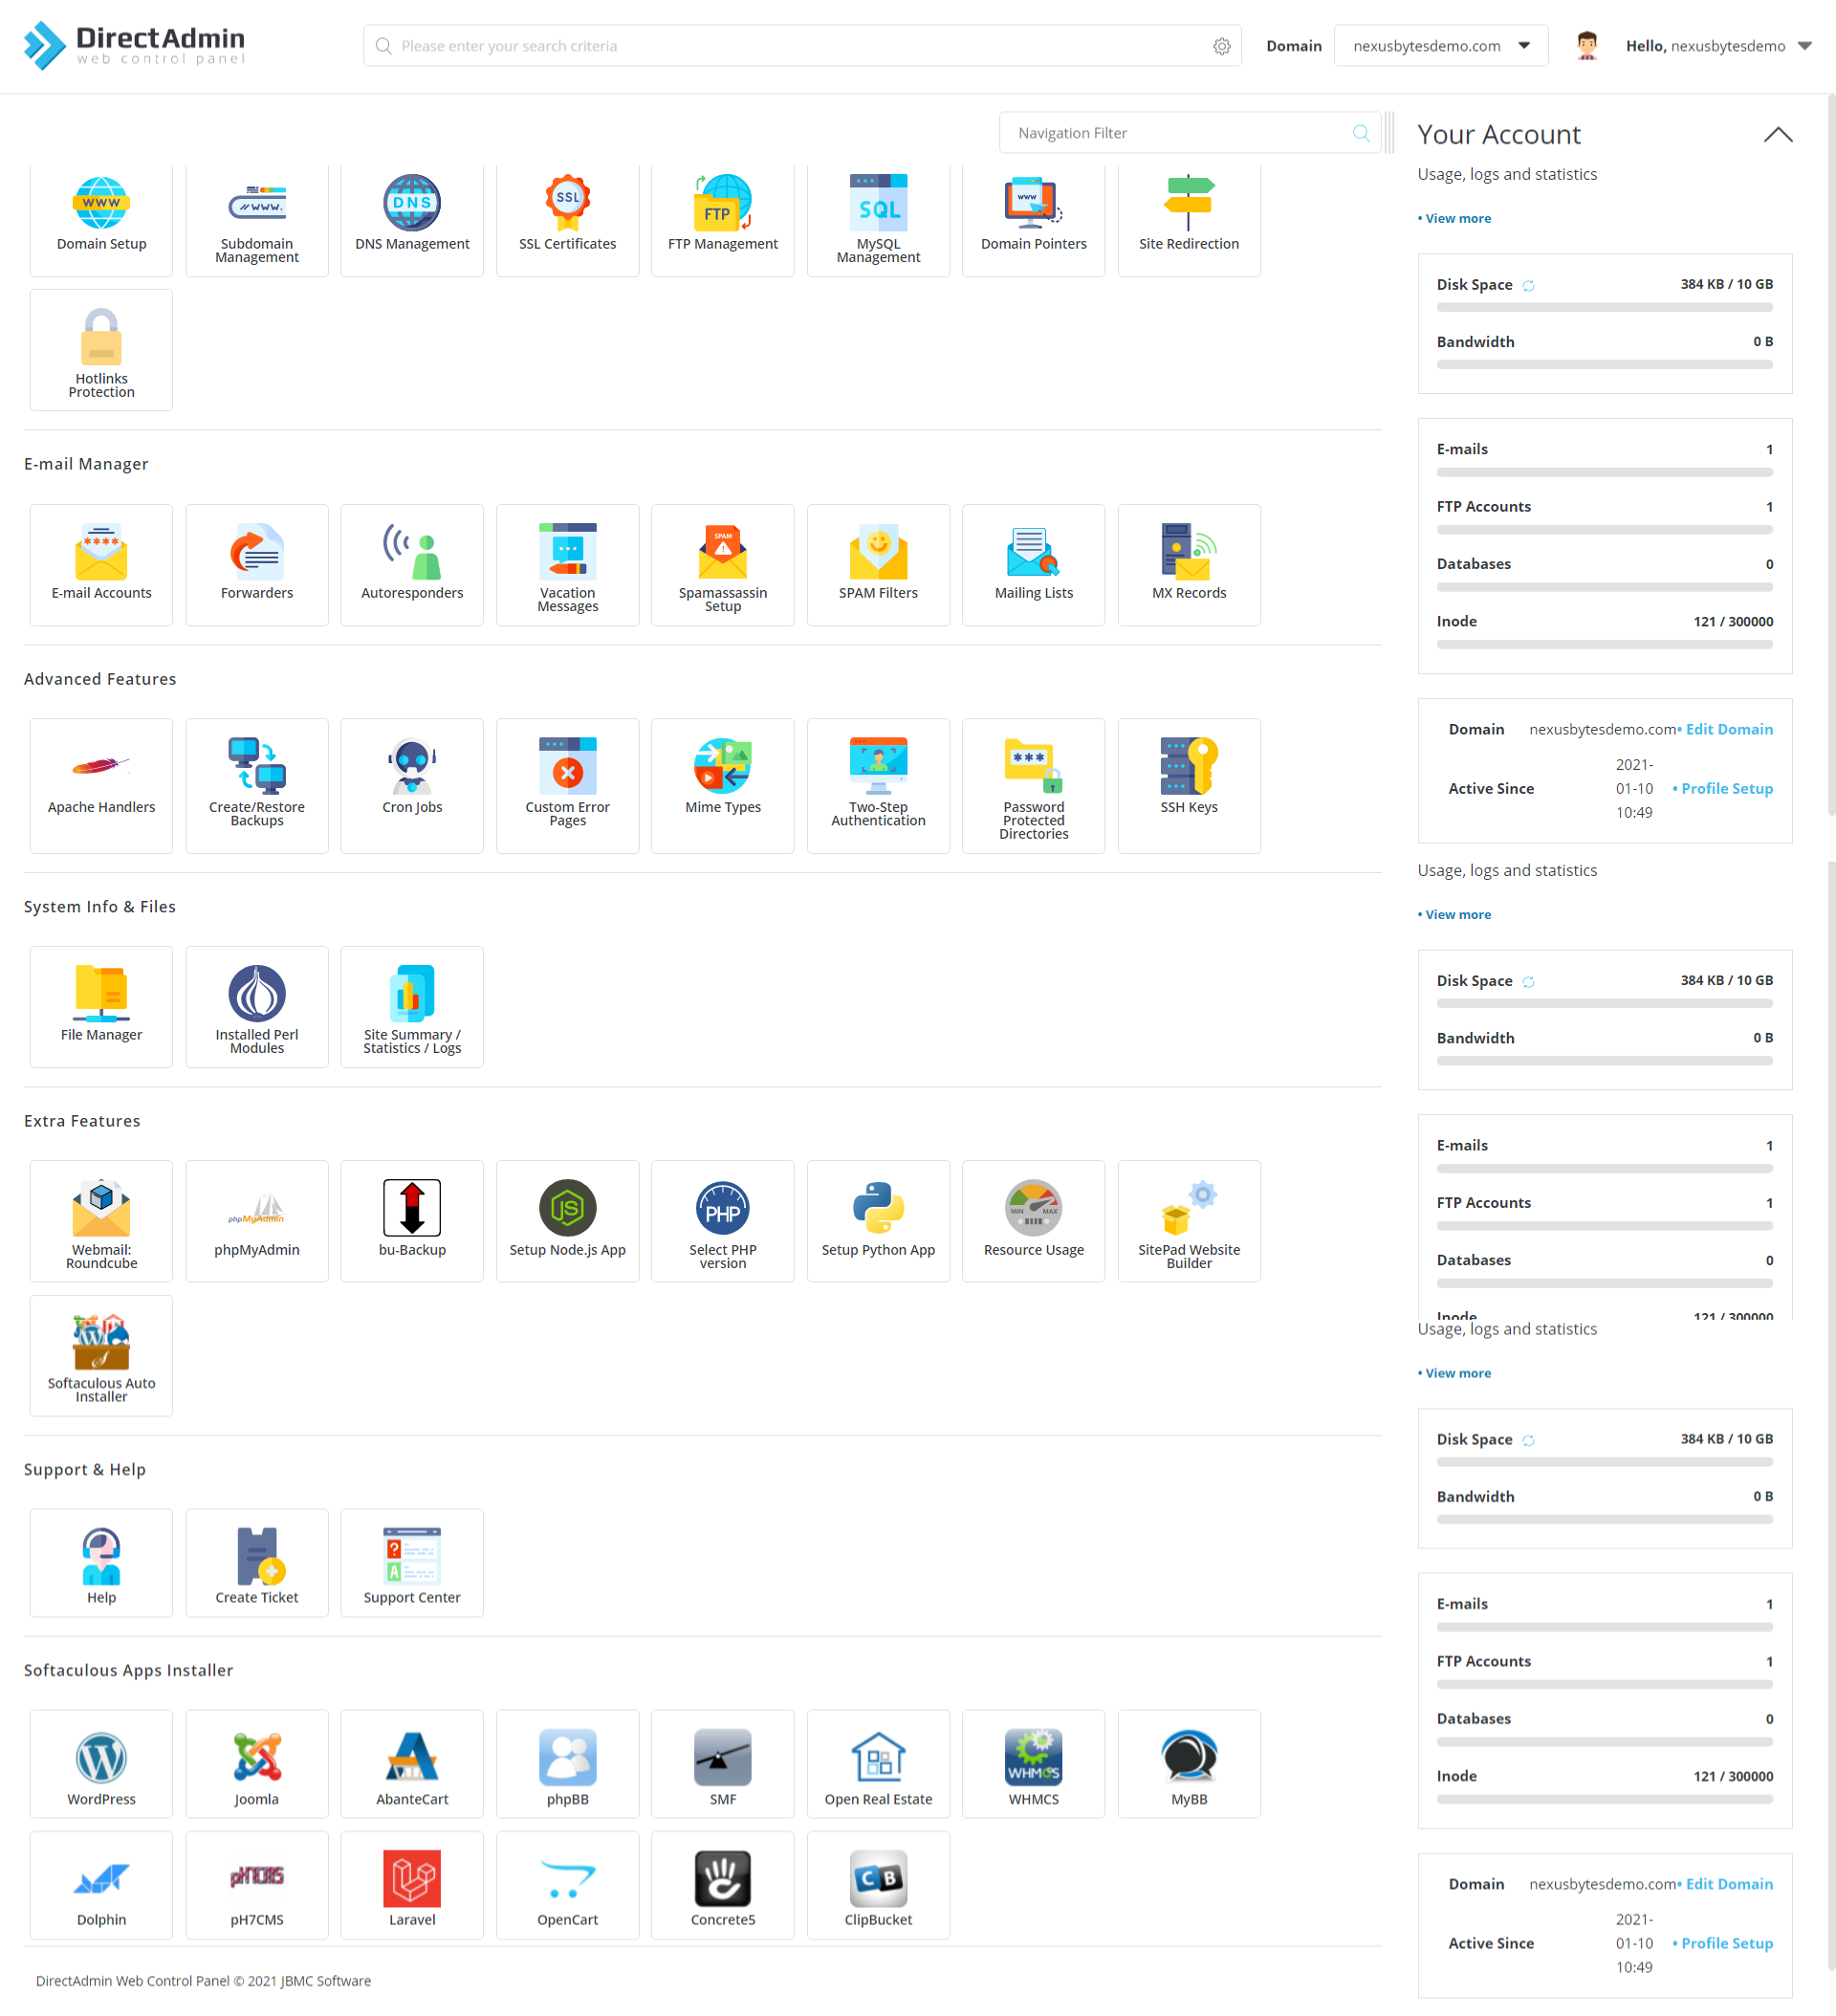
The DirectAdmin interface provides access to all management features organized in a logical, user-friendly layout.
Step 8: Basic DirectAdmin Configuration
After accessing the control panel, perform these essential configuration tasks:
Creating Your First Domain
- Navigate to the “Account Manager” section
- Click “Create New Account”
- Enter domain name, username, and password
- Specify package details and resource allocations
- Click “Create” to complete the process
Email Configuration
- Select your domain from the domain list
- Click “Email Accounts”
- Use the “Create Account” function to add new email addresses
- Configure forwarding and auto-responders as needed
Database Setup
- Navigate to “MySQL Management”
- Create a new database and user
- Assign appropriate permissions
- Record connection information for application configuration
DNS Management
- Select “DNS Management” from the main menu
- Review existing DNS records
- Add or modify records as needed for your domain
- Ensure proper MX records for email delivery
These basic configurations establish the foundation for your web hosting environment.
Troubleshooting Common Installation Issues
Despite careful preparation, you might encounter these common issues:
License Validation Problems
If you receive “License has expired” errors:
- Verify server time is correct:
date - If incorrect, set the proper time zone and time:
ln -sf /usr/share/zoneinfo/YOUR_REGION/YOUR_TIMEZONE /etc/localtime date MMDDhhmmYYYY - Refresh your license:
/usr/local/directadmin/scripts/getLicense.sh - Restart DirectAdmin:
systemctl restart directadmin
IP Address Mismatch
If your server IP changes:
- Contact DirectAdmin support with your license ID and new IP address
- After confirmation, run:
/usr/local/directadmin/scripts/getLicense.sh
/usr/local/directadmin/scripts/ipswap.sh
Port 2222 Blocked
Ensure port 2222 is open in your firewall and not blocked by your hosting provider.
Security Best Practices for DirectAdmin
Securing your DirectAdmin installation is crucial:
Change Default Credentials
Immediately change the default admin password and create a separate admin account for daily use.
Implement SSL/TLS
- Navigate to “SSL Certificates” in the admin panel
- Generate or upload certificates for your domains
- Enforce HTTPS for all DirectAdmin connections
Enable Brute Force Protection
DirectAdmin includes brute force detection. Enable and configure it under “Admin Settings” > “Brute Force Settings”.
Mount /tmp with Security Options
Add these options to /etc/fstab for the /tmp partition:
/dev/sdXY /tmp ext4 defaults,nosuid,noexec 0 2Disable Dangerous PHP Functions
Edit php.ini to disable potentially harmful functions:
disable_functions = exec,passthru,shell_exec,system,proc_open,popen,curl_exec,curl_multi_exec,parse_ini_file,show_sourceRegular Security Updates
Ensure automatic updates are enabled for both DirectAdmin and the underlying Debian system.
DirectAdmin Maintenance and Updates
Keeping DirectAdmin updated ensures access to the latest features and security patches:
Automated Updates
- Log in to the DirectAdmin admin interface
- Navigate to “Admin Settings” > “Update DirectAdmin”
- Enable automatic updates and select your preferred update channel
Using CustomBuild for Component Updates
DirectAdmin’s CustomBuild tool manages service components:
cd /usr/local/directadmin/custombuild
./build update
./build versions
./build set mysql 8.0
./build mysql
This example updates MySQL to version 8.0, but the same approach works for PHP, Apache, and other components.
Backup Before Updates
Always create a full backup before major updates:
/usr/local/directadmin/scripts/backup.sh admin admin_backupThis creates a full backup of the admin user’s data.
Extending DirectAdmin Functionality
DirectAdmin’s capabilities can be expanded through plugins and integrations:
Installing Plugins
- Navigate to “Admin Settings” > “Plugin Manager”
- Browse available plugins
- Click “Install” for desired plugins
- Configure according to your needs
Popular plugins include:
- Softaculous: One-click application installer
- CloudLinux: Resource usage monitoring and limitations
- ImunifyAV: Malware scanning and removal
API Integration
DirectAdmin offers a comprehensive API for automation and integration:
curl -u admin:password "http://YOUR_SERVER_IP:2222/CMD_API_SHOW_USERS"This example retrieves a list of all users via the API.
Performance Optimization Tips
Optimize your DirectAdmin server for better performance:
Resource Allocation
Adjust PHP memory limits based on your applications:
memory_limit = 256MMySQL Optimization
Edit my.cnf to optimize database performance:
innodb_buffer_pool_size = 1G
innodb_log_file_size = 256M
Implement Caching
Enable caching for web services:
- Install and configure Redis or Memcached
- Implement Nginx FastCGI caching for static content
- Enable PHP OPcache for improved PHP performance
Monitor Resource Usage
Use DirectAdmin’s built-in resource monitoring tools to identify bottlenecks and optimize accordingly.
Congratulations! You have successfully installed DirectAdmin. Thanks for using this tutorial for installing the DirectAdmin control panel on Debian 12 “Bookworm” Linux. For additional help or useful information, we recommend you check the official DirectAdmin website.