How To Install Django on Fedora 43

Django stands as one of the most popular Python web frameworks globally, powering thousands of websites and applications. This comprehensive guide walks you through installing Django on Fedora 43, from system preparation to creating your first project. Whether you’re building a personal blog, enterprise application, or RESTful API, Django provides the tools needed for rapid development with built-in security features.
Fedora 43, with its cutting-edge packages and robust performance, offers an excellent environment for Django development. The framework’s “batteries-included” philosophy means you get authentication, database management, and administrative interfaces out of the box. By following this tutorial, you’ll have a fully functional Django installation ready for web development within minutes.
Prerequisites
Before diving into the installation process, ensure your system meets these requirements. You’ll need root or sudo privileges on your Fedora 43 machine to install packages and configure system settings. An active internet connection is essential for downloading Django and its dependencies.
Basic familiarity with the Linux command line will help you navigate through the installation steps smoothly. While not mandatory, understanding Python programming fundamentals enhances your learning experience. Your system should have at least 2GB of RAM and 10GB of free disk space for comfortable development. A text editor like nano, vim, or gedit will be necessary for editing configuration files.
Understanding Django and Its Architecture
Django follows the Model-Template-View (MTV) architectural pattern, similar to the traditional MVC pattern. The Model layer handles data structure and database interactions through Django’s powerful Object-Relational Mapping (ORM) system. Templates manage the presentation layer, rendering HTML with dynamic content. Views process user requests and return appropriate responses.
The framework includes an automatic admin panel that provides a complete interface for managing application data without writing additional code. Built-in authentication systems, CSRF protection, and SQL injection prevention make Django inherently secure. Major platforms like Instagram, Pinterest, and Mozilla rely on Django for their backend infrastructure, demonstrating its scalability and reliability.
Step 1: Update System Packages
Maintaining an updated system ensures compatibility and security. Open your terminal and execute the following command to refresh the DNF repository metadata and upgrade existing packages. This process synchronizes your system with the latest Fedora repositories, ensuring you receive the most recent package versions.
sudo dnf update -yAfter the update completes, verify you’re running Fedora 43 with this command:
cat /etc/fedora-releaseThe output should display “Fedora release 43” followed by additional version information. Updating packages before installation prevents dependency conflicts and ensures optimal system performance.
Step 2: Install Python 3 and Pip
Fedora 43 typically ships with Python 3.13 or newer pre-installed. Verify the Python version on your system by running:
python3 --versionIf Python isn’t installed or you need additional components, install Python 3 and pip3 together:
sudo dnf install python3 python3-pip -yPip serves as Python’s package installer, enabling you to download and manage libraries from the Python Package Index (PyPI). Confirm pip installation by checking its version:
pip3 --versionInstall development tools required for compiling Python packages with C extensions:
sudo dnf install python3-devel gcc -yThese development packages become crucial when installing Django extensions or working with libraries that require compilation during installation. The gcc compiler and Python headers ensure smooth installation of various Django dependencies.
Step 3: Install Django Using Pip
Pip provides the most straightforward method for installing Django. For system-wide installation accessible to all users, execute:
sudo pip3 install DjangoAlternatively, install Django only for your current user account without requiring sudo privileges:
pip3 install --user DjangoUser-level installation places Django in your home directory, preventing conflicts with system packages. This approach proves ideal for development environments or shared systems where you lack root access.
Verify successful installation by checking the Django version:
django-admin --versionThe command should return version 5.2 or higher. To install a specific Django version for compatibility with existing projects:
pip3 install Django==5.1.3Confirm the location of the django-admin utility:
which django-adminThis command helps troubleshoot PATH-related issues if Django commands aren’t recognized.
Step 4: Setting Up Python Virtual Environment
Virtual environments represent best practice in Python development, isolating project dependencies and preventing version conflicts. Install the virtualenv package:
pip3 install virtualenvFedora’s Python 3 includes the built-in venv module, providing an alternative to virtualenv. Create a dedicated directory for Django projects:
mkdir ~/django-projects
cd ~/django-projects
Generate a new virtual environment named django_env:
python3 -m venv django_envActivate the virtual environment to begin using it:
source django_env/bin/activateNotice your command prompt changes, displaying the environment name in parentheses. While active, any Python packages you install remain contained within this environment. Install Django inside the virtual environment:
pip install DjangoThe virtual environment approach allows multiple projects with different Django versions to coexist peacefully on the same system. Deactivate the environment when finished:
deactivateProfessional developers consistently use virtual environments to maintain clean, reproducible development setups.
Step 5: Create Your First Django Project
Django distinguishes between projects and applications. A project represents your entire website configuration, while apps are reusable components within projects. Navigate to your preferred development directory:
mkdir ~/projects
cd ~/projects
Initialize a new Django project using django-admin:
django-admin startproject myprojectThis command creates a directory structure containing essential configuration files. Examine the generated files:
cd myproject
ls -la
The project includes manage.py, your command-line utility for administrative tasks. The inner myproject directory contains settings.py for configuration, urls.py for URL routing, wsgi.py and asgi.py for deployment interfaces.
Understanding each file’s purpose accelerates your Django learning curve. The settings.py file controls database connections, installed apps, middleware, templates, and security settings. URL configuration in urls.py maps web addresses to view functions.
Step 6: Configure Database and Run Migrations
Django defaults to SQLite for development, requiring no additional database server installation. Migrations propagate model changes to your database schema. Run initial migrations to create necessary database tables:
python3 manage.py migrateYou’ll see output listing each migration being applied, including auth, contenttypes, and sessions. Django’s migration system tracks database schema changes, enabling version control for your data structure. The migrations create tables for user authentication, permission management, and session handling.
Django generates a db.sqlite3 file in your project root, storing all database content. For production environments, configure PostgreSQL or MySQL in settings.py for better performance and concurrent access handling.
Step 7: Create Django Superuser Account
Administrative access requires a superuser account with full permissions. Create one using the management command:
python3 manage.py createsuperuserProvide a username when prompted. You can skip the email address or provide a valid one for password recovery. Enter a secure password meeting Django’s validation requirements. The system prevents simple passwords like “password123” or passwords too similar to your username.
This superuser account grants access to Django’s admin interface, where you manage site content, users, and permissions. Reset forgotten passwords later using:
python3 manage.py changepassword yourusernameStep 8: Configure Django Settings for External Access
By default, Django only accepts connections from localhost. Edit the settings file to allow external access:
nano myproject/settings.pyLocate the ALLOWED_HOSTS setting and add your server’s IP address:
ALLOWED_HOSTS = ['your-server-ip', 'localhost', '127.0.0.1']For development testing across your network, temporarily allow all hosts:
ALLOWED_HOSTS = ['*']Never use this wildcard configuration in production environments. Keep DEBUG = True during development for detailed error pages, but always set DEBUG = False before deploying publicly. Debug mode exposes sensitive configuration details that attackers could exploit.
Configure static files serving by adding these lines at the end of settings.py:
STATIC_ROOT = os.path.join(BASE_DIR, 'staticfiles')Step 9: Run Django Development Server
Start the built-in development server to test your installation:
python3 manage.py runserverThe server starts on port 8000 by default. Django watches your files for changes and automatically reloads. Specify a different port if 8000 is occupied:
python3 manage.py runserver 8080Allow connections from any network interface:
python3 manage.py runserver 0.0.0.0:8000The console displays “Starting development server at http://127.0.0.1:8000/” along with a timestamp. Press Ctrl+C to stop the server. Remember that this development server suits only testing purposes, never production deployment.
Step 10: Configure Firewall Rules
Fedora’s firewalld service blocks incoming connections by default. Open port 8000 for Django access:
sudo firewall-cmd --permanent --add-port=8000/tcpReload the firewall to apply changes:
sudo firewall-cmd --reloadVerify the port opened successfully:
sudo firewall-cmd --list-portsFor enhanced security, restrict access to specific IP addresses using rich rules. Production deployments typically use nginx or Apache as reverse proxies, eliminating the need to expose Django’s development server directly.
Step 11: Access Django Web Interface
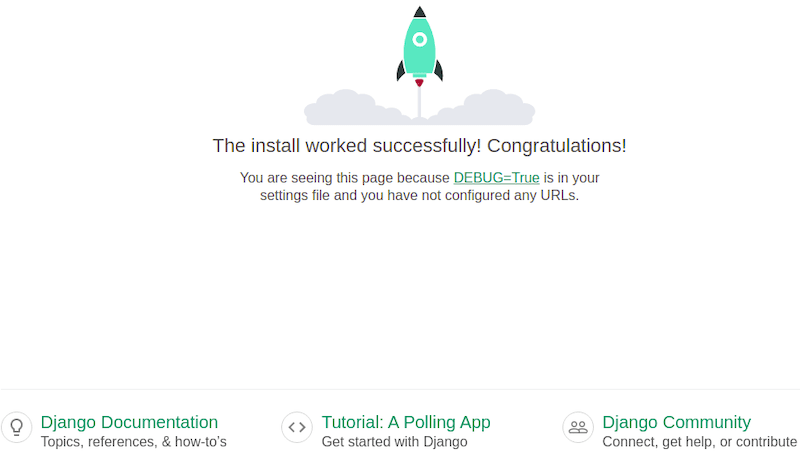
Open your web browser and navigate to http://localhost:8000 if accessing locally. You should see Django’s welcome page featuring a rocket ship animation with the message “The install worked successfully! Congratulations!” This page confirms your Django installation succeeded.

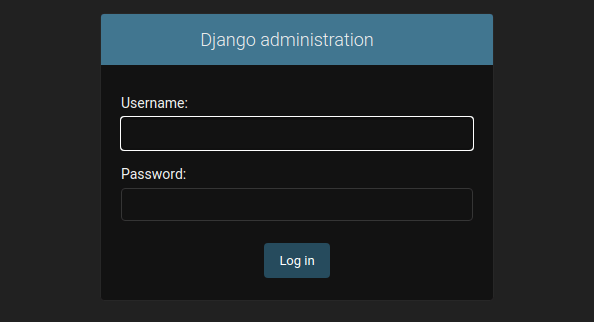
For remote access, use http://your-server-ip:8000 replacing your-server-ip with your actual server address. Access the admin panel at http://localhost:8000/admin to see the login interface. Enter your superuser credentials to explore Django’s automatic admin interface.

Step 12: Creating Your First Django App
Django projects contain multiple reusable apps, each handling specific functionality. Create an app for your blog, API, or feature:
python3 manage.py startapp myappThis generates a directory structure with models.py for database schemas, views.py for request handling, admin.py for admin customization, and tests.py for automated testing. Register the app in settings.py by adding it to INSTALLED_APPS:
INSTALLED_APPS = [
    'django.contrib.admin',
    'django.contrib.auth',
    'django.contrib.contenttypes',
    'django.contrib.sessions',
    'django.contrib.messages',
    'django.contrib.staticfiles',
    'myapp',
]
Create a simple view in myapp/views.py:
from django.http import HttpResponse

def home(request):
    return HttpResponse("Hello from Django on Fedora 43!")
Configure URL routing in myproject/urls.py:
from django.contrib import admin
from django.urls import path
from myapp import views

urlpatterns = [
    path('admin/', admin.site.urls),
    path('', views.home, name='home'),
]
Visit http://localhost:8000 to see your custom message displayed.
Troubleshooting Common Issues
Command Not Found Errors
If “django-admin: command not found” appears, your PATH variable lacks the installation directory. For user installations, add this to ~/.bashrc:
export PATH=$PATH:~/.local/binReload the configuration:
source ~/.bashrcPort Already in Use
When port 8000 is occupied, identify the blocking process:
sudo lsof -i :8000Kill the process or choose an alternative port for your Django server.
Migration Errors
Database locked errors often occur with SQLite when multiple processes access it simultaneously. Ensure no other Django servers or database browsers are running. Delete db.sqlite3 and migrations folders (except __init__.py) to start fresh if needed.
Permission Denied Issues
User installation prevents permission errors. If encountering “Permission denied” with sudo installation, check file ownership:
ls -l /usr/local/lib/python3.*/site-packages/Adjust permissions or switch to user-level virtual environment installations.
ALLOWED_HOSTS Configuration Error
“DisallowedHost” errors indicate missing IP addresses in ALLOWED_HOSTS. Add all IP addresses or domain names you’ll use to access the application.
Next Steps and Best Practices
Initialize Git version control in your project directory to track changes:
git init
git add .
git commit -m "Initial Django project setup"
Explore Django’s comprehensive documentation at docs.djangoproject.com for in-depth tutorials and API references. Install Django REST Framework for building APIs:
pip install djangorestframeworkConsider PostgreSQL for production deployments due to its superior performance and concurrent access handling:
sudo dnf install postgresql postgresql-server python3-psycopg2Deploy production applications with Gunicorn as the WSGI server and nginx as the reverse proxy. Store sensitive settings like SECRET_KEY and database passwords in environment variables rather than hardcoding them. The python-decouple package helps manage configuration:
pip install python-decoupleStudy Django’s security best practices including CSRF protection, XSS prevention, and clickjacking defenses. Join the Django community through forums, Discord channels, and Stack Overflow to accelerate your learning.
Congratulations! You have successfully installed Django. Thanks for using this tutorial for installing Django on your Fedora 42 Linux system. For additional help or useful information, we recommend you check the official Django website.