In this tutorial, we will show you how to install and configure Django on Ubuntu 18.04 LTS server. For those of you who didn’t know, Django is a popular Python framework for writing web applications. Web frameworks like Django provide a set of tools that help the developer to write the application faster as the framework takes care of the internal structure, thus the developer needs to take care of the application development only. Django is free and open-source software.
This article assumes you have at least basic knowledge of Linux, know how to use the shell, and most importantly, you host your site on your own VPS. The installation is quite simple and assumes you are running in the root account, if not you may need to add ‘sudo‘ to the commands to get root privileges. I will show you the step-by-step installation of Django Python web framework on an Ubuntu 18.04 (Bionic Beaver) server.
Prerequisites
- A server running one of the following operating systems: Ubuntu 18.04 (Bionic Beaver).
- It’s recommended that you use a fresh OS install to prevent any potential issues.
- SSH access to the server (or just open Terminal if you’re on a desktop).
- A
non-root sudo useror access to theroot user. We recommend acting as anon-root sudo user, however, as you can harm your system if you’re not careful when acting as the root.
Install Django on Ubuntu 18.04 LTS Bionic Beaver
Step 1. Start by updating your system packages to ensure you have the latest security patches and bug fixes. Open your terminal and run the following commands:
sudo apt-get update
sudo apt-get upgrade
These commands will fetch the latest package lists from the Ubuntu repositories and upgrade any installed packages to their latest versions.
Step 2. Installing Python 3 and venv.
Django requires Python 3 to run. Let’s verify the Python 3 version installed on your system by running:
python3 -V
If Python 3 is not installed or you have an older version, you can install it using the following command:
sudo apt install software-properties-common
sudo add-apt-repository ppa:deadsnakes/ppa
sudo apt install python3.9
Now you can install pip using the following command:
sudo apt install python3-venv
Next, Creating Virtual Environment:
mkdir my_django_app
cd my_django_app
Once inside the directory, run the following command to create your new virtual environment:
python3 -m venv venv
To start using this virtual environment, you need to activate it by running the activate script:
source venv/bin/activate
Step 4. Installing Django on Ubuntu 18.04 Bionic Beaver.
Once the pip is installed, run the following command to install Django:
sudo pip install django
To verify the Django version, run:
python -m django --version
Step 5. Create a sample Django project.
Now that the Django framework has been installed, you can give it a test drive by creating a sample project:
cd ~
django-admin startproject myidproject
The command above will create a directory myproject in your working directory ~, and store all necessary files within.
Run the commands below in sequence to get your application started. Follow the instructions on the screen to provide the superuser’s credentials:
cd myidproject/
python3 manage.py migrate
python3 manage.py createsuperuser
python3 manage.py runserver 0.0.0.0:8000
Step 6. Accessing Django.
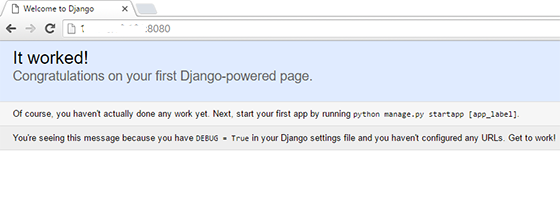
Django will be available on HTTP port 8080 by default. Open your favorite browser and navigate to http://your-domain.com:8000 or http://server-ip:8000/admin

Congratulations! You have successfully installed Django. Thanks for using this tutorial for installing the Django web framework on Ubuntu 18.04 Bionic Beaver server. For additional help or useful information, we recommend you check the official Django website.