How To Install Drupal on Fedora 39

In this tutorial, we will show you how to install Drupal on Fedora 39. In the ever-evolving digital landscape, content management systems play a pivotal role in crafting engaging and dynamic web experiences. Drupal, a powerful and versatile open-source CMS, is a go-to choice for developers and content creators. However, a seamless Drupal experience hinges on a robust foundation.
This article assumes you have at least basic knowledge of Linux, know how to use the shell, and most importantly, you host your site on your own VPS. The installation is quite simple and assumes you are running in the root account, if not you may need to add ‘sudo‘ to the commands to get root privileges. I will show you the step-by-step installation of the Drupal CMS on a Fedora 39.
Prerequisites
- A server running one of the following operating systems: Fedora 39.
- It’s recommended that you use a fresh OS install to prevent any potential issues.
- SSH access to the server (or just open Terminal if you’re on a desktop).
- An active internet connection. You’ll need an internet connection to download the necessary packages and dependencies for Drupal.
- A
non-root sudo useror access to theroot user. We recommend acting as anon-root sudo user, however, as you can harm your system if you’re not careful when acting as the root.
Install Drupal on Fedora 39
Step 1. Before starting, it’s crucial to update your Fedora system. Open your terminal and run the following commands:
sudo dnf update
Step 2. Installing Apache Web Server.
The Apache web server is a fundamental component of the LAMP stack. To install it, enter the following command:
sudo dnf install httpd
After the installation is complete, start the Apache service and enable it to start on boot:
sudo systemctl start httpd
sudo systemctl enable httpd
To verify that Apache is working, open a web browser and navigate to http://localhost. You should see the Apache default page.
For hosting multiple websites on your server, you need to set up virtual hosts. Create a configuration file for your Drupal site:
sudo nano /etc/httpd/conf.d/drupal.conf
Add the following content to the file:
<VirtualHost *:80>
ServerAdmin admin@example.com
DocumentRoot /var/www/html/drupal
ServerName your-drupal-site.com
ErrorLog logs/your-drupal-site-error_log
CustomLog logs/your-drupal-site-access_log common
</VirtualHost>
Save the file and exit the text editor. Now, create a directory for your Drupal site:
sudo mkdir /var/www/html/drupal
Step 3. Installing MySQL Database Server
Next, we’ll install MySQL, the database server for your Drupal site. Run:
sudo dnf install mysql-server
Start the MySQL service and set it to start on boot:
sudo systemctl start mysqld
sudo systemctl enable mysqld
Secure your MySQL installation by running:
sudo mysql_secure_installation
Follow the prompts to set a root password and configure additional security options.
Create a MySQL database and user for your Drupal installation:
sudo mysql -u root -p
Enter the MySQL root password when prompted, and then execute the following commands:
CREATE DATABASE drupaldb;
CREATE USER 'drupaluser'@'localhost' IDENTIFIED BY 'your_strong_password';
GRANT ALL ON drupaldb.* TO 'drupaluser'@'localhost';
FLUSH PRIVILEGES;
EXIT;
Step 4. Installing PHP and Necessary Modules.
PHP is the scripting language that Drupal is built upon. Install PHP and required modules:
sudo dnf install php php-mysql php-gd php-xml
After installation, restart the Apache webserver to enable PHP:
sudo systemctl restart httpd
To ensure everything is working, create a simple PHP file in your webroot:
echo "<?php phpinfo(); ?>" | sudo tee /var/www/html/index.php
Now, navigate to http://localhost/index.php to see the PHP information page.
Step 5. Installing and Configuring SSL.
Let’s encrypt your site with a free SSL certificate from Let’s Encrypt. Install Certbot, a tool for managing SSL certificates:
sudo dnf install certbot python3-certbot-apache
Now, obtain and install the SSL certificate:
sudo certbot --apache
Follow the prompts to configure SSL for your site.
To ensure SSL is properly configured in Apache, run:
sudo apachectl configtest
If the configuration test passes, restart Apache to enable SSL:
sudo systemctl restart httpd
Step 6. Installing Drupal on Fedora 39.
Navigate to the document root directory and download the latest Drupal release:
cd /var/www/html
sudo wget https://www.drupal.org/download-latest/tar.gz -O drupal.tar.gz
Unpack the downloaded file:
sudo tar -zxvf drupal.tar.gz
sudo mv drupal-* drupal
Navigate to your Drupal site directory:
cd /var/www/html/drupal
Copy the default settings file:
cp sites/default/default.settings.php sites/default/settings.php
Change permissions to allow Drupal to write to the settings file:
chmod 664 sites/default/settings.php
Install Drupal using Drush, a command-line tool for Drupal:
composer create-project drupal/recommended-project my_drupal_site
Step 7. Configure Firewall.
Before making any changes, it’s essential to check if Firewalld is running and enabled. Run the following commands to verify:
sudo systemctl status firewalld
To allow web traffic to your Drupal site, you need to open ports 80 (HTTP) and 443 (HTTPS). Use the following commands to add the necessary rules:
sudo firewall-cmd --permanent --zone=public --add-service=http
sudo firewall-cmd --permanent --zone=public --add-service=https
To apply the changes, reload the firewall rules:
sudo firewall-cmd --reload
You can verify that the rules have been applied correctly by running:
sudo firewall-cmd --list-all
Step 8. Accessing Drupal Web UI.
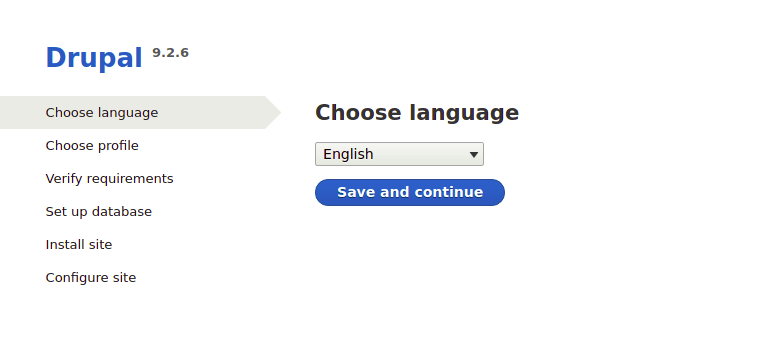
Open a web browser and access your server’s IP or domain. You should see the Drupal installation screen. Follow the on-screen instructions, and when prompted, enter the database credentials you created earlier.
