How To Install Eclipse IDE on Linux Mint 20

In this tutorial, we will show you how to install Eclipse IDE on Linux Mint 20. For those of you who didn’t know, Eclipse provides IDEs (Integrated Development Environment) and platforms for nearly every language and architecture. We are famous for our Java IDE, C/C++, JavaScript, and PHP IDEs built on extensible platforms for creating desktop, Web, and cloud IDEs. These platforms deliver the most extensive collection of add-on tools available for software developers.
This article assumes you have at least basic knowledge of Linux, know how to use the shell, and most importantly, you host your site on your own VPS. The installation is quite simple and assumes you are running in the root account, if not you may need to add ‘sudo‘ to the commands to get root privileges. I will show you the step-by-step installation of Eclipse IDE on a Linux Mint 20 (Ulyana).
Prerequisites
- A server running one of the following operating systems: Linux Mint 20 (Ulyana).
- It’s recommended that you use a fresh OS install to prevent any potential issues.
- A
non-root sudo useror access to theroot user. We recommend acting as anon-root sudo user, however, as you can harm your system if you’re not careful when acting as the root.
Install Eclipse IDE on Linux Mint 20 Ulyana
Step 1. Begin by updating your system packages to ensure that you have the latest security patches and bug fixes. Open the terminal and run the following commands:
sudo apt update
sudo apt install software-properties-common
These commands will update the package lists and install the necessary software-properties-common package, which is required for adding additional repositories.
Step 2. Installing Java.
Eclipse IDE requires Java installed on your Linux Mint system. Now, install Java OpenJDK 11 by executing the following command:
sudo apt install openjdk-11-jdk
Verify the installation of Java on your system:
java -version
You should see the output indicating the installed Java version, similar to:
openjdk version "11.0.11" 2021-04-20
OpenJDK Runtime Environment (build 11.0.11+9-Ubuntu-0ubuntu2.20.04)
OpenJDK 64-Bit Server VM (build 11.0.11+9-Ubuntu-0ubuntu2.20.04, mixed mode, sharing)
Step 3. Installing Eclipse IDE on Linux Mint 20.
Now we download the latest available Eclipse IDE from the official page:
wget https://www.eclipse.org/downloads/download.php?file=/technology/epp/downloads/release/2024-06/R/eclipse-java-2024-06-R-linux-gtk-x86_64.tar.gz
sudo tar -zxvf eclipse-java-2024-06-R-linux-gtk-x86_64.tar.gz -C /usr/
Next, symlink the eclipse executable to /usr/bin the path so that all users on your machine can able to run and use Eclipse IDE:
sudo ln -s /usr/eclipse/eclipse /usr/bin/eclipse
Step 4. Create Eclipse Launcher Icon.
Having a launcher icon on the menu would be very handy to start the application right from the desktop instead of using the command-line tool:
sudo nano /usr/share/applications/eclipse.desktop
Add the following lines:
[Desktop Entry]
Encoding=UTF-8
Name=Eclipse IDE
Comment=Eclipse IDE
Exec=/usr/bin/eclipse
Icon=/usr/eclipse/icon.xpm
Terminal=false
Type=Application
StartupNotify=false
Save and close.
Step 5. Accessing Eclipse IDE on Linux Mint.
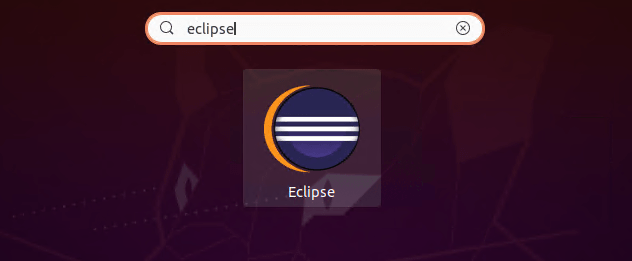
Once successfully installed, launch Eclipse through the desktop. Click on the application menu from the left bottom of the window in the LinuxMint distribution. Now, type ‘eclipse’ in the search bar.

Congratulations! You have successfully installed Eclipse. Thanks for using this tutorial for installing the latest version of Eclipse IDE on the Linux Mint system. For additional help or useful information, we recommend you check the official Eclipse website.