How To Install ELK Stack on Fedora 41

In this tutorial, we will show you how to install ELK Stack on Fedora 41. The ELK Stack, composed of Elasticsearch, Logstash, and Kibana, is a powerful set of tools for managing and analyzing logs. As organizations increasingly rely on data for decision-making, having an efficient log management system becomes crucial. This guide will walk you through the step-by-step process of installing the ELK Stack on Fedora 41, ensuring you have a robust setup for your log analysis needs.
Prerequisites for Installation
System Requirements
Before diving into the installation, ensure your system meets the following hardware specifications:
- RAM: Minimum 4 GB (8 GB recommended)
- CPU: Dual-core processor or better
- Disk Space: At least 10 GB of free disk space
Software Requirements
You will need the following software components installed on your Fedora 41 system:
- Java Development Kit (JDK): Required for Elasticsearch and Logstash.
- Network Connectivity: Ensure you have internet access to download necessary packages.
User Permissions
A non-root user with sudo privileges is recommended for installing the ELK Stack. This practice enhances security by limiting root access.
Preparing Your Fedora System
Start by updating your system to ensure all packages are current. Open a terminal and execute the following commands:
sudo dnf clean all
sudo dnf update -y
This will clean up any cached data and update your installed packages to their latest versions.
Installing Java
The ELK Stack requires Java to function correctly. The OpenJDK is a popular choice. Install it by running the following command:
sudo dnf install java-11-openjdk-devel -y
After installation, verify that Java is installed correctly:
java -version
You should see output indicating the version of Java installed, confirming that the installation was successful.
Installing Elasticsearch
Elasticsearch is a distributed search and analytics engine that forms the backbone of the ELK Stack. Follow these steps to install it:
Step 1: Import GPG Key
First, import the GPG key used to sign Elasticsearch packages:
wget -qO - https://artifacts.elastic.co/GPG-KEY-elasticsearch | sudo gpg --dearmor -o /etc/pki/rpm-gpg/RPM-GPG-KEY-elasticsearch
Step 2: Create Repository Configuration File
Create a new repository file for Elasticsearch:
echo "[elasticsearch-8.x]
name=Elasticsearch repository for 8.x packages
baseurl=https://artifacts.elastic.co/packages/8.x/yum
gpgcheck=1
gpgkey=file:///etc/pki/rpm-gpg/RPM-GPG-KEY-elasticsearch
enabled=1" | sudo tee /etc/yum.repos.d/elasticsearch.repo
Step 3: Install Elasticsearch Package
Now, install Elasticsearch using DNF:
sudo dnf install elasticsearch -y
Step 4: Start and Enable Elasticsearch Service
After installation, start the Elasticsearch service and enable it to launch at boot:
sudo systemctl start elasticsearch
sudo systemctl enable elasticsearch
Step 5: Configure Elasticsearch Settings
Edit the configuration file located at `/etc/elasticsearch/elasticsearch.yml` to set basic configurations such as network host. For example:
sudo nano /etc/elasticsearch/elasticsearch.yml
# Add or modify the following line:
network.host: localhost
This configuration binds Elasticsearch to localhost. Save and exit the editor.
Installing Kibana
Kibana provides a web interface for visualizing data stored in Elasticsearch. Here’s how to install it:
Step 1: Downloading and Installing Kibana Package
Add the Kibana repository and install it with the following commands:
wget -qO - https://artifacts.elastic.co/GPG-KEY-elasticsearch | sudo gpg --dearmor -o /etc/pki/rpm-gpg/RPM-GPG-KEY-kibana

echo "[kibana-8.x]
name=Kibana repository for 8.x packages
baseurl=https://artifacts.elastic.co/packages/8.x/yum
gpgcheck=1
gpgkey=file:///etc/pki/rpm-gpg/RPM-GPG-KEY-kibana
enabled=1" | sudo tee /etc/yum.repos.d/kibana.repo

sudo dnf install kibana -y
Step 2: Configuring Kibana Settings
Edit the Kibana configuration file located at `/etc/kibana/kibana.yml` to set server host and port:
sudo nano /etc/kibana/kibana.yml
# Add or modify these lines:
server.host: "localhost"
server.port: 5601
Step 3: Starting and Enabling Kibana Service
Start the Kibana service and enable it to run at system startup:
sudo systemctl start kibana
sudo systemctl enable kibana
Installing Logstash
Logstash is responsible for processing logs and events. To install Logstash, follow these steps:
Step 1: Downloading and Installing Logstash Package
Add the Logstash repository and install it as follows:
wget -qO - https://artifacts.elastic.co/GPG-KEY-elasticsearch | sudo gpg --dearmor -o /etc/pki/rpm-gpg/RPM-GPG-KEY-logstash

echo "[logstash-8.x]
name=Logstash repository for 8.x packages
baseurl=https://artifacts.elastic.co/packages/8.x/yum
gpgcheck=1
gpgkey=file:///etc/pki/rpm-gpg/RPM-GPG-KEY-logstash
enabled=1" | sudo tee /etc/yum.repos.d/logstash.repo

sudo dnf install logstash -y
Step 2: Creating a Basic Logstash Configuration File
Create a configuration file in `/etc/logstash/conf.d/` directory. For example, create `logstash-simple.conf`:
sudo nano /etc/logstash/conf.d/logstash-simple.conf

# Sample configuration:
input {
    stdin { }
}

output {
    elasticsearch {
        hosts => ["localhost:9200"]
        index => "logstash-%{+YYYY.MM.dd}"
    }
}
Step 3: Starting and Enabling Logstash Service
You can now start Logstash and enable it to run at startup:
sudo systemctl start logstash
sudo systemctl enable logstash
Configuring the ELK Stack
The final step involves configuring your ELK Stack to work together effectively. Here’s how to do that:
Setting Up Index Patterns in Kibana
Your first step in Kibana will be setting up index patterns to visualize data from Elasticsearch. Access Kibana by navigating to http://localhost:5601. Once there, follow these steps:
- Select “Management” from the left sidebar.
- Select “Index Patterns”.
- Create a new index pattern that matches `
logstash-*`. - Select “Next Step” and choose a time filter field if applicable.
- Select “Create Index Pattern”.
Configuring Data Sources for Logstash
If you plan to ingest logs from specific sources (like files or databases), configure those inputs in your Logstash configuration file accordingly.
Troubleshooting Common Issues
- If you encounter issues starting any service, check logs located in `
/var/log/elasticsearch/`, `/var/log/kibana/`, or `/var/log/logstash/`. - If Kibana cannot connect to Elasticsearch, ensure that Elasticsearch is running on port 9200.
- If you receive permission errors when accessing files or directories, check user permissions carefully.
Accessing the Kibana Dashboard
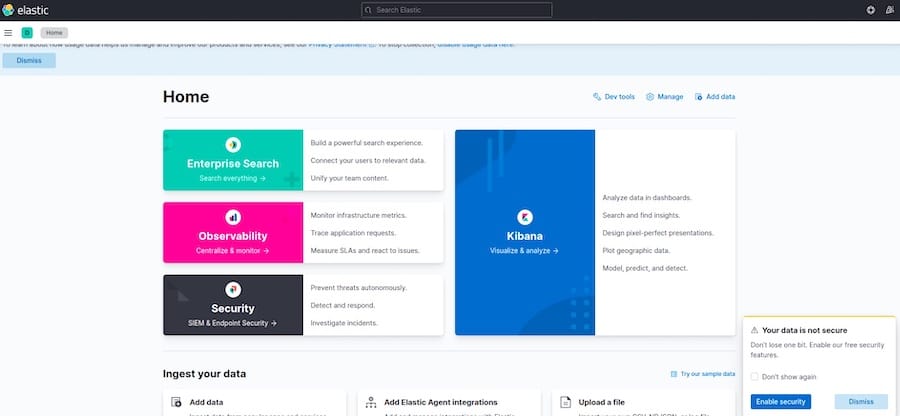
Your ELK Stack is now ready! To access Kibana’s dashboard, open your web browser and go to http://localhost:5601. You’ll be greeted with an intuitive interface where you can create visualizations, dashboards, and manage your data effectively.

Congratulations! You have successfully installed ELK Stack. Thanks for using this tutorial for installing the ELK Stack open-source log analytics platform on Fedora 41 system. For additional or useful information, we recommend you check the official ELK Stack website.