In this tutorial, we will show you how to install FreeFileSync on Ubuntu 16.04 LTS. For those of you who didn’t know, FreeFileSync is a free Open Source software that helps you synchronize files and synchronize folders in Windows, Linux, and Mac OS X. It is designed to save your time setting up and running backup jobs while having nice visual feedback along the way. With FreeFileSync, you can detect moved and renamed files and folders, keep versions of deleted/updated files, including copy-locked files, and much more.
For Linux users who value efficiency, reliability, and control over their backup processes, FreeFileSync represents the perfect balance of power and simplicity. Download it today and experience the peace of mind that comes from knowing your files are always properly synchronized and backed up.
This article assumes you have at least basic knowledge of Linux, know how to use the shell, and most importantly, you host your site on your own VPS. The installation is quite simple and assumes you are running in the root account, if not you may need to add ‘sudo‘ to the commands to get root privileges. I will show you the step-by-step installation FreeFileSync open-source file synchronization tool on a Ubuntu 16.04 (Xenial Xerus) server.
Prerequisites
- A server running one of the following operating systems: Ubuntu 16.04 (Xenial Xerus).
- It’s recommended that you use a fresh OS install to prevent any potential issues.
- SSH access to the server (or just open Terminal if you’re on a desktop).
- A
non-root sudo useror access to theroot user. We recommend acting as anon-root sudo user, however, as you can harm your system if you’re not careful when acting as the root.
Install FreeFileSync on Ubuntu 16.04
Step 1. First, make sure that all your system packages are up-to-date by running the following apt-get commands in the terminal.
sudo apt-get update
sudo apt-get upgrade
Step 2. Installing FreeFileSync on Linux Ubuntu.
First, go to the FreeFileSync download page to install FreeFileSync on Ubuntu systems:

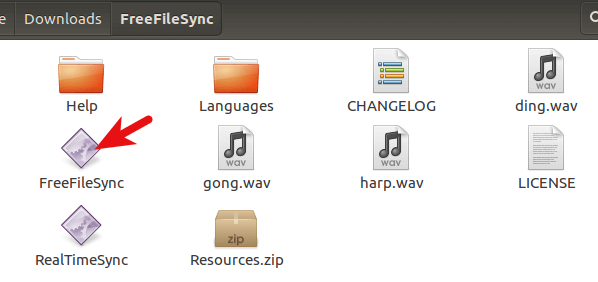
Once downloaded, You can manually install just by extracting the *.tar.gz file into any folder. FreeFileSync is an executable binary and needs no installation.

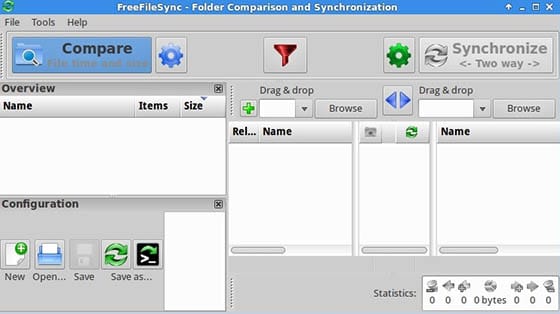
Finally step, Double-click the FreeFileSync binary and you will see the program running:

FreeFileSync is an executable binary there is no installation required but you should place the FreeFileSync folder into a more appropriate folder such as /opt/FreeFileSync.
With FreeFileSync properly installed on your Ubuntu system, you now have a powerful tool at your disposal for keeping your important files synchronized and backed up across multiple locations and devices.
Congratulations! You have successfully installed FreeFileSync. Thanks for using this tutorial for installing FreeFileSync on Ubuntu 16.04 LTS (Xenial Xerus) system. For additional help or useful information, we recommend you check the official FreeFileSync website.