How To Install FreeIPA on Rocky Linux 8

In this tutorial, we will show you how to install FreeIPA on Rocky Linux 8. For those of you who didn’t know, FreeIPA stands for Free Identity, Policy, Audit and it is an open-source identity management solution based on an LDAP directory and Kerberos with optional components such as DNS server, certification authority, and more. FreeIPA is built on top of well-known open-source components and standard protocols with a very strong focus on ease of management and automation of installation and configuration tasks.
This article assumes you have at least basic knowledge of Linux, know how to use the shell, and most importantly, you host your site on your own VPS. The installation is quite simple and assumes you are running in the root account, if not you may need to add ‘sudo‘ to the commands to get root privileges. I will show you the step-by-step installation of the FreeIPA on Rocky Linux. 8.
Prerequisites
- A server running one of the following operating systems: Rocky Linux 8.
- It’s recommended that you use a fresh OS install to prevent any potential issues.
- SSH access to the server (or just open Terminal if you’re on a desktop).
- A
non-root sudo useror access to theroot user. We recommend acting as anon-root sudo user, however, as you can harm your system if you’re not careful when acting as the root.
Install FreeIPA on Rocky Linux 8
Step 1. The first step is to update your system to the latest version of the package list. To do so, run the following commands:
sudo dnf check-update
sudo dnf update
sudo dnf install epel-release
Step 2. Setup Hostname.
FreeIPA requires a fully qualified domain name. If you have not changed the hostname during the installation, use the hostnamectl command:
sudo hostnamectl set-hostname freeipa.idroot.us
Step 3. Installing FreeIPA on Rocky Linux 8.
By default, FreeIPA is not available on Rocky Linux 8 base repository. First, enable the identity management appstream repo:
sudo dnf install @idm:DL1
After the IDM (identity management appstream) module has been enabled on your server system, now we install all the required packages for FreeIPA using the following command below:
sudo dnf install ipa-server
With the FreeIPA packages installed, now we set up the FreeIPA, run the command ipa-server-install. This is an interactive installation and you will need to answer some needed information:
sudo ipa-server-install
Output:
The log file for this installation can be found in /var/log/ipaserver-install.log
==============================================================================
This program will set up the IPA Server.
Version 4.9.4

This includes:
  * Configure a stand-alone CA (dogtag) for certificate management
  * Configure the NTP client (chronyd)
  * Create and configure an instance of Directory Server
  * Create and configure a Kerberos Key Distribution Center (KDC)
  * Configure Apache (httpd)
  * Configure the KDC to enable PKINIT

To accept the default shown in brackets, press the Enter key.

Do you want to configure integrated DNS (BIND)? [no]: no

Enter the fully qualified domain name of the computer
on which you're setting up server software. Using the form
<hostname>.<domainname>
Example: master.example.com.

Server host name [freeipa.idroot.us]: freeipa.idroot.us

The domain name has been determined based on the host name.

Please confirm the domain name [idroot.us]: freeipa.idroot.us

The kerberos protocol requires a Realm name to be defined.
This is typically the domain name converted to uppercase.

Please provide a realm name [freeipa.idroot.us]: freeipa.idroot.us
Certain directory server operations require an administrative user.
This user is referred to as the Directory Manager and has full access
to the Directory for system management tasks and will be added to the
instance of directory server created for IPA.
The password must be at least 8 characters long.

Directory Manager password:
Password (confirm):
Step 4. Configure Firewall Rules.
If any firewall is installed and configured on your server, then you will need to allow ports via firewalld. You can allow them with the following command:
sudo firewall-cmd --add-service={http,https,dns,ntp,freeipa-ldap,freeipa-ldaps} --permanent
sudo firewall-cmd --reload
You can verify by listing the current firewall settings:
sudo firewall-cmd --permanent --list-all
Step 5. Accessing the FreeIPA Web interface.
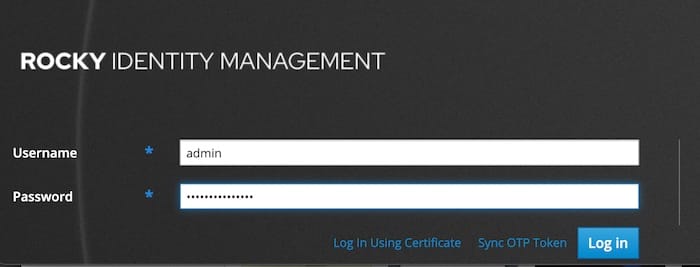
Once successfully installed, you can access FreeIPA using the address https://freeipa.idroot.us. Ignore the private SSL warning and proceed to the FreeIPA server login page. The username is admin and the password is the password you set up during the installation.

Once you successfully log in you’re presented with the Identity Dashboard interface:

Congratulations! You have successfully installed FreeIPA. Thanks for using this tutorial for installing the FreeIPA on your Rocky Linux 8 system. For additional help or useful information, we recommend you check the official FreeIPA website.