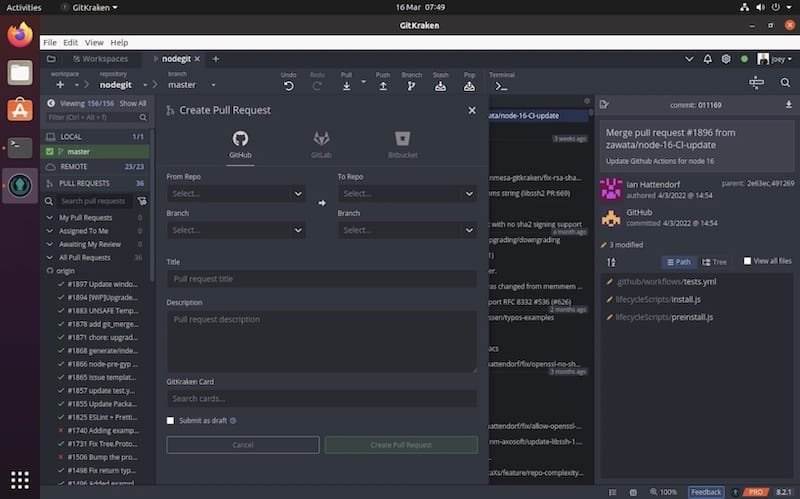
How To Install Gitkraken on Rocky Linux 9

In this tutorial, we will show you how to install Gitkraken on Rocky Linux 9. GitKraken is a powerful and user-friendly Git client that simplifies version control for developers. Its graphical interface makes managing repositories, branches, and commits more intuitive, especially for those who prefer not to rely solely on command-line tools. Rocky Linux 9, being a robust enterprise-grade Linux distribution, provides an excellent environment for running GitKraken. This comprehensive guide will walk you through the process of installing GitKraken on Rocky Linux 9, ensuring a smooth setup tailored to your development needs.
System Requirements
Hardware Requirements
- Processor: Minimum 2 GHz dual-core processor for basic tasks.
- RAM: At least 4 GB of RAM; 8 GB recommended for optimal performance.
- Storage: Minimum of 500 MB free disk space for GitKraken installation.
- Display: Minimum resolution of 1024×768 pixels.
Software Prerequisites
- Operating System: Rocky Linux 9 installed and updated.
- Dependencies: Ensure that necessary dependencies like
glibc,libX11, and others are installed. - Internet Connectivity: Required for downloading packages and updates.
Pre-Installation Steps
System Updates
Before installing GitKraken, it’s essential to update your system to ensure that all existing packages are up-to-date. This minimizes the risk of dependency conflicts and ensures a smoother installation process.
- Open the terminal.
- Run the following command to update the package repositories:
sudo dnf update -y- Once the update is complete, proceed to install any necessary development tools:
sudo dnf groupinstall "Development Tools" -yGit Installation
GitKraken is built on top of Git, so having Git installed is a prerequisite.
- Install Git using the DNF package manager:
sudo dnf install git -y- Verify the installation by checking the Git version:
git --version- Configure Git with your user information:
git config --global user.name "Your Name"
git config --global user.email "youremail@example.com"
GitKraken Installation Methods
RPM Package Installation
The RPM package is the recommended method for installing GitKraken on Rocky Linux 9 as it simplifies dependency management.
- Download the latest GitKraken RPM package using
wget:
wget https://release.gitkraken.com/linux/gitkraken-amd64.rpm- Install the downloaded RPM package with DNF:
sudo dnf install ./gitkraken-amd64.rpm -y- If any dependency issues arise, DNF will attempt to resolve them automatically. If not, manually install the required dependencies and rerun the installation command.
After successful installation, you can launch GitKraken from the applications menu or by typing gitkraken in the terminal.
Manual Installation
Alternatively, you can install GitKraken using the tar.gz archive, which offers more control over the installation process.
- Download the GitKraken tar.gz archive:
wget https://release.gitkraken.com/linux/gitkraken-amd64.tar.gz- Extract the downloaded archive:
tar -xvzf gitkraken-amd64.tar.gz- Move the extracted files to the
/optdirectory:
sudo mv gitkraken /opt/- Create a symbolic link to make GitKraken accessible from the terminal:
sudo ln -s /opt/gitkraken/gitkraken /usr/local/bin/gitkraken- Launch GitKraken by typing:
gitkrakenThis method is beneficial if you prefer to manage GitKraken’s installation manually or need to install it in a specific location.
Post-Installation Configuration
Initial Setup
- Launch GitKraken from the applications menu or terminal.
- Upon first launch, you’ll be prompted to log in or sign up for a GitKraken account. Follow the on-screen instructions to authenticate.
- Once logged in, configure your default Git settings within GitKraken to match your preferences.

Integration Setup
- Connecting with Remote Repositories:
- In GitKraken, navigate to the “File” menu and select “Clone Repo” to clone an existing repository.
- Alternatively, use the “+” button in the repository pane to add a new repository.
- SSH Key Configuration:
-
- Generate an SSH key pair if you haven’t already:
ssh-keygen -t rsa -b 4096 -C "your_email@example.com"- Add your SSH key to your Git hosting service (e.g., GitHub, GitLab, Bitbucket).
- In GitKraken, go to “Preferences” > “Authentication” to manage your SSH keys.
-
- Custom Preferences:
- Customize GitKraken’s appearance and behavior through the “Preferences” menu.
- Adjust themes, keyboard shortcuts, and other settings to enhance your workflow.
Usage Guide
Basic Operations
- Repository Cloning:
- Click on the “+” button and select “Clone Repository.”
- Enter the repository URL and choose a local directory for the clone.
- Click “Clone the repo!” to start the process.
- Commit Management:
- Make changes to your project files.
- In GitKraken, navigate to the “Unstaged Files” section.
- Select the files you wish to commit, stage them, and write a commit message.
- Click “Commit changes to [branch name]” to finalize.
- Branch Operations:
- Create a new branch by clicking the branch icon and selecting “New Branch.”
- Switch between branches using the branch selector in the top-left corner.
- Merge branches by right-clicking the target branch and selecting “Merge [branch name] into [current branch].”
Advanced Features
- Merge Conflict Resolution:
- When a merge conflict occurs, GitKraken will highlight the conflicting files.
- Open the conflicted file in GitKraken’s built-in editor to resolve the conflicts manually.
- After resolving, mark the conflict as resolved and proceed with the merge.
- Interactive Rebase:
- Navigate to the commit history and right-click on the commit you wish to rebase.
- Select “Interactive Rebase” and follow the prompts to reorder, squash, or edit commits as needed.
- GitFlow Implementation:
- Enable GitFlow by navigating to “Preferences” > “GitFlow.”
- Initialize GitFlow in your repository to manage feature branches, releases, and hotfixes seamlessly.
Troubleshooting
- Installation Errors:
- Missing Dependencies: If DNF reports missing dependencies during installation, install them manually using
sudo dnf install [dependency-name]. - Corrupted Package: Re-download the RPM package and attempt the installation again.
- Missing Dependencies: If DNF reports missing dependencies during installation, install them manually using
- Performance Issues:
- Ensure your system meets the recommended hardware specifications.
- Close unnecessary applications to free up system resources.
- Dependency Conflicts:
- Use
sudo dnf checkto identify and resolve dependency issues. - Consider using containerization tools like Docker to isolate GitKraken from conflicting dependencies.
- Use
Maintenance and Updates
Keeping GitKraken Updated
Ensure that GitKraken remains up-to-date to benefit from the latest features and security patches.
- Run the following command periodically to check for updates:
sudo dnf upgrade gitkraken -y- Alternatively, enable automatic updates through your package manager settings.
Backup Procedures
- Regularly back up your Git repositories to prevent data loss.
- Use GitKraken’s built-in backup features or integrate with external backup solutions.
Uninstallation Steps
If you need to remove GitKraken from your system, follow these steps:
- Remove the GitKraken package using DNF:
sudo dnf remove gitkraken -y- Delete any residual configuration files:
rm -rf ~/.gitkraken- Optionally, remove the symbolic link if created manually:
sudo rm /usr/local/bin/gitkrakenCongratulations! You have successfully installed Gitkraken. Thanks for using this tutorial for installing the latest version of Gitkraken on Rocky Linux 9. For additional help or useful information, we recommend you check the official Gitkraken website.