How To Install GitLab on Fedora 40

In this tutorial, we will show you how to install GitLab on Fedora 40. In the evolving landscape of software development, GitLab has emerged as a powerhouse for version control and collaborative project management. Its versatility and robust set of features make it an indispensable tool for developers. For those using Linux, especially Fedora 40, installing GitLab can supercharge your project development workflow. The process isn’t just about getting another tool; it’s about embracing a platform that can streamline your operations, improve collaboration, and increase productivity. Given the importance of Git in modern development practices, combining it with the power of GitLab on a Fedora system represents a significant upgrade to any developer’s toolkit.
We will guide you through the process of installing GitLab on Fedora 40, starting with installing and configuring the necessary dependencies, which lays the foundation for a smooth GitLab desktop installation. Next, we will dive into how to add the GitLab repository and kick off the installation process. Setting up your GitLab instance correctly is crucial for optimal performance and security, so we’ll cover the configuration steps in detail.
Prerequisites
Before we dive into the installation process, ensure that you have the following prerequisites in place:
- A server running one of the following operating systems: Fedora 40.
- It’s recommended that you use a fresh OS install to prevent any potential issues.
- You will need access to the terminal to execute commands. Fedora provides the Terminal application for this purpose. It can be found in your Applications menu.
- A stable internet connection to download the necessary packages.
- A non-root sudo user or access to the root user. We recommend acting as a non-root sudo user, however, as you can harm your system if you’re not careful when acting as the root.
Install GitLab on Fedora 40
Step 1. Preparing Your Fedora 40 System.
To ensure a smooth installation process, it’s crucial to prepare your Fedora 40 system beforehand. Start by updating your system to the latest stable release using the following command in the terminal:
sudo dnf clean all
sudo dnf update
This step ensures that all packages on your Fedora system are up to date, which is crucial for maintaining software compatibility and system security.
Step 2. Installing Dependencies.
GitLab requires several dependencies to function properly. Install them using the following command:
sudo dnf install curl policycoreutils openssh-server perl
Step 3. Installing and configuring Postfix.
GitLab needs a mail service to send notifications. We’ll use Postfix for this purpose:
sudo dnf install postfix
sudo systemctl enable postfix
sudo systemctl start postfix
Step 4. Installing GitLab on Fedora 40.
To begin, we need to add the GitLab repository to our system. Since GitLab is not available in the default Fedora repositories, we’ll create a specific repository for it. Open a terminal as root and use the nano editor to create a new repository file:
nano /etc/yum.repos.d/gitlab-ce.repo
Add the following content to the file:
[gitlab_gitlab-ce]
name=gitlab_gitlab-ce
baseurl=https://packages.gitlab.com/gitlab/gitlab-ce/el/8/$basearch
repo_gpgcheck=1
gpgcheck=1
enabled=1
gpgkey=https://packages.gitlab.com/gitlab/gitlab-ce/gpgkey https://packages.gitlab.com/gitlab/gitlab-ce/gpgkey/gitlab-gitlab-ce-3D645A26AB9FBD22.pub.gpg
sslverify=1
sslcacert=/etc/pki/tls/certs/ca-bundle.crt
metadata_expire=300
Save and close the file. This step sets up the repository, enabling us to install GitLab from it.
After adding the repository, proceed with the installation of GitLab CE (Community Edition):
sudo dnf install gitlab-ce
This command will fetch and install GitLab CE along with its dependencies, configuring it for use on your Fedora system.
Step 5. Configure GitLab.
After successfully installing GitLab on Fedora 40, the initial configuration is crucial to ensure that the software functions correctly. Open the GitLab configuration file by executing
nano /etc/gitlab/gitlab.rb
Locate the line starting with external_url and change it to reflect your domain, for example:
external_url 'http://gitlab.example.com'
Save and close the file, then run gitlab-ctl reconfigure to apply the changes.
This reconfiguration ensures that your GitLab instance is accessible at the specified URL, completing the setup process. By following these detailed steps, you’ll have a fully functional GitLab installation on your Fedora 40 system, ready to enhance your development workflow.
Step 6. Open Required Ports in the Firewall.
If you have the firewall enabled, you need to open the HTTP and HTTPS ports:
sudo firewall-cmd --permanent --add-service=http
sudo firewall-cmd --permanent --add-service=https
sudo firewall-cmd --reload
Step 7. Access GitLab Web Interface.
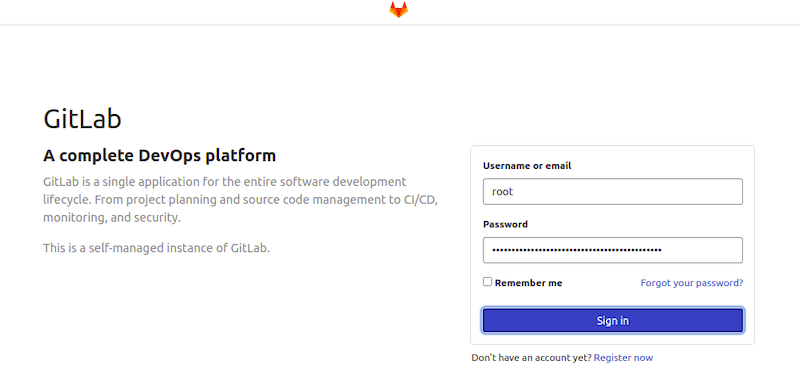
After the installation completes, you can access the GitLab web interface by navigating to the URL you specified in the previous step. On first access, you’ll be prompted to set a password for the root user.
The initial root password is generated automatically and stored in /etc/gitlab/initial_root_password. You can retrieve it with:
sudo cat /etc/gitlab/initial_root_password

Congratulations! You have successfully installed GitLab. Thanks for using this tutorial for installing GitLab on Fedora 40 system. For additional help or useful information, we recommend you check the official GitLab website.