How To Install GitLab on Fedora 41

GitLab is a powerful platform for version control and continuous integration/continuous deployment (CI/CD) that has gained immense popularity among developers and teams. Installing GitLab on Fedora 41 allows users to leverage its features effectively in a Linux environment. This guide will walk you through the process of installing GitLab on Fedora 41, from preparing your system to troubleshooting common issues.
Prerequisites
System Requirements
- Minimum Hardware Specifications:
- CPU: 2 cores
- RAM: 4 GB
- Disk Space: 10 GB (SSD recommended)
- Recommended Specifications:
- CPU: 4 cores or more
- RAM: 8 GB or more
- Disk Space: 20 GB or more
Software Requirements
- Fedora 41 installed on your machine.
- Required packages:
curl, openssh-server, ca-certificates, tzdata, perl, policycoreutils
User Permissions
You will need to have sudo privileges to install GitLab and configure the necessary services. Ensure that your user account has administrative access.
Step 1: Preparing Your System
Updating the System
The first step in preparing your system is to ensure that all packages are up to date. Open your terminal and run the following command:
sudo dnf updateThis command updates all installed packages to their latest versions, ensuring compatibility with GitLab.
Installing Dependencies
Next, you need to install the required dependencies. Execute the following command:
sudo dnf install curl openssh-server ca-certificates tzdata perl policycoreutilsThis command installs essential packages that GitLab relies on for proper functionality.
Configuring SSH
GitLab requires SSH for secure communication. Start and enable the SSH service with the following commands:
sudo systemctl start sshd
sudo systemctl enable sshd
This ensures that the SSH service starts automatically at boot time.
Step 2: Downloading and Installing GitLab
Adding the GitLab Repository
The next step is to add the official GitLab repository for Fedora. Run this command in your terminal:
curl https://packages.gitlab.com/install/repositories/gitlab/gitlab-ce/script.rpm.sh | sudo bashThis command fetches and executes a script that adds the GitLab repository to your system’s package manager.
Installing GitLab Community Edition
You can now install GitLab Community Edition by executing the following command:
sudo EXTERNAL_URL="http://your_domain_or_IP" dnf install gitlab-ceReplace your_domain_or_IP with your actual domain name or IP address. This sets up the external URL that users will use to access your GitLab instance.
Step 3: Configuring GitLab
Initial Configuration
After installation, you need to configure GitLab by running:
sudo gitlab-ctl reconfigureThis command initializes and configures all necessary components of GitLab according to your settings.
Accessing GitLab Web Interface
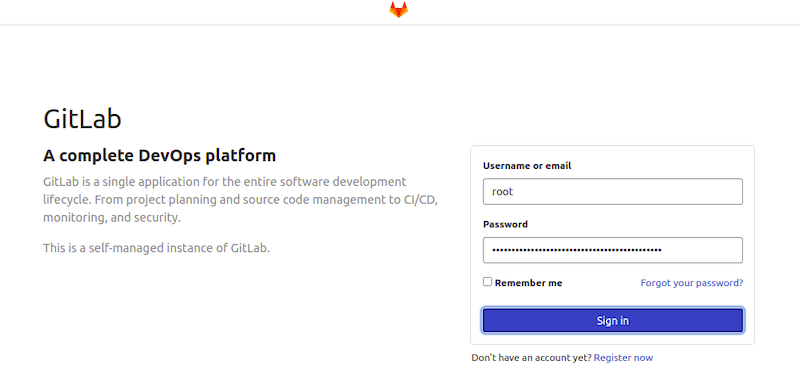
You can access your newly installed GitLab instance by navigating to http://your_domain_or_IP in your web browser. You should see the GitLab login page.

Setting Up Initial Root Password
The first time you log in, you must set up an initial root password. To find this password, use the following command:
sudo cat /etc/gitlab/initial_root_passwordThis command displays the initial root password needed for logging into your GitLab instance for the first time. Make sure to change this password immediately after logging in for security purposes.
Step 4: Firewall Configuration
Adjusting Firewall Rules
If you have a firewall enabled, you need to allow traffic on HTTP (port 80) and HTTPS (port 443). Use these commands:
sudo firewall-cmd --permanent --add-port=80/tcp
sudo firewall-cmd --permanent --add-port=443/tcp
sudo firewall-cmd --reload
This opens up the necessary ports for web traffic, allowing users to access your GitLab instance over the internet.
Verifying Firewall Settings
You can verify if the ports are correctly configured by running:
sudo firewall-cmd --list-allThis command will display all active rules and services in your firewall configuration.
Step 5: Post-Installation Steps
Create a New Admin User (Optional)
If you want to create additional users with administrative privileges, log in as root and use the following commands:
sudogitlab-rails console production
user = User.new(username: 'new_admin', email: 'admin@example.com', password: 'password', admin: true)
user.save!
This creates a new user with admin rights. Remember to replace 'new_admin', 'admin@example.com', and 'password' with actual values.
Enabling HTTPS (Optional)
If you want to secure your connection using HTTPS, you can set up SSL certificates. One popular option is using Let’s Encrypt. First, ensure you have Certbot installed:
sudo dnf install certbot python2-certbot-nginx
sudo certbot --nginx -d your_domain.com
sudo gitlab-ctl reconfigure
This installs Certbot and configures SSL certificates for your domain automatically. Make sure to replace 'your_domain.com'.
Troubleshooting Common Issues
Installation Errors
- Error during dependency installation: If you encounter issues while installing dependencies, ensure that all required repositories are enabled and try running the update command again.
- Error related to insufficient disk space: If you see errors regarding disk space during installation, consider increasing disk capacity or cleaning up unnecessary files using commands like
sudo dnf clean all. - Error starting services: If services do not start after installation, check logs located in
/var/log/gitlab/. Use commands likesudogitlab-ctl tail.
Access Issues
- Cannot access web interface: If you cannot reach your GitLab instance via a web browser, check if your firewall settings allow traffic on ports 80 and 443 as mentioned earlier.
- Error logging in with root user: If you’re unable to log in with the root user, double-check that you’re using the correct initial password obtained from
/etc/gitlab/initial_root_password. - No response from server: If there is no response from your server, verify that it is running properly by checking its status with:
sudogitlab-ctl status
Congratulations! You have successfully installed GitLab. Thanks for using this tutorial for installing GitLab on Fedora 41 system. For additional help or useful information, we recommend you check the official GitLab website.