In this tutorial, we will show you how to install GlassFish on AlmaLinux 8. For those of you who didn’t know, GlassFish is an open-source application server for the Java EE platform. The GlassFish project is initially started by Sun Microsystem and is now sponsored by Oracle Corporation. GlassFish allows developers to create applications for enterprises that are portable, scalable, and integrate with legacy technologies.
This article assumes you have at least basic knowledge of Linux, know how to use the shell, and most importantly, you host your site on your own VPS. The installation is quite simple and assumes you are running in the root account, if not you may need to add ‘sudo‘ to the commands to get root privileges. I will show you the step-by-step installation of the GlassFish on AlmaLinux 8. You can follow the same instructions for Rocky Linux.
Prerequisites
- A server running one of the following operating systems: AlmaLinux 8.
- It’s recommended that you use a fresh OS install to prevent any potential issues.
- SSH access to the server (or just open Terminal if you’re on a desktop).
- A
non-root sudo useror access to theroot user. We recommend acting as anon-root sudo user, however, as you can harm your system if you’re not careful when acting as the root.
Install GlassFish on AlmaLinux 8
Step 1. First, let’s start by ensuring your system is up-to-date.
sudo dnf update
sudo dnf install epel-release
Step 2. Installing Java.
Before installing GlassFish, you need to install java on your system:
sudo dnf install java-11-openjdk-devel
Then, set the JAVA_HOME environment:
sudo update-alternatives --config java
From the output, copy the Java path to this file:
nano ~/.bash_profile
Add the following line:
export JAVA_HOME=/usr/lib/jvm/jre-openjdk
export PATH=$PATH:$JAVA_HOME/bin
Next, update the bash profile:
source ~/.bash_profile
Finally, confirm the path is set using the following command:
$ echo $JAVA_HOME
/usr/lib/jvm/java-11-openjdk-11.0.12.0.7-0.el8_4.x86_64/bin/java

$ java -version
openjdk version "11.0.12" 2021-08-17 LTS
OpenJDK Runtime Environment 19.1 (build 11.0.13+7-LTS)
OpenJDK 64-Bit Server VM 19.1 (build 11.0.13+7-LTS, mixed mode, sharing)
Step 3. Installing GlassFish on AlmaLinux 8.
Now create a user for Glassfish:
sudo useradd -s /sbin/nologin glassfish
After that, we download the latest version of Eclipse GlassFish from the official page:
wget https://download.eclipse.org/ee4j/glassfish/glassfish-6.2.0.zip
sudo unzip -d /opt/ glassfish-6.2.0.zip
Change the ownership to the GlassFish user created above:
sudo chown -R glassfish:glassfish /opt/glassfish6/
Step 4. Create Systemd File Glassfish
Now we create a systemd service to autostart Glassfish server:
nano /usr/lib/systemd/system/glassfish.service
Add the following lines:
[Unit]
Description = GlassFish Server v6.2.0
After = syslog.target network.target

[Service]
User = glassfish
ExecStart = /usr/bin/java -jar /opt/glassfish6/glassfish/lib/client/appserver-cli.jar start-domain
ExecStop = /usr/bin/java -jar /opt/glassfish6/glassfish/lib/client/appserver-cli.jar stop-domain
ExecReload = /usr/bin/java -jar /opt/glassfish6/glassfish/lib/client/appserver-cli.jar restart-domain
Type = forking

[Install]
WantedBy = multi-user.target
Save changes and exit the file, then start the glassfish server also set it to start automatically on boot:
sudo systemctl start glassfish
sudo systemctl enable glassfish
Step 5. Configure Firewall.
Allow Glassfish Service ports in AlmaLinux firewall:
sudo firewall-cmd --add-port={4848,8080,8181}/tcp --permanent
sudo firewall-cmd --reload
Step 6. Setting up Glassfish Path.
Add Glassfish binaries to a PATH environment variable:
sed -i 's/^PATH=*/PATH=\/opt\/glassfish6\/bin:/g' ~/.bash_profile
By default, GlassFish has no password, so we need to set a password for GlassFish admin users and enable a secure login:
sudo /opt/glassfish6/bin/asadmin --port 4848 change-admin-password
Now GlassFish admin console is running as a clear text HTTP service. Enable secure login with this command below:
sudo /opt/glassfish6/bin/asadmin --port 4848 enable-secure-admin
Next, restart Glassfish:
sudo systemctl restart glassfish
Step 7. Accessing GlassFish Web Interface.
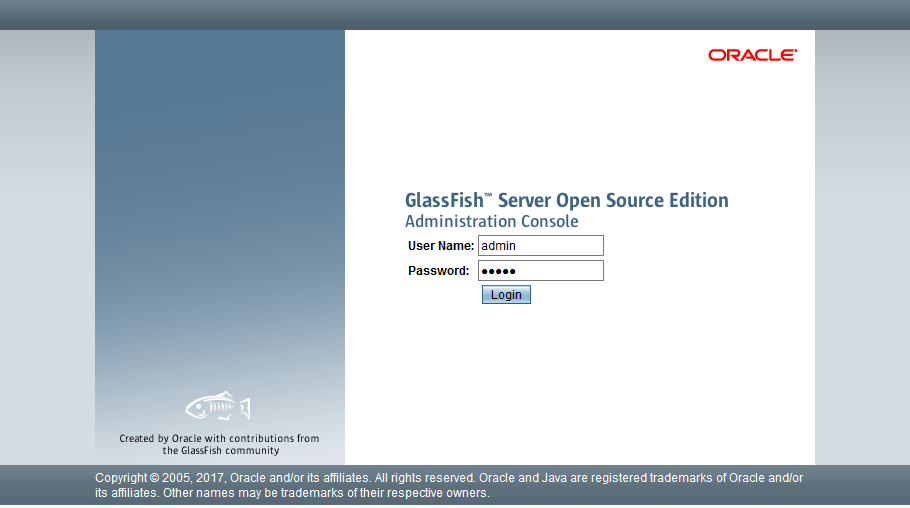
Once successfully installed, now open your favorite browser and navigate to http://your-server-ip-address:4848 and log in as an admin user with the password, that we have set in previous steps:

Congratulations! You have successfully installed GlassFish. Thanks for using this tutorial for installing the GlassFish on your AlmaLinux 8 system. For additional help or useful information, we recommend you check the official GlassFish website.