How To Install GlassFish on Manjaro

In this tutorial, we will show you how to install GlassFish on Manjaro. GlassFish, an open-source, fully Java EE-compliant application server, is a powerful tool for developing, deploying, and managing Java-based enterprise applications. Its robust feature set includes Java EE compliance, a user-friendly web-based administration console, high performance and scalability, and support for hot deployment.
This article assumes you have at least basic knowledge of Linux, know how to use the shell, and most importantly, you host your site on your own VPS. The installation is quite simple and assumes you are running in the root account, if not you may need to add ‘sudo‘ to the commands to get root privileges. I will show you the step-by-step installation of the GlassFish on a Manjaro Linux.
Prerequisites
- A server or desktop running one of the following operating systems: Manjaro, and other Arch-based distributions.
- It’s recommended that you use a fresh OS install to prevent any potential issues.
- SSH access to the server (or just open Terminal if you’re on a desktop).
- A stable internet connection is crucial for downloading and installing packages. Verify your connection before proceeding.
- Access to a Manjaro Linux system with a non-root sudo user or root user.
Install GlassFish on Manjaro
Step 1. First, let‘s update the system and install the necessary packages. Open your terminal and enter the following commands:
sudo pacman -Syu
sudo pacman -S base-devel
Step 2. Installing OpenJDK.
OpenJDK, an open-source implementation of the Java Platform, Standard Edition, is a prerequisite for GlassFish. You can install OpenJDK on your Manjaro Linux system by running the following command in your terminal:
pacman -S jre17-openjdk
Once the installation is complete, verify the version of Java installed by running:
java --version
Step 3. Installing GlassFish on Manjaro.
With the necessary packages installed, you can now download the GlassFish package from the official website. Use the wget command followed by the URL of the GlassFish package to download it. After downloading, extract the package using the unzip command. The commands should look something like this:
wget https://download.eclipse.org/ee4j/glassfish/glassfish-7.0.1.zip
unzip glassfish-7.0.1.zip
After extracting the GlassFish package, move the extracted GlassFish directory to the /opt directory. The /opt directory is a common directory for storing third-party software on Linux systems. You can move the directory using the mv command:
sudo mv glassfish7 /opt/
Next, define the PATH variable to include the bin directory of GlassFish. This allows you to run GlassFish commands from any location in the terminal. You can do this by adding the following line to your .bashrc or .zshrc file:
export PATH=$PATH:/opt/glassfish7/bin
Then, source the .bashrc or .zshrc file to apply the changes:
source ~/.bashrc
With the PATH variable defined, you can now start the GlassFish server using the asadmin command:
asadmin start-domain
This command starts the default domain, domain1.
You can verify the GlassFish server using the following command:
asadmin list-domains
By default, there is no password for the GlassFish admin user, so you can set it using the following command:
asadmin change-admin-password
Next, you will also need to enable the admin user. You can enable it using the following command below:
asadmin --port 4848 enable-secure-admin
Step 4. Creating a Systemd Service for GlassFish.
Creating a systemd service for GlassFish allows the server to start automatically at boot, making it easier to manage. To do this, we’ll create a new service file:
sudo nano /etc/systemd/system/glassfish.service
Add the following lines to the file:
[Unit]
Description = GlassFish Server v7.1.0
After = syslog.target network.target

[Service]
ExecStart = /usr/bin/java -jar /opt/glassfish7/glassfish/lib/client/appserver-cli.jar start-domain
ExecStop = /usr/bin/java -jar /opt/glassfish7/glassfish/lib/client/appserver-cli.jar stop-domain
ExecReload = /usr/bin/java -jar /opt/glassfish7/glassfish/lib/client/appserver-cli.jar restart-domain
Type = forking

[Install]
WantedBy = multi-user.target
Save and close the file. Then, start and enable the GlassFish service:
sudo systemctl start glassfish
sudo systemctl enable glassfish
To verify that GlassFish is running correctly, you can check the status of the service:
sudo systemctl status glassfish
Step 5. Access GlassFish Web UI.
Open a web browser on your local machine or on the same network as your Manjaro Linux server where GlassFish is installed and in the address bar of the browser, enter the URL for the GlassFish Admin Console. The default URL is typically:
http://your-IP-address:4848.

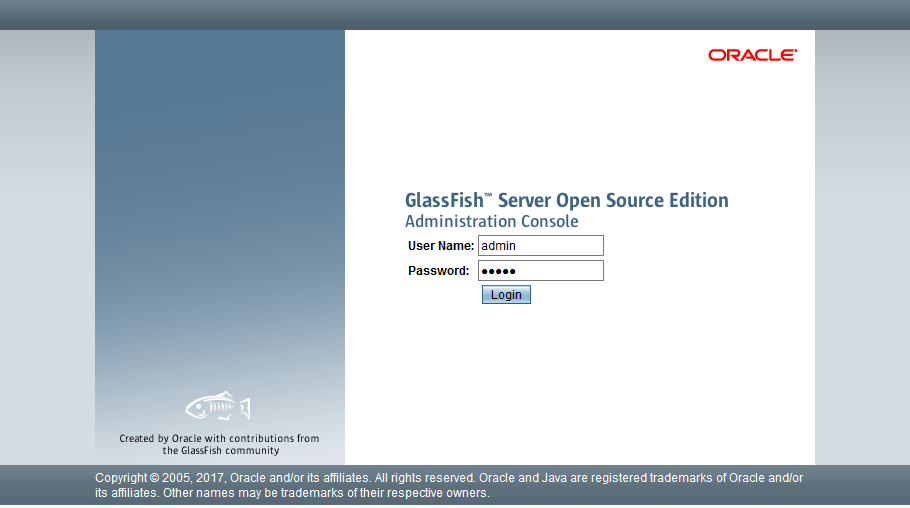
The GlassFish login page should appear. If you have set an admin password during the installation or initial configuration, you will need to enter the username (usually admin) and the password you have configured.
Step 6. Configure Firewall.
If you encounter any issues accessing the Web UI, ensure that your firewall settings allow traffic on port 4848, which is the default port for the GlassFish Admin Console. You can allow traffic on this port using the following commands in the terminal:
sudo ufw allow 4848/tcp
Or, if you’re using firewalld:
sudo firewall-cmd --add-port=4848/tcp --zone=public
sudo firewall-cmd --add-port=4848/tcp --zone=public --permanent
Congratulations! You have successfully installed GlassFish. Thanks for using this tutorial to install the latest version of the GlassFish on the Manjaro system. For additional help or useful information, we recommend you check the official GlassFish website.