How To Install GlassFish on openSUSE

In this tutorial, we will show you how to install GlassFish on openSUSE. Eclipse GlassFish is an open-source application server that serves as the Eclipse Foundation’s implementation of the Jakarta EE platform, which was formerly known as Java EE. The project originated from Sun Microsystems and has since been developed and maintained by the Eclipse Foundation. GlassFish is written in Java and is designed to be cross-platform, meaning it can run on various operating systems that support Java.
This article assumes you have at least basic knowledge of Linux, know how to use the shell, and most importantly, you host your site on your own VPS. The installation is quite simple and assumes you are running in the root account, if not you may need to add ‘sudo‘ to the commands to get root privileges. I will show you the step-by-step installation of the Eclipse GlassFish on openSUSE.
Prerequisites
- A server running one of the following operating systems: openSUSE.
- It’s recommended that you use a fresh OS install to prevent any potential issues.
- You will need access to the terminal to execute commands. openSUSE provides the Terminal application for this purpose. It can be found in your Applications menu.
- You’ll need an active internet connection to download GlassFish and its dependencies.
- You’ll need administrative (root) access or a user account with sudo privileges.
Install GlassFish on openSUSE
Step 1. Before we begin the installation process, it’s important to ensure that your system is up-to-date. You can do this by running the following command in your terminal:
sudo zypper refresh
sudo zypper update
Step 2. Installing Java Development Kit (JDK).
Eclipse GlassFish requires Java to run, and it’s recommended to use a version of JDK that is compatible with the version of GlassFish you plan to install. You can install OpenJDK’s JDK on openSUSE using zypper:
sudo zypper search openjdk-devel
sudo zypper --non-interactive install java-17-openjdk-devel
Verify the Java version with the command below:
javac -version
Step 3. Installing Eclipse GlassFish on openSUSE.
Visit the official Eclipse GlassFish download page and choose the version that suits your needs. You can use wget or curl to download the GlassFish package directly to your openSUSE system:
wget https://download.eclipse.org/ee4j/glassfish/glassfish-7.0.12.zip
Once the download is complete, extract the package to your desired installation directory, such as /opt:
sudo unzip glassfish-7.0.12.zip -d /opt/
For security purposes, it’s a good practice to create a dedicated user for running GlassFish:
sudo useradd -s /sbin/nologin glassfish
Change the ownership of the GlassFish directory to the newly created user:
sudo chown -R glassfish:glassfish /opt/glassfish7/
Step 4. Create a Systemd Service File.
To manage GlassFish as a service, create a systemd service file:
sudo nano /usr/lib/systemd/system/glassfish.service
Add the following content to the file:
[Unit]
Description=GlassFish Server
After=syslog.target network.target

[Service]
User=glassfish
ExecStart=/opt/glassfish6/glassfish/bin/asadmin start-domain domain1

[Install]
WantedBy=multi-user.target
Enable and start the GlassFish service using systemd:
sudo systemctl daemon-reload
sudo systemctl enable glassfish
sudo systemctl start glassfish
Step 5. Configure GlassFish.
Set an admin password for the GlassFish domain to secure your server:
/opt/glassfish7/bin/asadmin --port 4848 change-admin-password
When prompted for the user, type the default user admin, and press ENTER when asked for the password. The default GlassFish comes without a password. When prompted to set up a new password, type your password and repeat.
Step 6. Configure Firewall.
When setting up Eclipse GlassFish on openSUSE, it‘s crucial to configure the firewall to allow traffic to and from the server.
By default, GlassFish uses port 8080 for HTTP traffic and port 4848 for the admin console. However, these ports can be customized:
sudo firewall-cmd --zone=public --add-port=8080/tcp --permanent
sudo firewall-cmd --zone=public --add-port=4848/tcp --permanent
After adding the ports, reload the firewall to apply the changes:
sudo firewall-cmd --reload
To ensure the ports are open, you can use the firewall-cmd tool to list all open ports:
sudo firewall-cmd --zone=public --list-ports
Step 7. Access the GlassFish Admin Console Web UI.
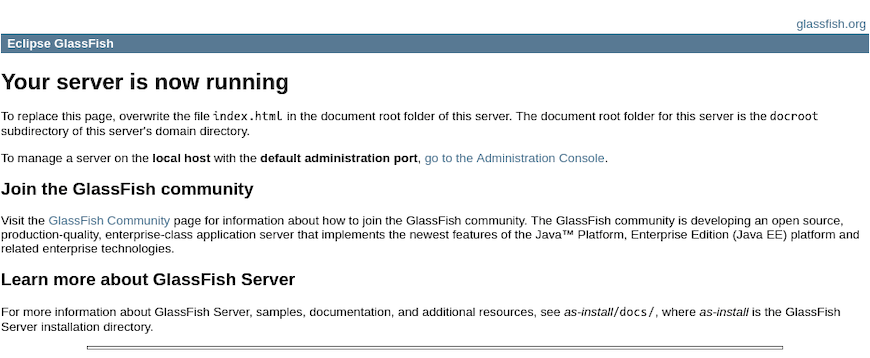
Once GlassFish is running, you can access the admin console by navigating to http://your-IP-address:4848 in your web browser.

Congratulations! You have successfully installed GlassFish. Thanks for using this tutorial for installing the Eclipse GlassFish on your openSUSE system. For additional or useful information, we recommend you check the official GlassFish website.